Sourdough Challah
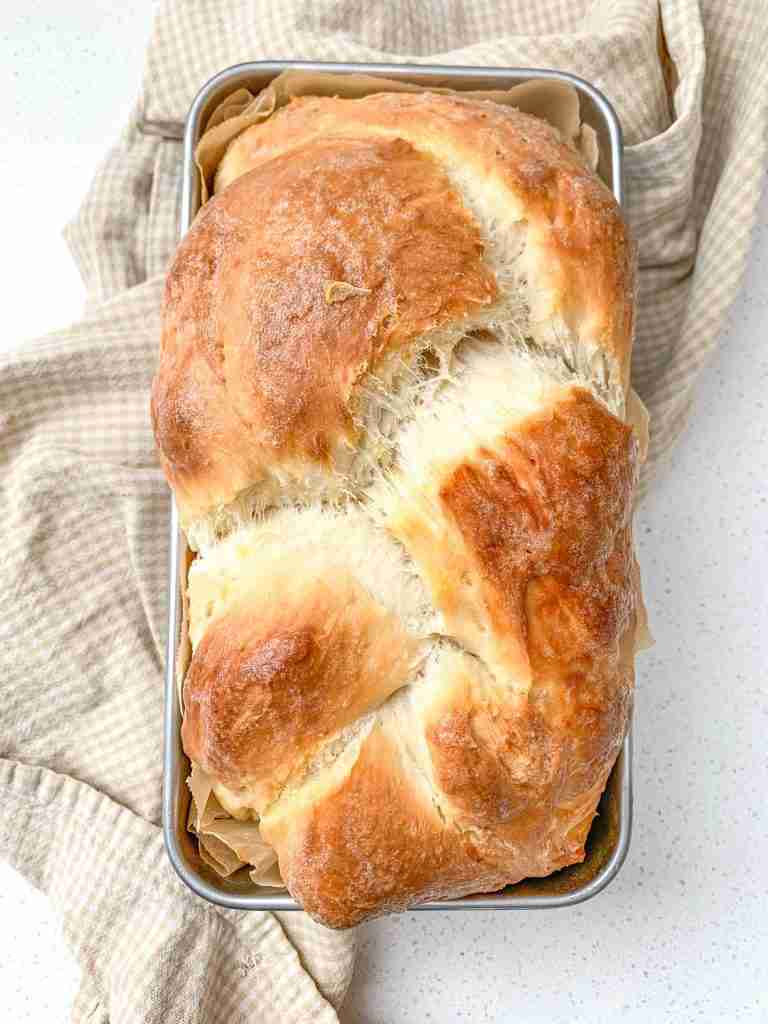
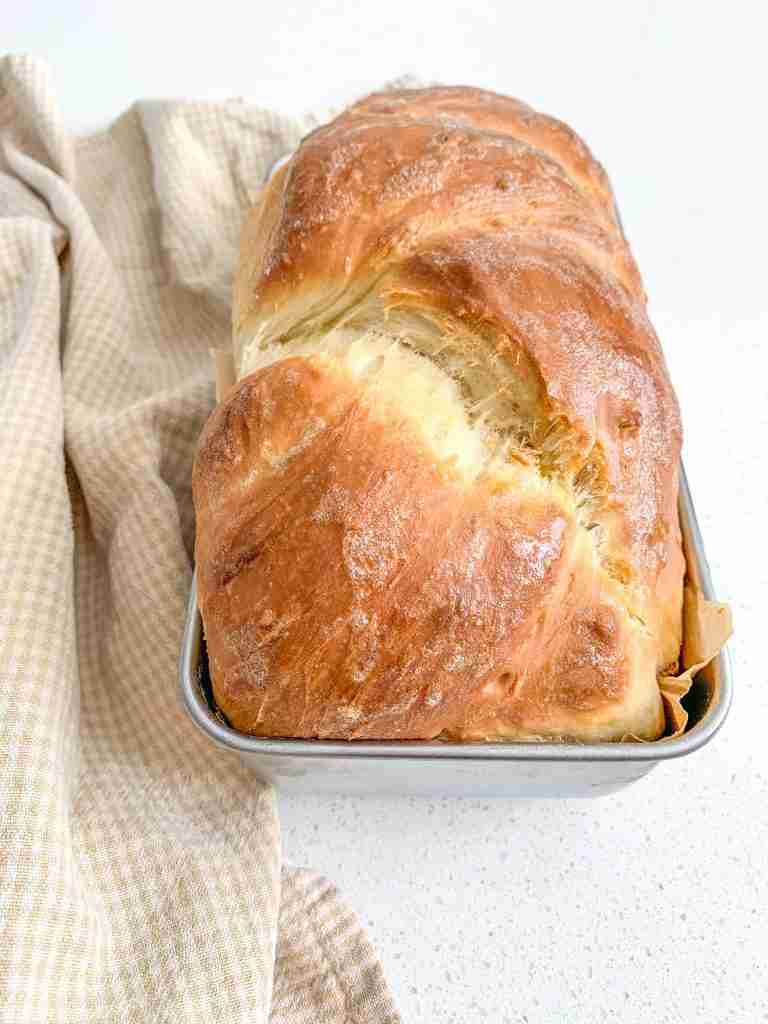
This sourdough challah bread is so soft and fluffy. It’s got a slightly sweet taste with the texture of a brioche. The dough is enriched with egg, making it so much more special than a regular loaf. It’s one of my favorite bread recipes I’ve created!
P.S. It’s much easier to make than you think! Don’t let the abundance of steps in this recipe scare you away. It really is beginner-friendly.
This post may contain affiliate links of items I know and love. Read our disclosure policy for more information. I NEVER use AI (artificial intelligence) to create content for Plum Branch Home. Recipes, blog posts, photos, videos, podcasts, social media content: everything is made from scratch by me, Molly LaFontaine. After developing my recipes, they’re tested 2x by my husband, Tyler, and I before publishing. What you see from Plum Branch Home is real. It’s made for a reason, tested, and loved!
This post may contain affiliate links of items I know and love. Read our disclosure policy for more information.
If you want to make this recipe but don’t have a sourdough starter, no worries! Grab my free guide so you can make your own starter at home.
If you’re new to sourdough baking and feel hesitant, or you have questions, I’ve got something for you! I broke down the basics of what you need to know about sourdough baking in my free sourdough baking guide for beginners. I highly recommend grabbing a copy!
What is Challah Bread?
Challah is a slightly sweet, egg-rich, braided bread that usually is risen with yeast. However, for my recipe I’m using sourdough instead of yeast for gut benefits from the fermentation.
Challah bread is a staple in Jewish cuisine, but you don’t have to be Jewish to enjoy it! We are not Jewish, but in our home, we enjoy it as a side to go with soups, as toast in the morning, and even for sandwiches.

Tips for Baking Sourdough Challah
- Make sure your starter is active! Before you get started with this recipe, you need to feed your starter a 2:1 ratio of flour to water 4–12 hours before you start. Example of the 2:1 feeding: 1 cup flour + 1/2 cup water. Your sourdough starter needs to be very active and bubbly to begin.
- Let the dough bulk ferment for 12 hours. It is important to let your dough bulk ferment for the full 12 hours. It should double in size and have air bubbles in it.
- Place the dough in a warm spot to rise. For both the bulk ferment and the second rise after shaping, your dough needs to be at room temperature in a non-drafty place. If your dough doesn’t look like it’s doing anything halfway through the rises, you need to place it in a slightly warmer area. This can be in a turned-off oven with the light on and oven door open, or you can slightly warm the oven to about 75-80 degrees Fahrenheit, then turn it off and place your dough inside with the door shut. Never leave the oven on, even on the keep warm setting, with fermenting dough inside. Your dough, for both rises, needs to double.
Ingredients You’ll Need
- fed sourdough starter (needs to be active and bubbly)
- water
- raw honey
- salt
- avocado oil (or melted butter)
- all-purpose flour
- large egg
- optional – melted butter (for brushing the top after baking)
Kitchen Tools You’ll Need
- Large Glass Bowl
- Bread Whisk
- 9×5″ loaf pan— this is the perfect loaf pan
- parchment paper
Recipe FAQs
Yes, you can! My recipe uses sourdough starter but make sure it’s fed. Meaning it needs to be active and bubbly before you use it for this recipe.
Yes, it is! That’s what we’re doing here. Instead of using yeast, we use fed sourdough starter.
Challah is a slightly sweet, eggy bread that’s been enriched with egg. This creates a brioche-like texture and taste.
Of course! That’s what we’re doing here but you can also braid regular sourdough bread dough.
The best in my opinion is all-purpose flour. It makes a beautiful loaf.
How to Make Sourdough Challah
Preparing your starter
BEFORE YOU GET STARTED: Feed your starter 4-12 hours before starting this recipe. I recommend feeding it a 2:1 ratio of unbleached flour to filtered water to get the same results as I do when you make this recipe. Example: 1 cup flour + 1/2 cup water. Your starter needs to be active, bubbly, and a thicker consistency to begin this recipe.
Make the challah dough
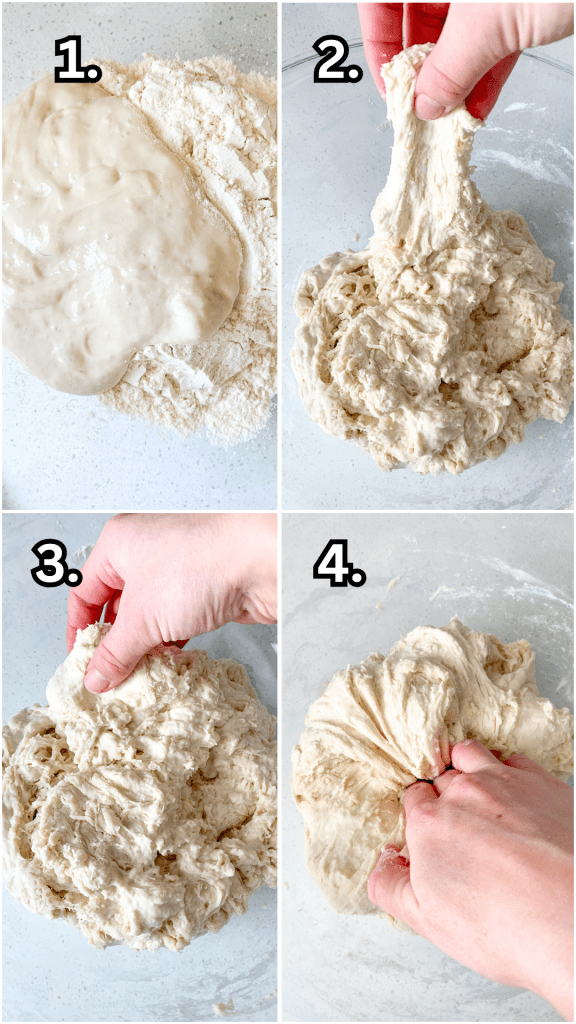
In a large mixing bowl add in fed starter, water, honey, salt, and avocado oil. Mix until completely combined.
Add in only 3 cups flour (the other 1/2 cup later) and stir until a dough forms. Use your hands to bring the dough into a ball if needed. If this isn’t working add 1-2 Tablespoons of extra water to help but don’t do this if not necessary.
Cover dough with a lid loosely, a damp kitchen towel (that’s been wet then rung out), or plastic wrap. Let dough sit for 30 minutes on the counter at room temperature.
Stretch and fold the dough
After 30 minutes, begin the first round of stretch and folds. To do this pull a section of the dough upward, folding it into the center, and pressing it down. Repeat this around the dough for 1-2 complete circles.
Cover the dough again and let it sit at room temperature for another 30 minutes. Then, repeat a second round of stretch and folds.

Bulk ferment
Cover the dough and let it sit at room temperature on the counter or in a turned-off oven/microwave for 12 hours until it doubles in size. See notes for helpful information.
Add the egg
Once bulk fermentation is complete your dough should have doubled in size. Uncover the dough and add in the egg. This will be sticky but knead it into the dough.
THEN add the 1/2 cup of flour and knead that into the dough to help with the stickiness. (Do it this way to prevent large clumps of eggy flour in your bread)
Use your hands to knead the dough until it’s completely incorporated. We do this now so we can still enrich the dough but it doesn’t have to ferment with the raw eggs.
Cold ferment
Place the dough in the fridge for 4 hours. You can leave it in the fridge overnight or even up to 24 hours if you need more time.
Shape the dough
Turn the dough out onto the counter and roll it into a loaf (log). Add flour to the counter if sticking
Place the dough on a piece of parchment paper that’s been cut to fill a 9×5” loaf pan.
Make sure you’re shaping your bread on the parchment paper for easy transportation!

Cut the dough long wise 3/4 of the length to make 3 strips. Leaving a few inches at the top still together.

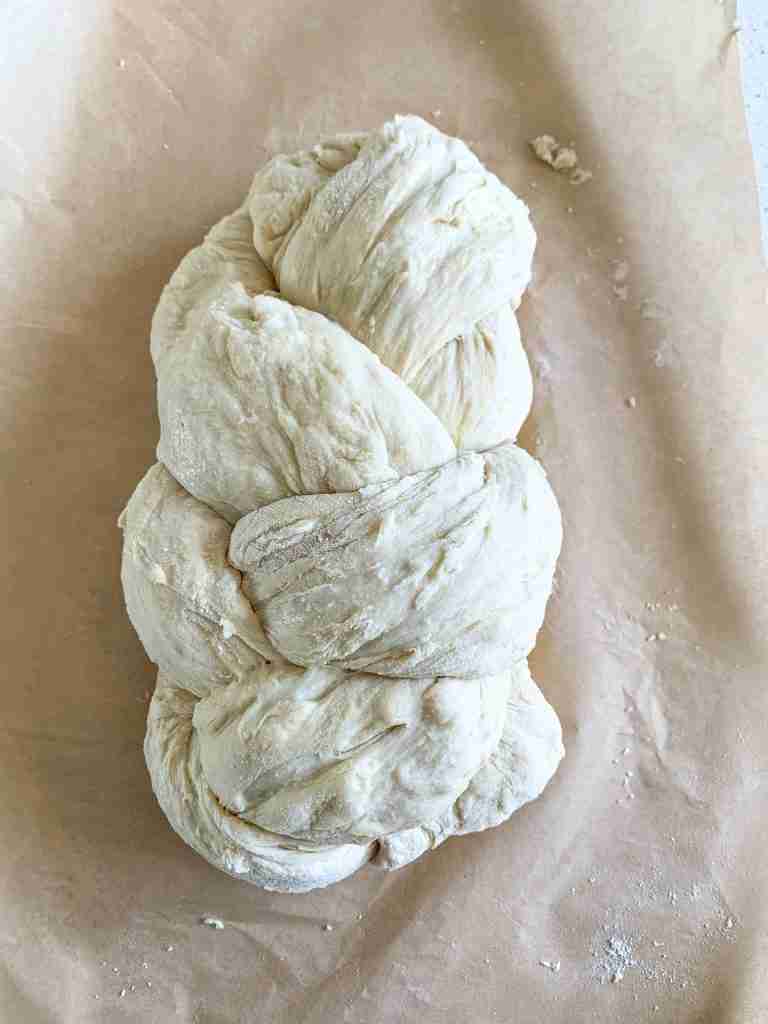
Take the 3 strands and weave them together like a braid (like you would braid hair – look up a tutorial if needed).
Place the shaped bread on the parchment into a loaf pan.
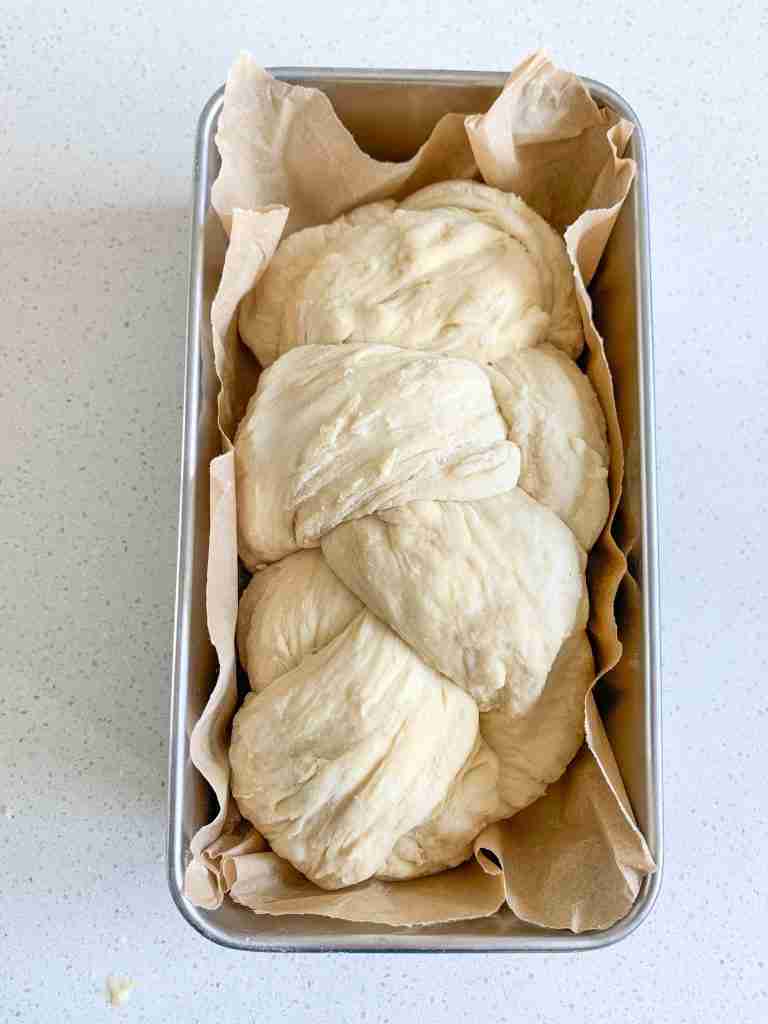
Proof the dough & bake
Cover with a kitchen towel or Saran wrap and let it rise for 3-4 hours at room temperature. (See notes for tips)
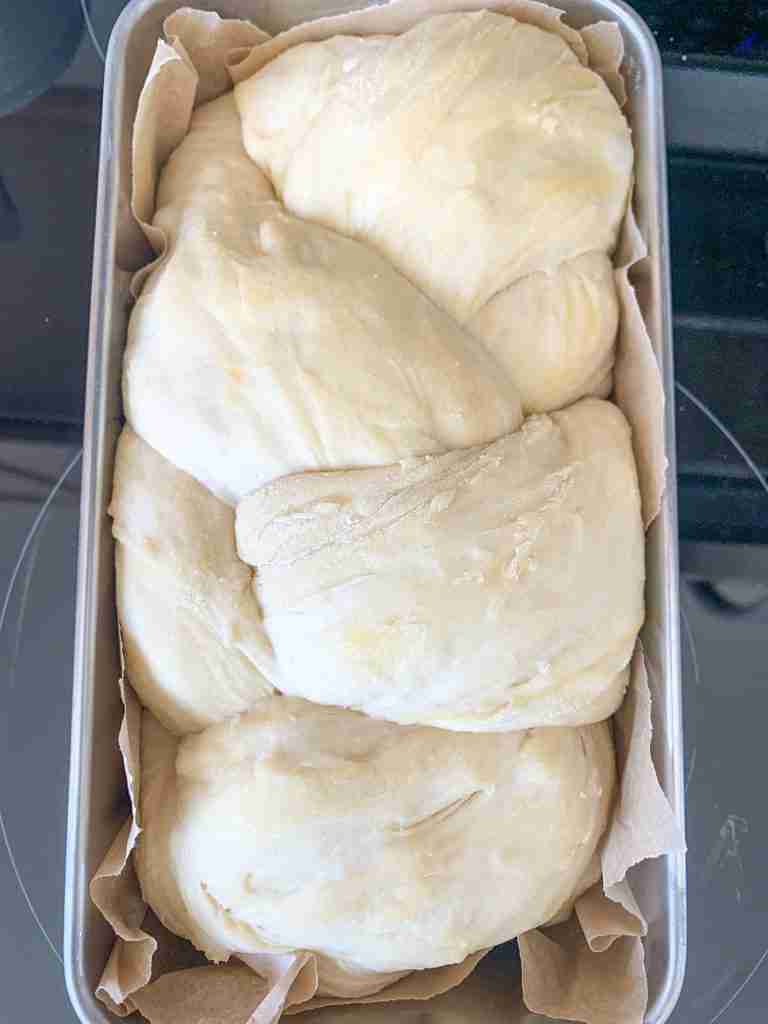
Once the bread has doubled, preheat the oven to 375 degrees.
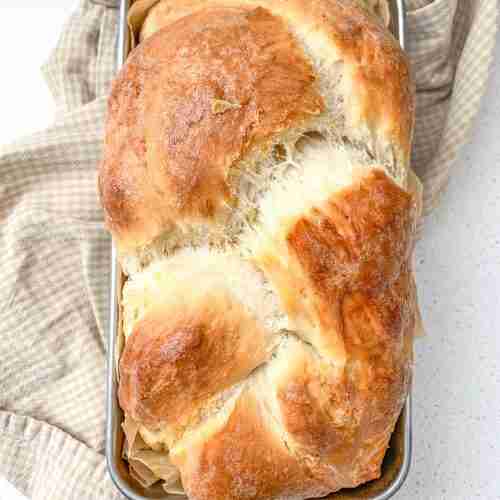
Bake for 40-45 minutes.
Take out of oven and brush with butter if desired. Let cool in the pan for 5 minutes then remove and let it cool rest of the way on a wire rack. Enjoy!
Storing the Bread
After the bread is fully cooled, I place it in a 4-quart glass bowl with an airtight lid. I keep it in the pantry for about 5 days. After that, I place the bowl in the fridge for another 2-3 days.
Freezing the Bread
To freeze this bread, wrap it in parchment paper and place it in a freezer-safe container or bag. It’ll keep for about 3 months in the freezer.
When you’re ready, thaw in the fridge overnight, then enjoy!

How to Eat Sourdough Challah Bread
My favorite way to enjoy challah bread is warm with butter spread all over it. It makes the perfect side to go with soups, especially my slow cooker chicken enchilada soup.
You can also toast it, slather it with honey, or even jam. All of them would be delicious. Not to mention you could slice the loaf up and use it for homemade french toast!
More Sourdough Breads To Try
- Sourdough Chocolate Babka
- Artisan Sourdough Boule
- Sourdough Apple Bread
- Whole Wheat Sourdough Sandwich Bread
- Sourdough Sandwich Bread (light and fluffy)
Did you make this recipe?
- Give it a 5-star rating in the comments below 👇🏼
- Share a photo of your challah bread on your Instagram or Facebook stories. Be sure to tag @plumbranchhome and use the hashtag #plumbranchhome so I can see it!
Sourdough Challah Recipe
Sourdough Challah
Ingredients
- 1/2 cup fed sourdough starter (needs to be active and bubbly)
- 3/4 cup water
- 2 tsp raw honey
- 2 tsp salt
- 1/4 cup avocado oil (or melted butter)
- 3 1/2 cups all-purpose flour
- 1 egg (whisk egg in a bowl before adding)
- optional – melted butter (for brushing after baking)
Instructions
Preparing your starter
- BEFORE YOU GET STARTED: Feed your starter 4-12 hours before starting this recipe. I recommend feeding it a 2:1 ratio of unbleached flour to filtered water to get the same results as I do when you make this recipe. Example: 1 cup flour + 1/2 cup water. Your starter needs to be active, bubbly, and a thicker consistency to begin this recipe.
Make the challah dough
- In a large mixing bowl add in fed starter, water, honey, salt, and avocado oil. Mix until completely combined.
- Add in only 3 cups flour (the other 1/2 cup later) and stir until a dough forms. Use your hands to bring the dough into a ball if needed. If this isn’t working add 1-2 Tablespoons of extra water to help but don’t do this if not necessary.
- Cover dough with a lid loosely, a damp kitchen towel (that’s been wet then rung out), or plastic wrap. Let dough sit for 30 minutes on the counter at room temperature.
Stretch and fold the dough
- After 30 minutes, begin the first round of stretch and folds. To do this pull a section of the dough upward, folding it into the center, and pressing it down. Repeat this around the dough for 1-2 complete circles.
- Cover the dough again and let it sit at room temperature for another 30 minutes. Then, repeat a second round of stretch and folds.
Bulk ferment
- Cover the dough and let it sit at room temperature on the counter or in a turned-off oven/microwave for 12 hours until it doubles in size. See notes for helpful information.
Add the egg
- Once bulk fermentation is complete your dough should have doubled in size. Uncover the dough and add in the egg. This will be sticky but knead it into the dough. THEN add the 1/2 cup of flour and knead that into the dough to help with the stickiness. (Do it this way, egg before flour, to prevent large clumps of eggy flour in your bread)
- Use your hands to knead until it’s completely incorporated. We do this now so we can still enrich the dough but it doesn’t have to ferment with the raw eggs.
Cold ferment
- Place the dough in the fridge for 4 hours. This makes shaping much easier! You can leave it in the fridge overnight or even up to 24 hours if you need more time.
Shape the dough
- Turn the dough out onto the counter and roll it into a loaf (log). Add flour to the counter if sticking
- Place the dough on a piece of parchment paper that’s been cut to fill a 9×5” loaf pan.
- Make sure you’re shaping your bread on the parchment paper for easy transportation!
- Cut the dough long wise 3/4 of the length to make 3 strips. Leaving a few inches at the top still together.
- Take the 3 strands and weave them together like a braid (like you would braid hair – look up a tutorial if needed).
- Place the shaped bread on the parchment into a loaf pan.
Proof the dough & bake
- Cover with a kitchen towel or seran wrap and let it rise for 3-4 hours at room temperature. (See notes below)
- Once the bread has doubled, preheat the oven to 375 degrees.
- Bake for 40-45 minutes or until golden brown and baked all the way through.
- Take out of oven and brush with melted butter. Then let cool in the pan for 5 minutes then remove and let it cool rest of the way on a wire rack. Enjoy!
Notes
Bulk Ferment & Proofing Tips
- Make sure your starter is active! Before you get started with this recipe, you need to feed your starter a 2:1 ratio of flour to water 4–12 hours before you start. Example of the 2:1 feeding: 1 cup flour + 1/2 cup water. Your sourdough starter needs to be very active and bubbly to begin.
- Let the dough bulk ferment for 12 hours. It is important to let your dough bulk ferment for the full 12 hours. It should double in size and have air bubbles in it.
- Place the dough in a warm spot to rise. For both the bulk ferment and the second rise after shaping, your dough needs to be at room temperature in a non-drafty place. If your dough doesn’t look like it’s doing anything halfway through the rises, you need to place it in a slightly warmer area. This can be in a turned-off oven with the light on and oven door open, or you can slightly warm the oven to about 75-80 degrees Fahrenheit, then turn it off and place your dough inside with the door shut. Never leave the oven on, even on the keep warm setting, with fermenting dough inside. Your dough, for both rises, needs to double.
- If your dough doesn’t look like it’s doing anything halfway through the rises, you need to place it in a slightly warmer area.
- This can be in a turned-off oven with the light on and oven door open, or you can slightly warm the oven to about 75-80 degrees Fahrenheit, then turn it off and place your dough inside with the door shut.
- Never leave the oven on, even on the keep warm setting, with fermenting dough inside. Your dough, for both rises, needs to double.
- If your dough doesn’t double even in the warmer area, there is a problem with your starter. It is too weak to ferment the dough even in a warm environment.
- To fix this, you will want to leave your starter out on the counter for 2 days and feed it every 12 hours at a 2:1 ratio of unbleached flour to filtered water.
- For example, 1 cup unbleached flour + 1/2 cup filtered (or bottled) water.
- Make sure you’re using unbleached flour and filtered or bottled water to do this. If you don’t, it will affect your starter strength. Reverse osmosis water (or any water that uses salt in the filter) can make the starter weak.
- This will strengthen the cultures in your starter to give you fluffy baked bread and treats. After the 2 days, you can go back to feeding it like usual (once a week if stored in the fridge or once a day if stored on the counter). Be sure to use the 2:1 ratio feeding from here on out.
Absolutely delicious, excellent recipe.!!!!
Soft and flavorful 🙂
Thank you so much!! I’m so happy to hear you love this recipe!😊