Sourdough Christmas Tree Cakes (Inspired by Little Debbie)
I knew I had to create a sourdough Christmas tree cake recipe when my husband said the Little Debbie ones were his favorite holiday treat! I wanted to make them at home from scratch to eliminate additives, excess sugar, and other unnecessary ingredients. Now, this recipe has become a Christmas tradition! We look forward to them all year. I hope they replace store-bought Little Debbie Christmas tree cakes in your house like they have in ours!
This recipe was inspired by but not affiliated with or endorsed by the Little Debbie brand and/or corporation in any way. This post may contain affiliate links of items I know and love. Read our disclosure policy for more information. I NEVER use AI (artificial intelligence) to create content for Plum Branch Home. Recipes, blog posts, photos, videos, podcasts, social media content: everything is made from scratch by me, Molly LaFontaine. After developing my recipes, they’re tested 2x by my husband, Tyler, and I before publishing. What you see from Plum Branch Home is real. It’s made for a reason, tested, and loved!
.
If you want to make this recipe but don’t have a sourdough starter, no worries! Grab my free guide so you can make your own starter at home.
If you’re new to sourdough baking and feel hesitant, or you have questions, I’ve got something for you! I broke down the basics of what you need to know about sourdough baking in my free sourdough baking guide for beginners. I highly recommend grabbing a copy!

Inspiration Behind My Sourdough Christmas Tree Cake Recipe
This recipe is absolutely delicious, and the inspiration behind it is so sweet. My husband has always loved Little Debbie Christmas Tree cakes. He told me that as a child he loved them and he still does to this day as an adult.
The only problem is we haven’t bought Little Debbie snack cakes in years because of the additives and ingredients they include. My heart has always felt sad that my husband was missing out on his favorite holiday treats, so I wanted to surprise him!
I quietly developed my recipe and made a batch for my sweet Tyler. He was SO excited! So much so that he asked if we could start a tradition of making and decorating these little cakes at Christmas time instead of cookies. Of course, I said yes!
So, my hope with this recipe is that I’ll inspire more of you to make these cakes at home instead of buying them at the store. They’re not only better for you, but they taste a heck of a lot better too!
What are Homemade Little Debbie Christmas Tree Cakes?
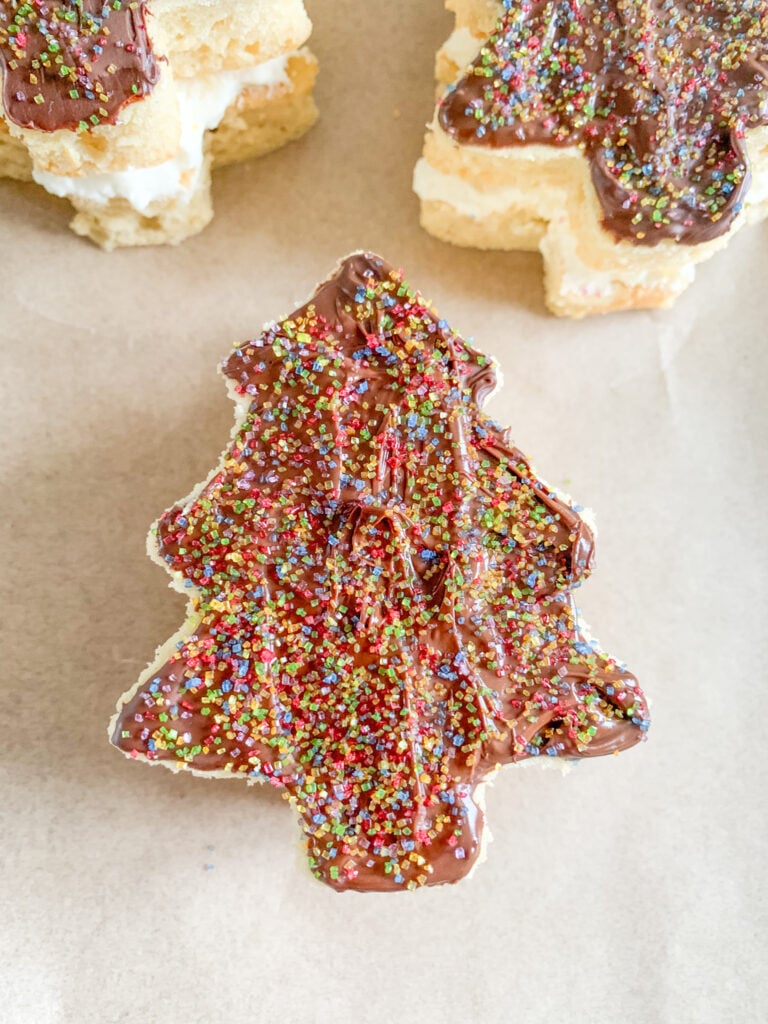
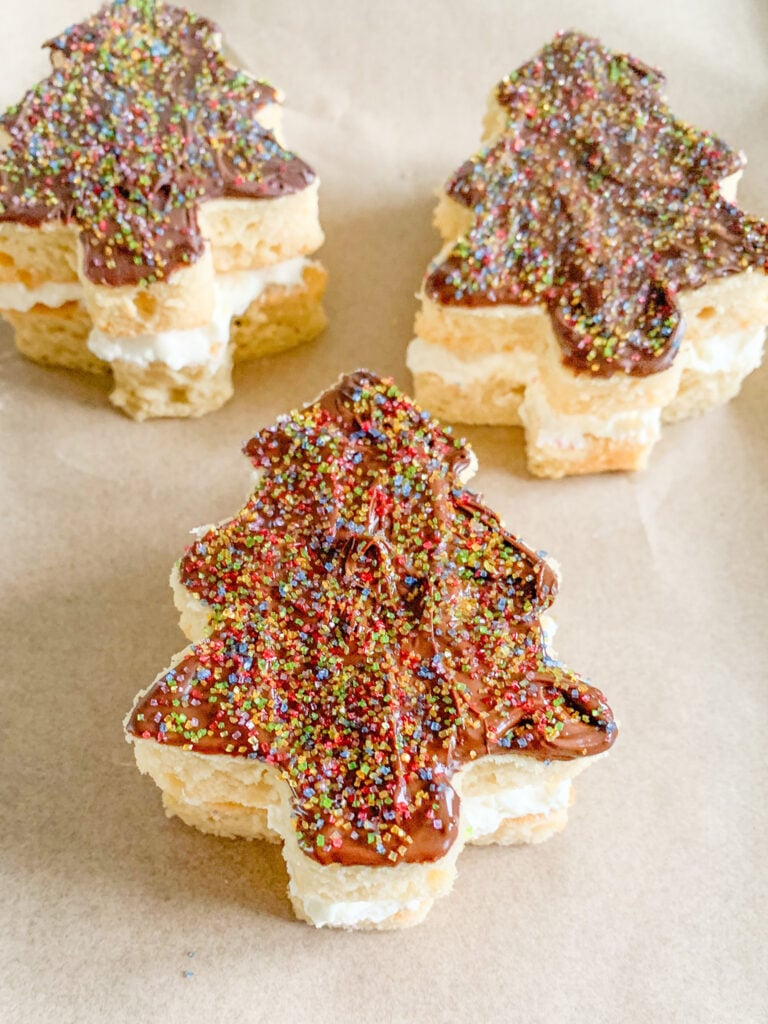
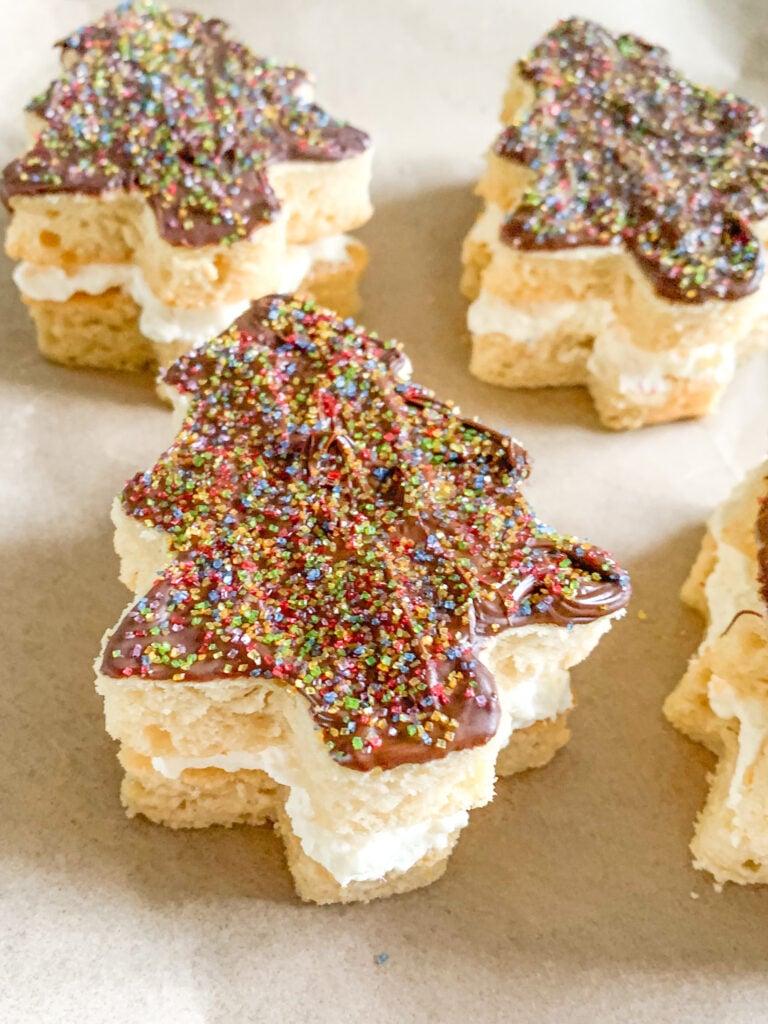
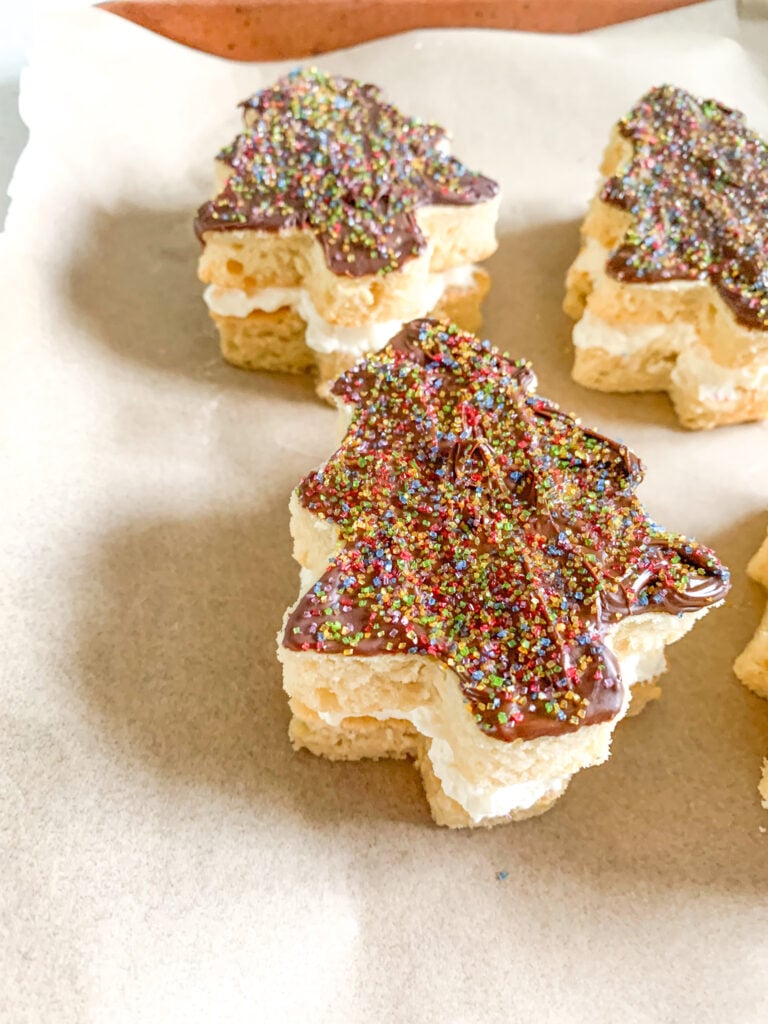
They are two-tiered sourdough cakes inspired by the Little Debbie version you can buy at the grocery store. They’re made from scratch with wholesome ingredients. They start with a moist sourdough vanilla cake. Then, they are layered with homemade stabilized whipped cream and topped with melted chocolate and natural decorating sugar.
Why We Love This Recipe and Think You Will Too!
- Better For You: By making them at home, you eliminate all those nasty ingredients and excess sugars.
- Made Completely From Scratch: They have such an amazing taste since they’re made from scratch!
- Simple Steps: The steps are really easy to follow — no overwhelm here!
- Beginner and Kid-Friendly: Beginners can make this recipe, and kids will enjoy helping.
- Can Be a Tradition: You can start decorating Christmas tree cakes instead of cookies each year like we do!
- Full of Fermentation Benefits: The sourdough adds fermentation benefits, especially if you do the optional cold ferment.
- Fun to Customize: You can make the decorating your own with different colored decorating sugar and kinds of chocolate.
My Tips for Making Christmas Tree Cakes From Scratch
- Read the full recipe before getting started so you know what to expect.
- Don’t skip a step or do something other than it says. Make it a few times first before making any small, subtle variations.
- Make sure you don’t over-mix the cake batter. This can cause it to be dense.
- Don’t skip the avocado oil or sour cream; they help keep the cake moist
- Ensure the cake is fully cooled before you try to take it out of the pan or frost it.
- Have all the components laid out before you assemble and decorate.
Ingredients You’ll Need (with notes and substitutions)
Note: Please see the recipe card at the bottom of this blog post for measurements
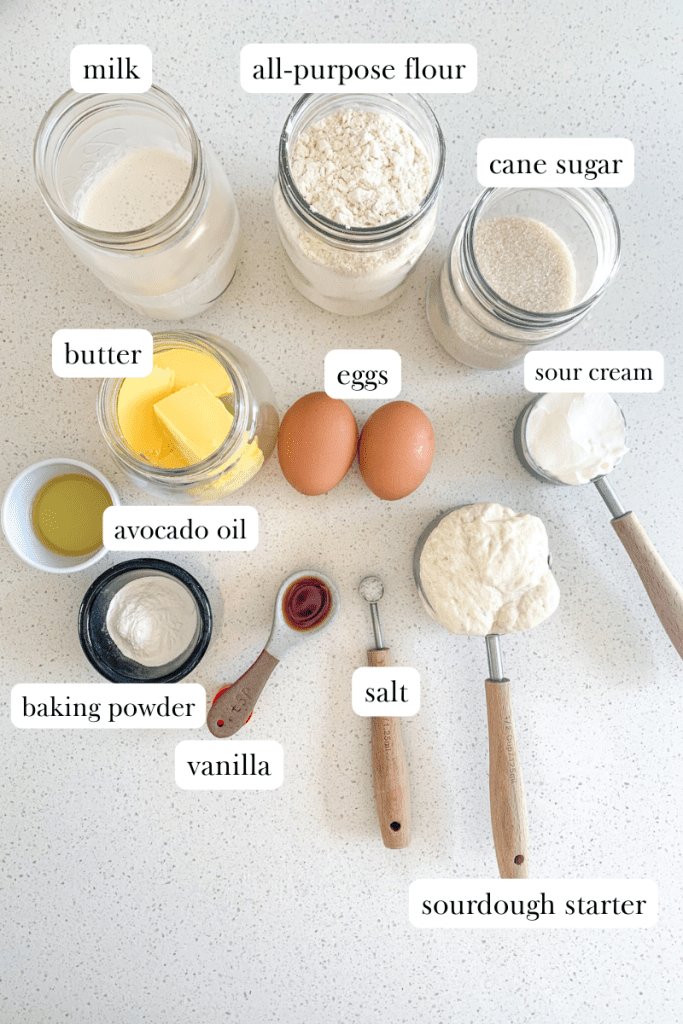
Ingredients You Need for Sourdough Sheet Cake
- salted butter: you’ll want to use stick butter not margarine
- avocado oil: you can use melted butter or coconut oil, not olive oil
- cane sugar: this is a wholesome option but you can use regular sugar if desired
- eggs: regular large eggs work best
- pure vanilla extract: I highly recommend pure extract rather than imitation
- sourdough discard: AKA unfed starter, this adds fermentation benefits
- milk: I use whole milk but any works
- sour cream: or plain, unsweetened yogurt
- sea salt: or you can use regular salt
- baking powder: I like to get an aluminum-free version
- all-purpose flour: I get unbleached organic but you can use any all-purpose
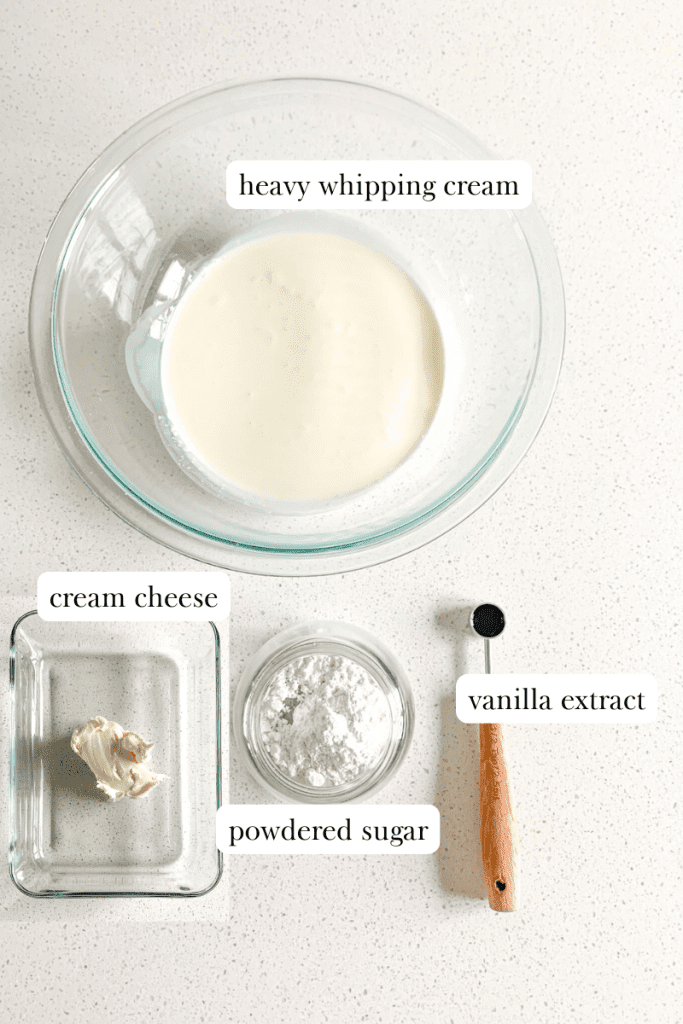
Ingredients for Stabilized Whipped Cream
- heavy whipping cream: I like getting organic so there isn’t many additives
- pure vanilla extract: I highly recommend pure extract rather than imitation
- powdered sugar: I like to get powdered cane sugar, Florida Crystals brand is my favorite
- plain cream cheese: I try to get a brand that has less gums and additives when possible
What You’ll Need for Decorating
- semisweet chocolate chips: or white chocolate chips
- Naturally colored decorating sugar: I like to use the natural Watkins brand
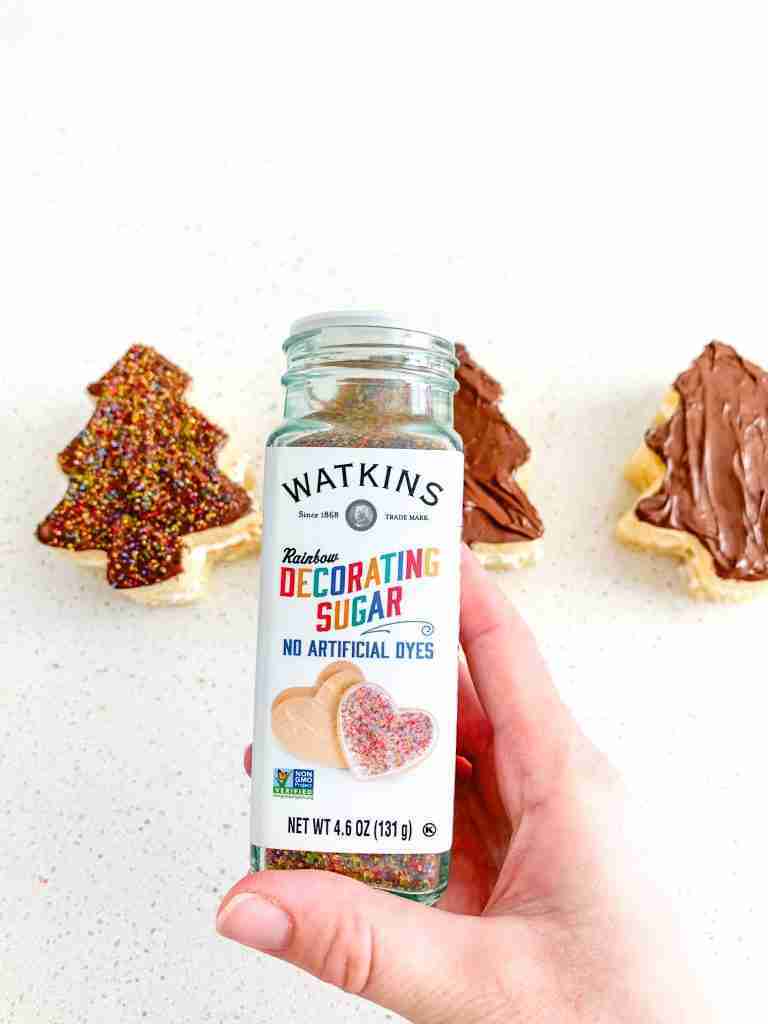
Choosing a Wholesome Decorating Sugar
For decorating sugar, I always recommend choosing a brand that is naturally colored. I prefer not to buy any that have FD&C artificial food colorings in them. Like Red 40, Blue 1, etc.
That way, these snack cakes can be fully wholesome! I like to use the Watkins brand. They have all different colors, and they keep those nasty dyes out of your food.
Helpful Kitchen Tools for this Recipe
This section contains Amazon affiliate links to items I use and love for this recipe.
- 10×15″ rimmed baking sheet
- 4″ Christmas tree cookie cutter
- mixing bowls
- electric mixer
- wire cooling rack
How to Make Sourdough Christmas Tree Cakes
Note: Please see the recipe card at the bottom of this blog post for the full written recipe.
30 minutes to 1 hour before you start this recipe set out butter, eggs, sourdough discard, milk, sour cream, and cream cheese so they can come to room temperature.
Make the Sourdough Cake
Preheat oven to 350 degrees and grease a (approximately 10” x 15”) rimmed baking sheet pan (AKA a jelly roll pan) with butter and flour (tap off extra flour).
In a large mixing bowl add softened butter, avocado oil, and sugar. Mix with an electric mixer with beater attachments on low speed for 2 minutes. It should be creamy and well-combined.
Add eggs one at a time, beating until completely combined both times.
Add in vanilla, sourdough discard, milk, sour cream, salt, and baking powder. (IMPORTANT: if you want to make the batter ahead or do the optional cold ferment in a few steps, wait to add baking powder!) Mix on low-speed just until combined. Do not over mix.
Add in flour a little at a time and mix on low speed just until combined. Do not over mix.
OPTIONAL: You don’t have to do this step but you can add an airtight lid to the mixing bowl or Saran Wrap and place it in the fridge for up to 24 hours until you’re ready to bake. This allows the starter’s cultures to ferment the other ingredients adding more fermentation benefits. If you do this step, add baking powder right before baking.
Pour cake batter onto the prepared baking sheet. Spread evenly with a spatula to fill the entire pan.
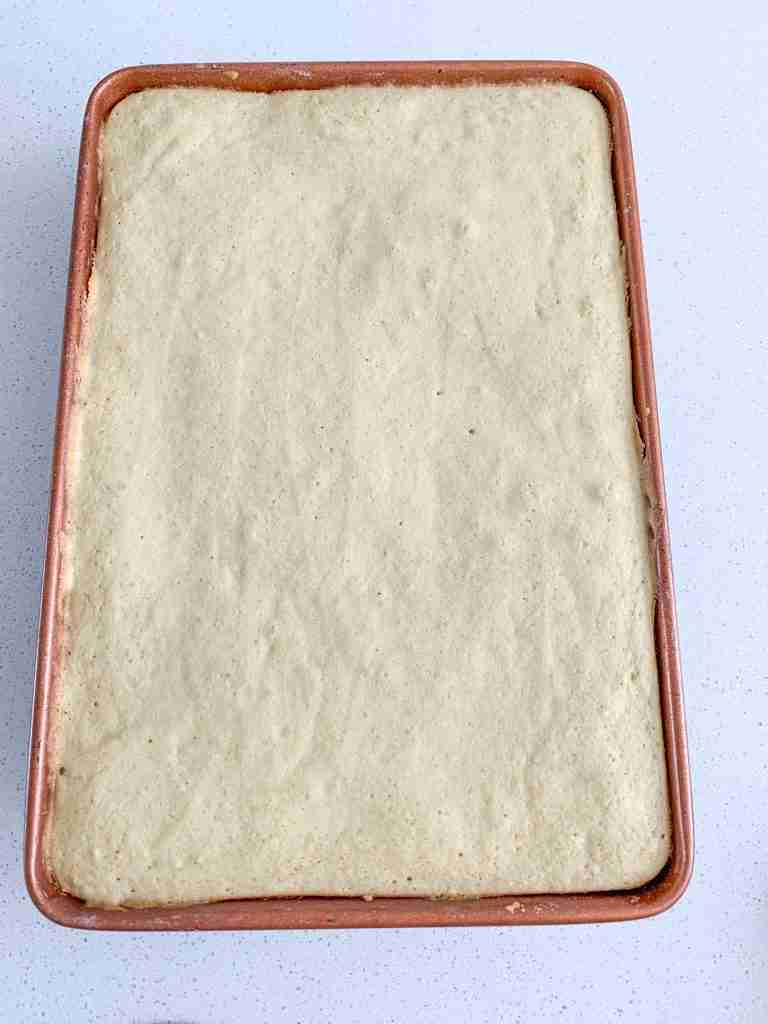
Bake for 20-24 minutes or until a toothpick comes out clean. Take cake out of oven and place, still in the pan, on a wire rack for 30 minutes to cool.
Make the Whipped Cream Layer
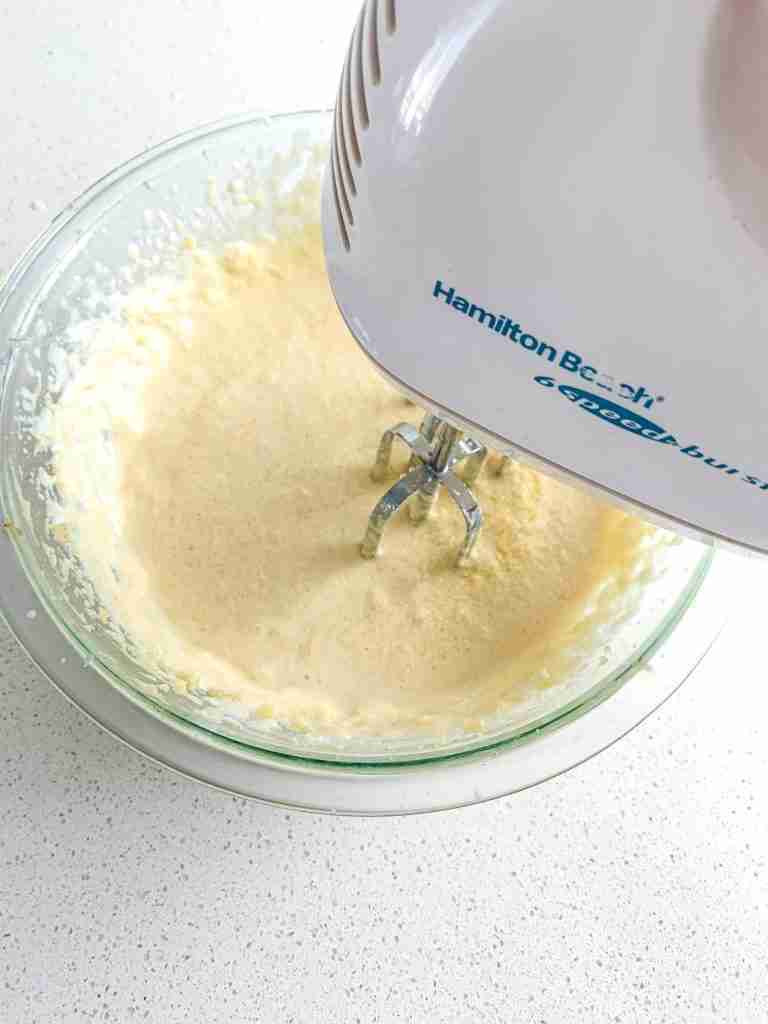
During this cooling time, in a medium sized mixing bowl, add cold heavy whipping cream, vanilla extract, softened cream cheese, and powdered sugar.

Use an electric mixer on medium speed with a whisk attachment (or a regular whisk if desired) to whip the ingredients together for 2-3 minutes or until peaks form. The whipped cream should stay on the whisk and not drop off. Store in the fridge until you’re ready to use it.
(If heavy whipping cream isn’t cold the whipped cream won’t come together. If this happens place the bowl in the freezer for 5-10 minutes and try again.)
Make the Coating
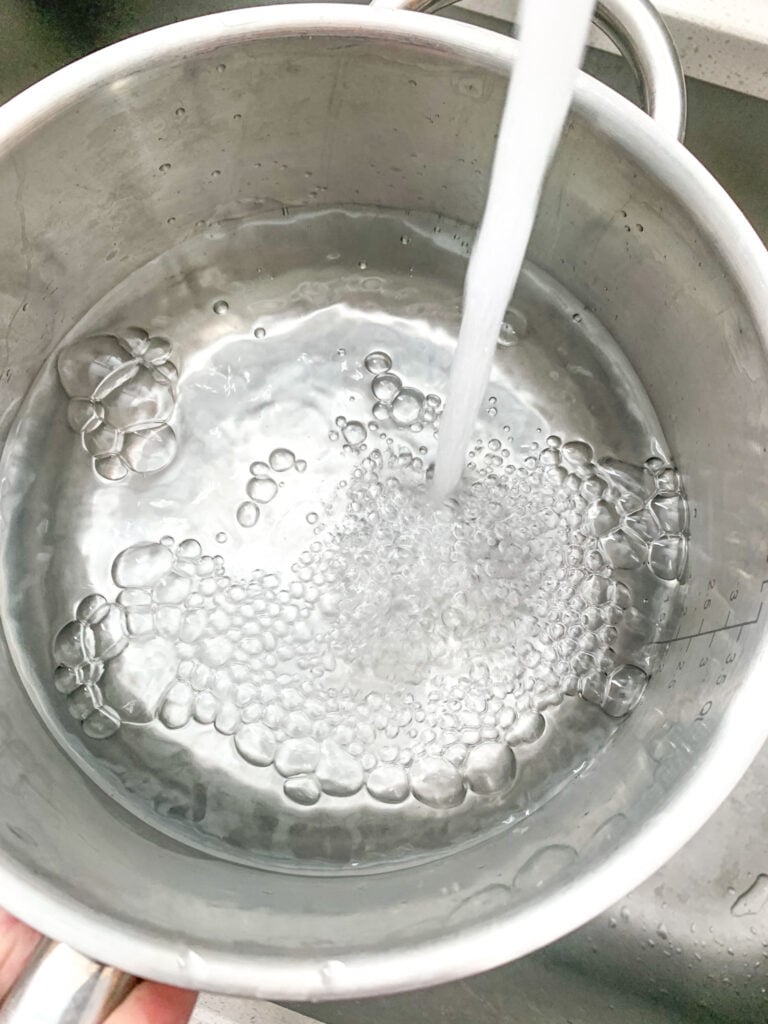
Fill a pot about 1/3 of the way full with water and bring to a simmer over medium-high heat.
Once simmering turn down heat to medium-low and place a glass or stainless steel heat-safe bowl over the pot. It should sit on the pot but ensure the bottom doesn’t touch the water.
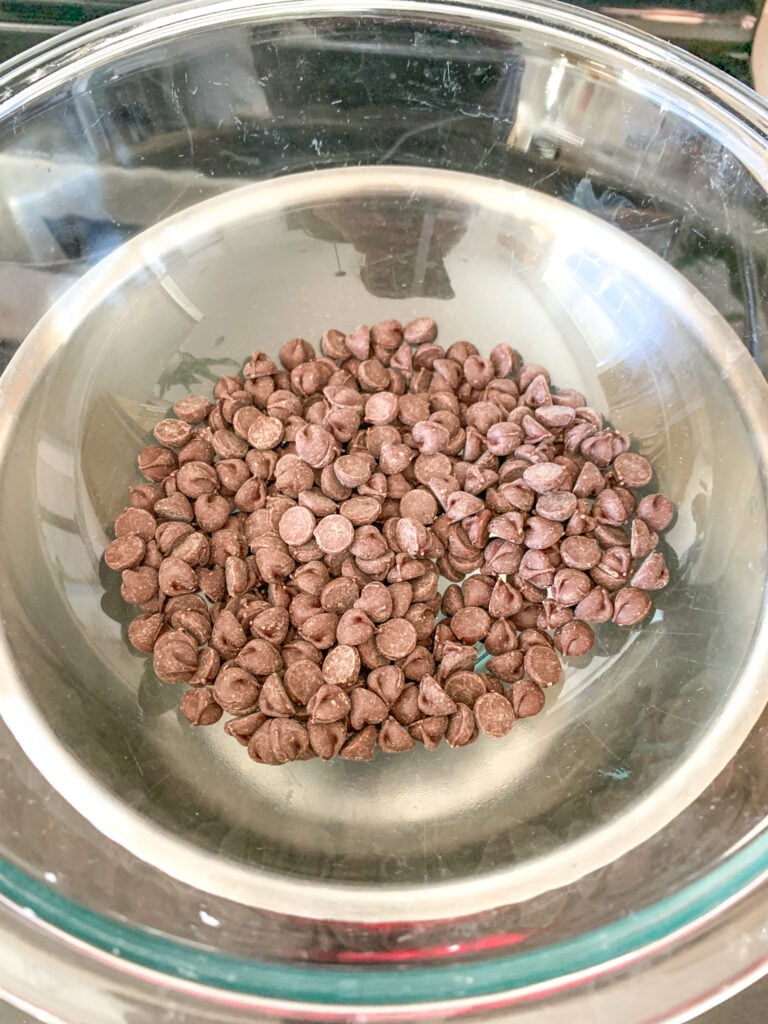
Add chocolate chips of choice (semi-sweet or white) to bowl and melt over medium-low heat, stirring continuously until smooth. Carefully use hot pads to immediately take bowl off heat as soon as it’s melted. Do not let chocolate burn.
Cut the Cake
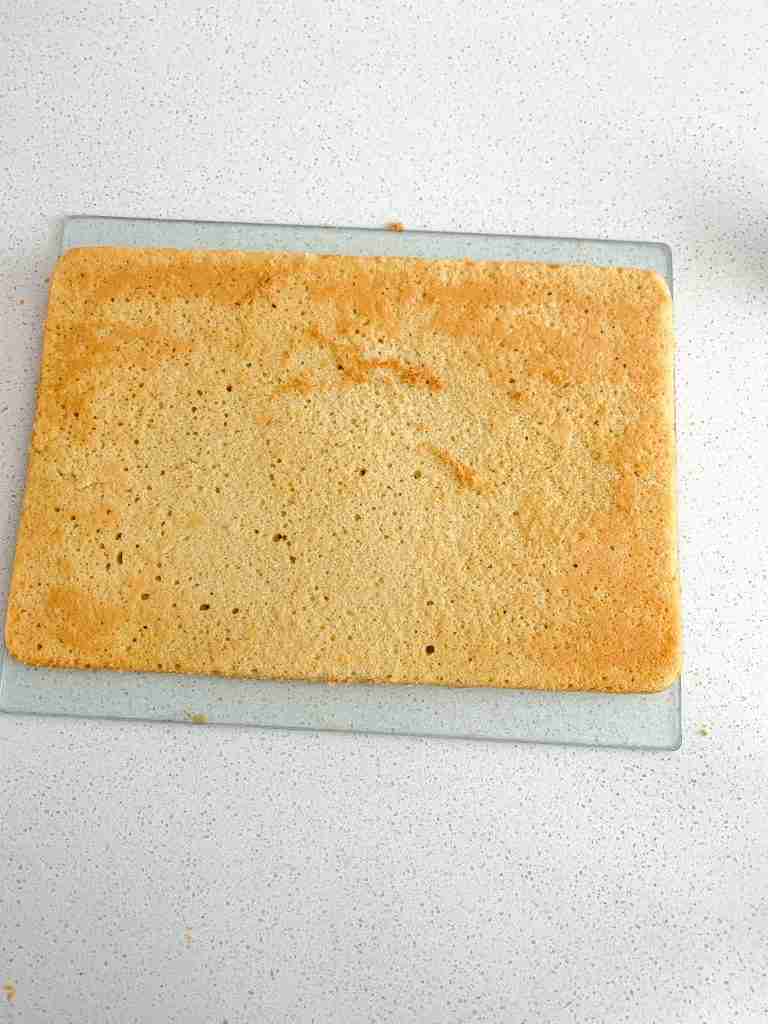
When cake is fully cooled, take a spatula and loosen edges as well as underneath the cake. Be very gentle not to crack the cake.
Place a cutting board on top of the pan and flip the entire board and pan upside down so the pan is sitting on the board. Remove pan and cake should come out easily onto the board if you loosened it all the way.
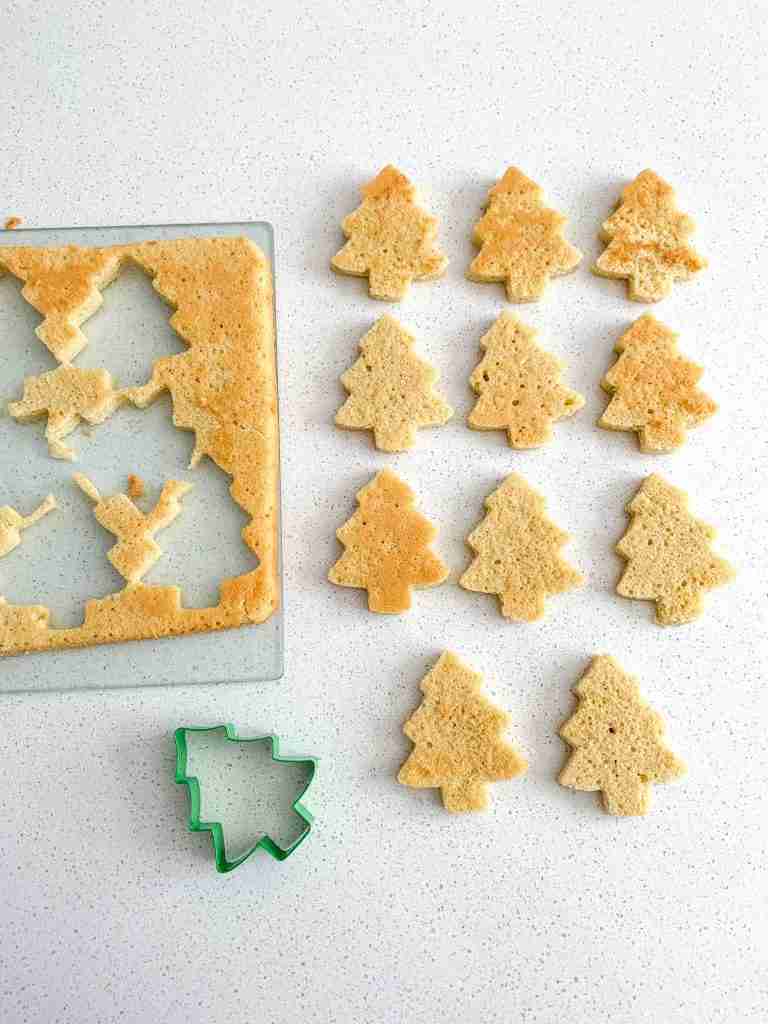
Leave cake upside down and take a 4” Christmas tree cookie cutter and cut out trees. Start close to the edges so you can cut a few out of the center.
Set excess cake aside (you can use this for another recipe like cake pops, or you can cut it up and save it or freeze it for later).
Assemble and Decorate
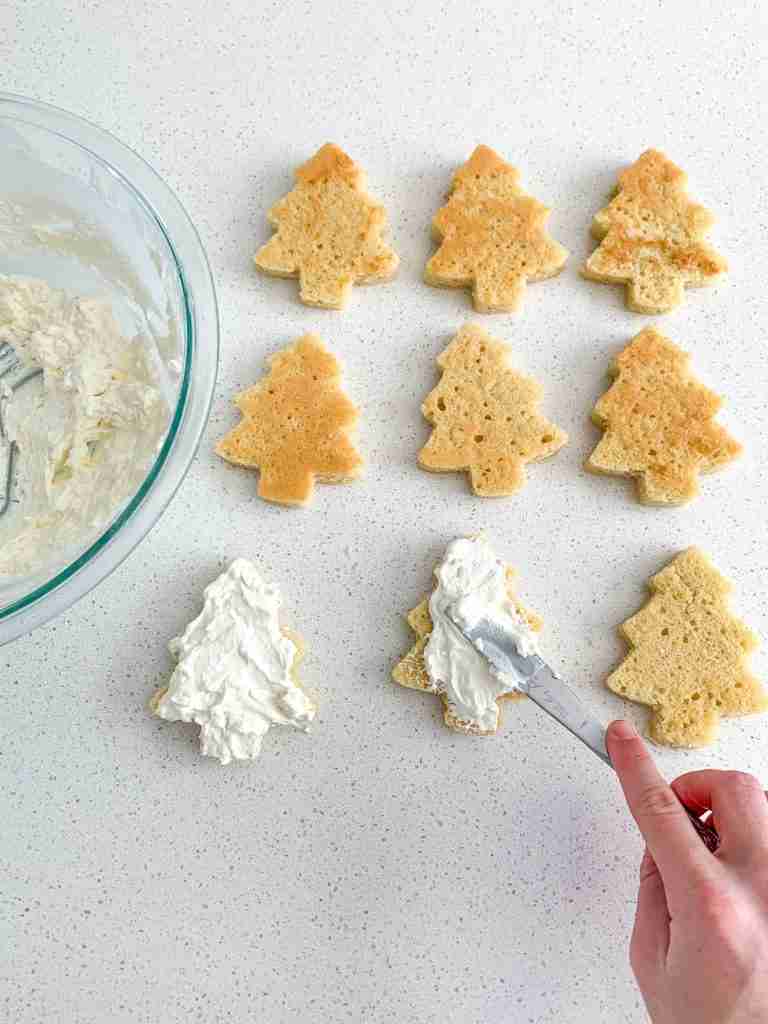
Spread 2-3 spoonfuls of the whipped cream filling you made on half of the trees. The other half will be used to top them. Make sure you have a good ratio of filling to cake.
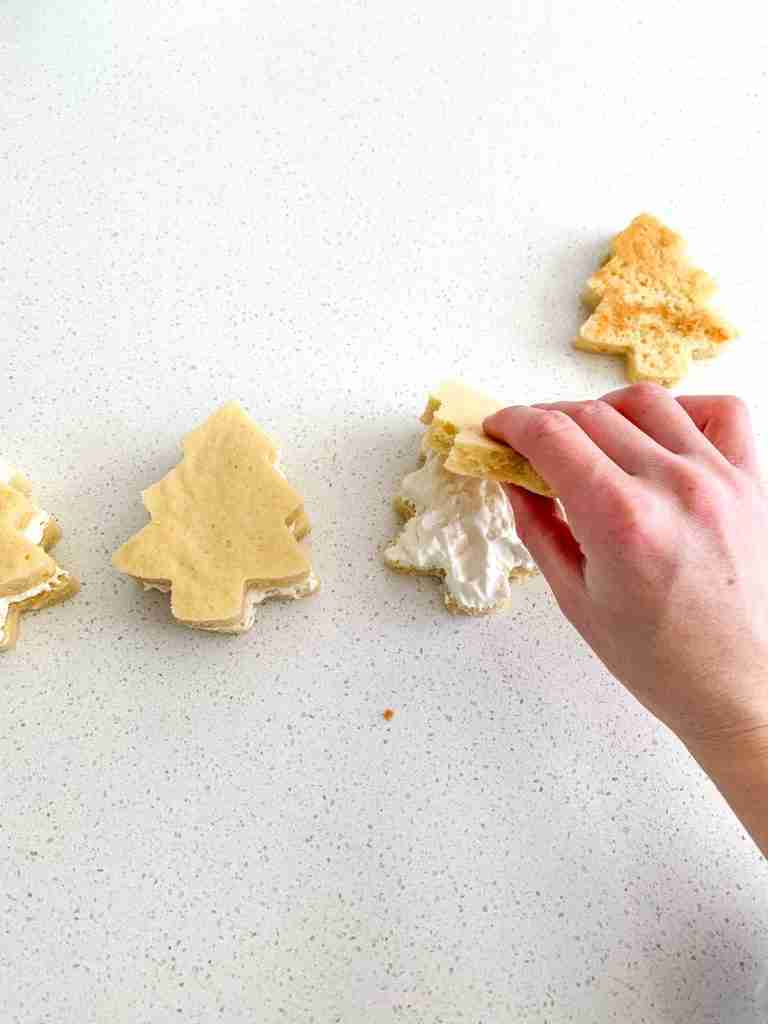
Place other half of uncovered trees on top of the covered to make little 2-tiered cakes.
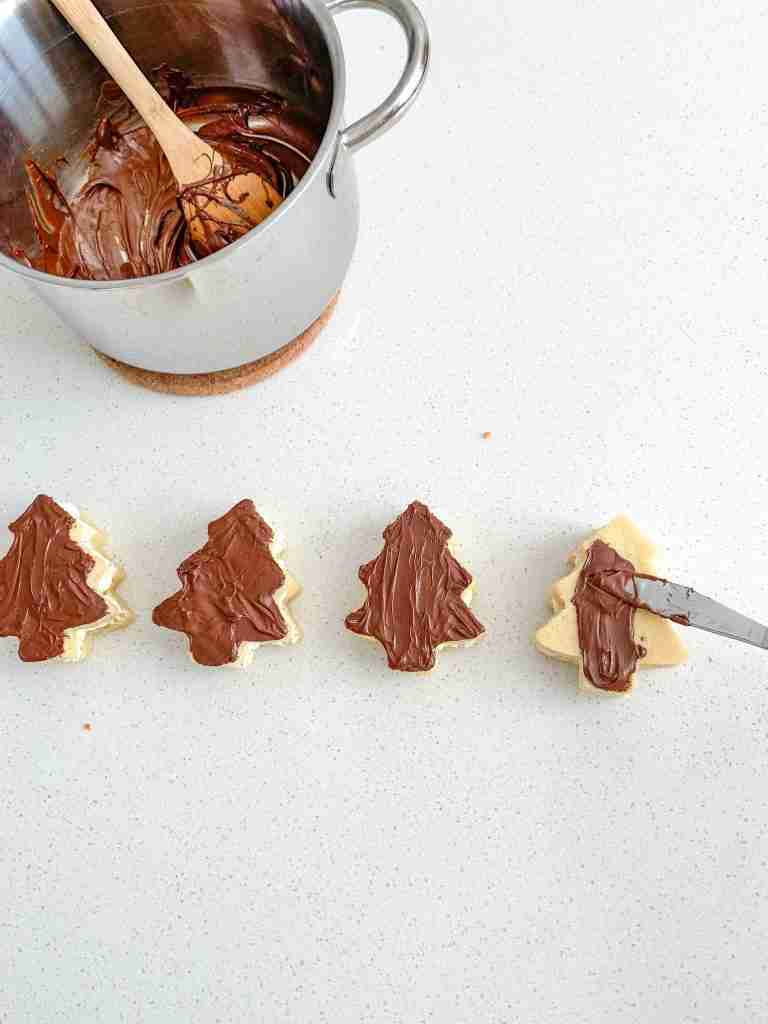
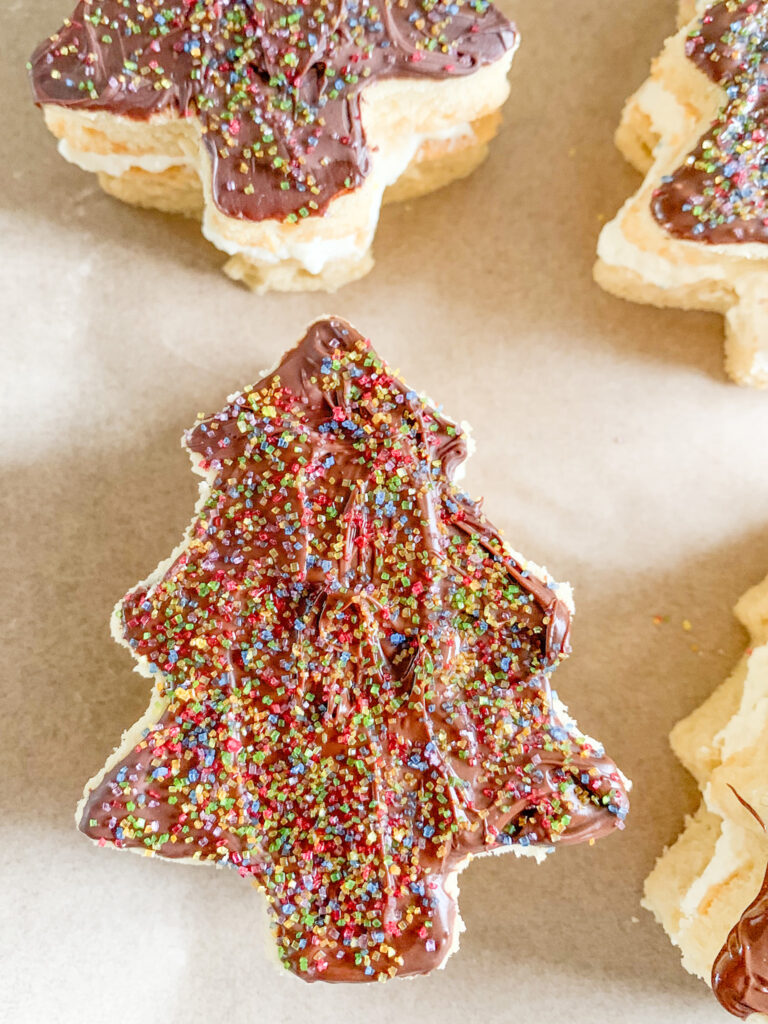
To decorate, grab the chocolate you melted earlier (if it’s hardened warm it back up over the pan) and spread an even layer over the tops of each tree.
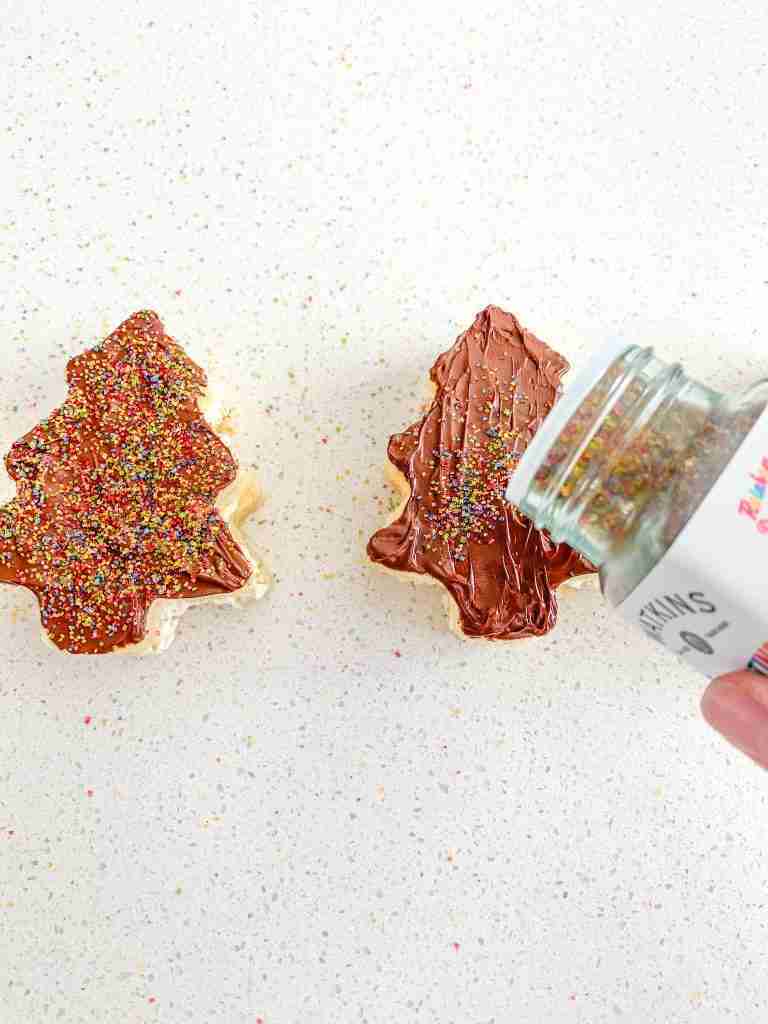
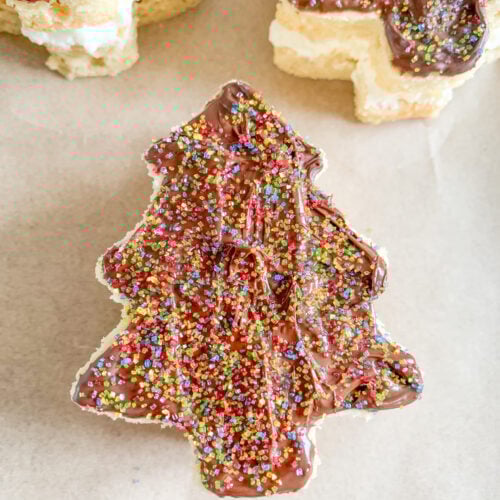
Once you’ve “frosted” your trees immediately sprinkle tops with decorating sugar.
Place decorated trees on a clean parchment-lined sheet pan and refrigerate for 5-20 minutes to harden chocolate. Enjoy! Be sure to store leftover cakes in an airtight container in the fridge.
Video Tutorial
Make Decorating Sourdough Christmas Tree Cakes a Tradition
These cakes are so much fun to decorate by yourself or with loved ones! My husband and I have a tradition of decorating these instead of Christmas cookies during the holiday season.
You could get a few different colors of natural decorating sugar and do a mix of white chocolate, dark, and milk for different decorating options. The possibilities are endless, and kids will love them!
How to Store Christmas Tree Snack Cakes
Because of the whipped cream, these cakes need to be stored in the fridge in an airtight container, preferably glass. They’ll last 2-3 days. Because cake dries out when stored in the fridge, the longer they sit the more dry they will be, but they’ll still taste delicious!
Frequently Asked Questions
I highly recommend it! This whipped cream is stabilized and created specifically to fill these cakes. If you use a pre-made version, it might melt into the cake instead of being its own layer.
Cream cheese helps stabilize the whipped cream and adds flavor! You can swap it for unflavored gelatin if you prefer, but I do recommend keeping it in.
You can if you’d like. When developing this recipe, I tried a few different ways to coat the cakes. If you want to fully coat them, the best is with almond bark (baking chocolate) because it’s a little thinner, but overall my husband and I think they taste better with just the tops coated. Feel free to experiment!
I’ve not tried making my recipe without sourdough discard. You are welcome to try it, but you will have to add a little more flour and/or milk to get a correct cake batter consistency.
You get fermentation benefits from the sourdough starter’s cultures. If you long ferment the dough in the fridge for 12-24 hours before baking, those cultures ferment the other ingredients. This long fermentation is optional but adds even more fermentation benefits!
More Sourdough Holiday Recipes To Try
If you’re looking for more sourdough recipes for Christmas, try a few of these:
- Sourdough Candy Cane Danish
- Sourdough Pistachio Chocolate Chip Cookies
- Sourdough Brownies Recipe
- Sourdough Chocolate Chip Blondies
- Cut Out Sourdough Sugar Cookies
- Sourdough Coffee Cake
If you made this recipe, give it a 5-star rating below and share a photo on your social media stories! Be sure to tag @plumbranchhome
Recipe
Sourdough Christmas Tree Cakes (Inspired by Little Debbie)
Ingredients
Sourdough Vanilla Cake
- 6 Tbsp softened salted butter
- 2 tsp avocado oil
- 3/4 cup cane sugar
- 2 eggs
- 1 tsp pure vanilla extract
- 1/2 cup sourdough discard
- 3/4 cup milk (I use whole milk but any works)
- 1/4 cup sour cream (or plain, unsweetened yogurt)
- 1/4 tsp sea salt
- 2 tsp baking powder
- 1 1/2 cup all-purpose flour (I use unbleached organic but you can use any)
Stabilized Whipped Cream (for the center)
- 1 cup heavy whipping cream (I like getting organic so there isn't many additives)
- 1/2 tsp pure vanilla extract
- 1/3 cup powdered sugar (I like to get powdered cane sugar, Florida Crystals brand is my favorite)
- 2 oz plain cream cheese, softened
Decorations
- 1/2 cup semisweet chocolate chips or white chocolate chips
- Naturally colored decorating sugar (no artificial food dyes)
Instructions
- 30 minutes to 1 hour before you start this recipe set out butter, eggs, sourdough discard, milk, sour cream, and cream cheese so they can come to room temperature.
Make the Cake
- Preheat oven to 350 degrees and grease a (approximately 10” x 15”) rimmed baking sheet pan (AKA a jelly roll pan) with butter and flour (tap off extra flour).
- In a large mixing bowl add softened butter, avocado oil, and sugar. Mix with an electric mixer with beater attachments on low speed for 2 minutes. It should be creamy and well-combined.
- Add eggs one at a time, beating until completely combined both times.
- Add in vanilla, sourdough discard, milk, sour cream, salt, and baking powder. (IMPORTANT: if you want to make the batter ahead or do the optional cold ferment in a few steps, wait to add baking powder!) Mix on low-speed just until combined. Do not over mix.
- Add in flour a little at a time and mix on low speed just until combined. Do not over mix.
- OPTIONAL: You don't have to do this step but you can add an airtight lid to the mixing bowl or Saran Wrap and place it in the fridge for up to 24 hours until you’re ready to bake. This allows the starter’s cultures to ferment the other ingredients adding more fermentation benefits. If you do this step, add baking powder right before baking.
- Pour cake batter onto the prepared baking sheet. Spread evenly with a spatula to fill the entire pan.
- Bake for 20-24 minutes or until a toothpick comes out clean.
- Take cake out of oven and place, still in the pan, on a wire rack for 30 minutes to cool.
Make the Whipped Cream Layer
- During this cooling time, in a medium sized mixing bowl, add cold heavy whipping cream, vanilla extract, softened cream cheese, and powdered sugar.
- Use an electric mixer on medium speed with a whisk attachment (or a regular whisk if desired) to whip the ingredients together for 2-3 minutes or until peaks form. The whipped cream should stay on the whisk and not drop off. Store in the fridge until you’re ready to use it.(If heavy whipping cream isn’t cold the whipped cream won’t come together. If this happens place the bowl in the freezer for 5-10 minutes and try again.)
Melt Chocolate for Decorating
- Fill a pot about 1/3 of the way full with water and bring to a simmer over medium-high heat.
- Once simmering turn down heat to medium-low and place a glass or stainless steel heat-safe bowl over the pot. It should sit on the pot but ensure the bottom doesn't touch the water.
- Add chocolate chips of choice (semi-sweet or white) to bowl and melt over medium-low heat, stirring continuously until smooth. Carefully use hot pads to immediately take bowl off heat as soon as it's melted. Do not let chocolate burn.
Cut the Cake
- When cake is fully cooled, take a spatula and loosen edges as well as underneath the cake. Be very gentle not to crack the cake.
- Place a cutting board on top of the pan and flip the entire board and pan upside down so the pan is sitting on the board. Remove pan and cake should come out easily onto the board if you loosened it all the way.
- Leave cake upside down and take a 4” Christmas tree cookie cutter and cut out trees. Start close to the edges so you can cut a few out of the center.
- Set excess cake aside (you can use this for another recipe like cake pops, or you can cut it up and save it or freeze it for later).
Assemble and Decorate
- Spread 2-3 spoonfuls of the whipped cream filling you made on half of the trees. The other half will be used to top them. Make sure you have a good ratio of filling to cake.
- Place other half of uncovered trees on top of the covered to make little 2-tiered cakes.
- To decorate, grab the chocolate you melted earlier (if it's hardened warm it back up over the pan) and spread an even layer over the tops of each tree.
- Once you’ve "frosted" your trees immediately sprinkle tops with decorating sugar.
- Place decorated trees on a clean parchment-lined sheet pan and refrigerate for 5-20 minutes to harden chocolate. Enjoy!
- Be sure to store leftover cakes in an airtight container in the fridge.
Video
Notes
I regularly feed my sourdough starter a 2:1 ratio of unbleached flour to filtered water, this creates a 50% hydrated starter even when I use discard. If you feed your starter differently, results may vary due to a different hydration which will cause a different consistency. No matter how you feed your starter just ensure it’s a thick consistency when you use it for my recipes even if you’re using discard.
Please leave a comment below or share a photo on social media! If you share a photo be sure to tag me @plumbranchhome
These are adorable! Can’t wait to make.
Thank you so much! I’m excited for you to make them!