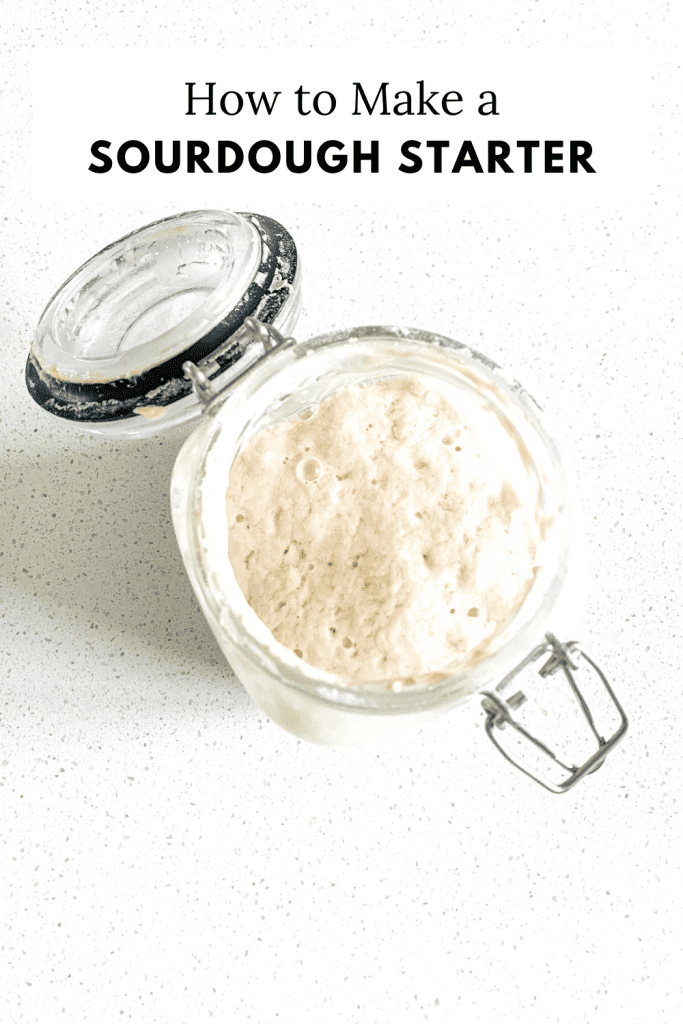
How to Make a Sourdough Starter (Guide for Beginners)
Learning how to make sourdough starter can be daunting but it’s as simple as mixing water and flour on a schedule for seven days. No really, it’s that simple! Of course, there are things you need to know while mixing these two ingredients but that’s what this blog post is going to walk you through.
This post may contain affiliate links of items I know and love. Read our disclosure policy for more information.
If you’d prefer a printable guide, grab a copy of my free eBook below instead of following this blog post!
You’re going to learn how to make a simple sourdough starter day by day as well as what a starter does, and what discard is. I’ve been making sourdough bread from scratch for a while now and let me tell you, it’s one of the best decisions I’ve made! Let’s first dive into a few helpful tips before we get to the recipe.
What Is Sourdough Starter Made of?
Sourdough starters can be made of a few different things. Although the best recipes are simply filtered water and flour. It is very important to use filtered water (if you have reverse osmosis or live in the country with a well you’re fine to use water our of the faucet). If you don’t the chlorine and additives from tap water can prohibit the development of your starter.
When I first learned to make mine, I was so confused on why I wasn’t using yeast. I later learned that sourdough starter actually replaces yeast in recipes. When you mix flour and water together, in a certain way over seven days it allows good bacteria to become active which is what makes your sourdough starter. When we get to the recipe it’ll make a little more sense, just hang in there. I promise creating a sourdough starter is super simple.
Sourdough Starter Terms To Know
Before we get any further, I’m going to explain a few terms to help this blog post become easier to read. Terms such as discard, feeding, etc.
Sourdough Starter
A living culture of bacteria that is fed regularly that eat flour and water to create gas which raises bread
Discard
Unfed starter that is removed from the jar before feeding your starter
Feeding
Adding equal amounts of flour and water to the starter jar to feed the live culture of bacteria
Activation
When feeding your starter you are activating it for baking
Alveoli
The gas bubbles or pockets in the crumb (soft interior) of bread
Baking Timeline
Schedule followed when making and baking a loaf of bread
Banneton
Shaping basket made of natural rattan or cane used during cold fermenting “proofing”
Belly
The rounded surface of dough that opens up during baking
Bench-Rest
Allowing the dough to lay on the counter before shaping
Bulk Ferment
The first rise of sourdough dough where the magic happens and the dough doubles in size
Proofing
The second rise of sourdough dough is done mainly in cold temps like the fridge
Bread Whisk or Danish Whisk
Handy whisk used specifically for mixing dough
Dutch Oven
A cast iron pot (some are ceramic covered) used in the oven to bake bread and create a crust (cheaper option to a bread cloche)
Bread Cloche
Stoneware dome used to bake dough in the oven that mimics a professional oven by creating a golden crust on bread
Elasticity
Stretchiness of the dough (sourdough is very elastic)
Hooch
Liquid formed on top of a hungry sourdough starter (can form in the middle or at bottom)
Scoring Knife
A French word referring to a tool for scoring bread
Scoring
Also known as slashing, where cuts are made on the belly of the dough to control where it opens during baking. This allows pretty designs or rustic looks done with a sharp razor or bread lame.
Resting
The time letting the dough rest between folds during shaping
Shaping
Creating the oval or oblong shape of bread you desire
Rustic Sourdough
Sourdough loaf that doesn’t require kneading and full of whole grains
Bench Scraper
A tool used to easily lift loaves off the bench (counter) or cut down in sections
Stretch and Fold
Method of moving the dough to strengthen it in place of kneading
Tension
Creating tension in the dough to make scoring easier and a better belly of the dough when baking
Poke Test
Testing the dough with a finger poke to see if it’s ready to bake (perfect poke = after pushing finger in the dough the dimple slowly starts to fill back in but not fully)
Tools
When it comes to tools for sourdough bread making, you don’t need anything fancy. If you want to start making your starter but you don’t have the items below NO WORRIES! You can still start today. All you really need is your jar for your starter. These breadmaking items are a great investment and make the process not only easier but so much fun.
When it comes to baking items like the cloche or Dutch oven do note you don’t need one of these BUT without them you won’t get a crust on your loaf. I highly recommend choosing one or the other. The Dutch oven is the most affordable if you’re on a budget.
- Starter Jar
- Dutch Oven (if you have a bread cloche you don’t need one of these)
- Bread Cloche (if you have a Dutch oven you don’t need one of these)
- Bench Scraper
- Scoring Knife
- Bread Whisk
- Banneton
- Bread Making Kit (has everything above but jar & Dutch oven/cloche)
Type of Container To Use
You’re going to want to pick a jar that you don’t mind using for a long time. I highly recommend this jar being glass. You don’t want the plastic to leech into your starter and not only make you sick but interfere with the development of your starter. You can do a mason jar, glass storage jar, or a bowl.
Make sure you have a loose-fitting lid or some type of cloth to cover the top. I use a glass storage jar that is about 4-5 cups of compacity and works great. Do note, your starter will grow and needs room to do so. Never use an air-tight jar, in warm weather it can burst from the fermentation process happening.
Read this guide for more starter container information: Choosing a Sourdough Starter Jar (and answering starter jar questions)
How Long Does a Sourdough Starter Last?
Essential sourdough starters can last 30+ years if fed correctly. You’ll use it for tons of recipes and continue feeding it every time. At some moments you’ll have more starters and at others, you’ll have less.
If you ever decide you don’t want to care for your starter and you’re done making bread simply rinse it down the drain. However, I don’t recommend getting rid of your starter. It’s such a useful thing to have in your kitchen! Let’s go over real quick how often you need to feed and care for it. Don’t worry it’s customizable.
How Much Care Will My Sourdough Starter Need?
After the initial first seven days of creating your sourdough starter, it’s really up to how much you want to use it. If you want to make fresh breads, cinnamon rolls, pancakes, pizza dough, etc. every day leave your starter out on the counter.
If you choose to do this (after the seven initial days of creating it) you’ll need to use some of the starter every day and feed it with flour and water.
For less work, you can stick your starter in the refrigerator. This slows down the bacteria, allowing you to care for and use it less. When sticking it in the refrigerator you will want to feed it once a week (which is perfect for a weekly loaf of bread or other recipe).
If time gets away from you or you’re on vacation, don’t worry you can go up to 2 weeks without feeding it without it having issues. Although you don’t want to do this all the time.
Read this guide for more starter care information: The Best Sourdough Starter Feeding Ratio & Guide
Instructions For Less Care
If you choose to store your sourdough starter in the fridge, there are a few things to note. When you want to use your starter ALWAYS get it out about 24 hours before you want to use it, this activates your bacteria. When you first take it out of the fridge be sure to feed it (go to the paragraph below to learn how) and then let it sit for 24 hours.
For example, if you want to use your starter to make homemade pizza dough Friday night, get your starter out and feed it Thursday night. After you use your starter be sure to feed it once more then stick it back in the fridge. Note: always feed your starter when you take any out.
How Do You Feed a Sourdough Starter After the First 7 Days?
Once your starter is established, on day 8 of this recipe, check out my feeding guide for a complete run down on how and when to feed your sourdough starter.
You’ll feed it once a day if left on the counter or once a week if stored in the fridge. For each feeding, I like to do a 1:2 ratio of water and flour. For example, if you have approximately 2 cups of starter, feed it 1/4 cup water + 1/2 cup flour. Feed your starter 4-12 hours before using it.

Why do you use a 1:1 ratio to create the starter but a 2:1 ratio to feed it?
So, when creating a sourdough starter, you’ll want to use a 1:1 ratio. After it’s established (on day 8), you will begin feeding your starter which means you’ll use a 2:1 ratio from there on out.
Can I use bleached all-purpose flour to make a sourdough starter?
You can, it may affect how quickly the cultures form and how strong they are. If you can, I highly recommend grabbing unbleached it’s the same price!
Read this guide all about flour for starter feedings: Best Flour for Sourdough Starter Feeding
On day 3 my starter has tons of hooch and isn’t forming bubbles what do I do?
For the rest of the time (days 4 through 7) instead of doing 1 cup water and 1 cup flour, you’ll want to do 1 cup flour and 1/2 cup water. This will help strengthen the cultures you’re creating.
How to Make a Sourdough Starter (Recipe)
How to Make a Sourdough Starter
Equipment
- 1 glass jar
- 1 Spoon
Ingredients
- 7 cup unbleached all-purpose flour (1 cup daily)
- 7 cup filtered water (1 cup daily)
Instructions
- Day 1: grab your glass jar and mix 1 cup flour + 1 cup water in it with a spoon. Be sure to mix well and scrape down the sides when done. Let the jar sit out on the counter where there isn't a breeze and cover it with a dish towel. Let sit for 24 hours.
- Day 2: uncover your glass jar and open it. Take out half of the mixture and place it in a bowl (this is your discard). You don't need to measure just eyeball it. Put your discard off to the side (you can use this for a discard loaf, pancakes, etc.) or you can throw it out if desired. Now add another 1 cup flour + 1 cup water to the mixture in your glass starter jar (this is feeding your starter). Mix until well combined, scrape the sides of the jar, cover with lid, and place on the counter under the kitchen towel for another 24 hours.
- Day 3, 4, 5, 6, & 7: for the next 5 days you will repeat step 2 (day 2). If water is on top of your mixture (hooch) don't worry, just stir it in. Your starter mixture will have a fermented odor to it, which is 100% normal. If your starter mixture smells like mildew or turns black, throw it out and start again with a clean jar.
- Day 8: on day 8 your starter should be active and ready. It should have some bubbles and begin to grow. (It will double in size on day 8 when you feed it if it's active). You can now bake fresh sourdough bread and treats. Care Guide From Here on Out:Counter Storage: Feed your starter a 2:1 ratio, 1x per day or 2x (every 12 hours if it’s above 70 degrees inside your house)Fridge Storage (easiest way): 4-12 hours before using your starter, take it out of the fridge and feed it if you plan to use it for a recipe that needs a rise. After baking with the starter, feed it again and then stick it in the fridge until you’re ready to use next time.Discarding from here on out: The only time you’ll have to discard before feeding is if the starter container is already half full to prevent overflowing. Take out 1/2 cup if needed.
Hi!! So excited for this recipe and so thankful I found your page! I am starting my first starting today and using a jar similar to yours. On the first day to I latch the lid closed or do I just cover with a dish towel?
Thank you!!
Hi!! Thanks so much for stopping by Plum Branch Home! That is so exciting, you’re going to love this sourdough starter. I just latched the lid each day and it turned out great. Let me know if you have any other questions! So excited for your sourdough journey!!
****Update 6/29/23: I just learned/experimented that a loose-fitting lid (not-air tight) or a cloth of some type is best to cover your sourdough starter both on the counter and in the fridge. This prevents the jar from breaking with the fermentation process. Hope this helps!
Nice Sourdough Starter recipe!!!!
I love my starter, it is doing great on the counter or in the fridge. I’ve used both methods with this starter and it’s doing great.
It makes delicious sourdough items!!
I used Plum Branch Home No Knead Sourdough Bread recipe and it made an amazing loaf of bread!!!
I didn’t have the correct pan to bake it in. I used a square Corning Ware dish (check out PBH Q&A and tips). I made a round loaf and baked it for 30 minutes uncovered. It turned out wonderful, crunchy crust with a soft center.
My starter is so active I have to use a loose fitting lid so it doesn’t burst my jar (PBH thanks for the tip). I’m thinking about getting a bigger glass
container to put it in 🙂
(think I used to small of one to begin with)
I 🧡 Plum Branch Home Sourdough
Thank you so much!! I am so happy to hear your starter is doing so well in both the room temperature and refrigerator! That loaf recipe is my go-to anytime I’m needing fresh bread!! So glad you enjoyed it! Thank you so much for sharing what you used to for baking and how it turned out! The bigger container could be a great idea to give you a little more room or if you want to keep a larger supply of starter 😊. Thanks so much for sharing your thoughts!
This is the first recipe I have made that actually gets me a bubbly starter!!
Once I have my starter, how much should I feed it and how often?
Thanks!
Aww, I’m so happy to hear this!! Once your starter is established, you’ll feed it either once a day if left on the counter or once a week if stored in the fridge. For each feeding, I like to do a 1:2 ratio of water and flour.
For example, if you have approximately 2 cups of starter, feed it 1/4 cup water + 1/2 cup flour. Feed it 4-12 hours before using it. If you have any more questions don’t hesitate to reach out!
Hi there.
I’m a little confused. The recipe above for the starter is a 1:1 ratio not a 2:1. The same for when you feed it.
Help. This is my first time trying this.
Hello, thanks for reaching out with your question. So, when you first create a sourdough starter, you’ll want to use a 1:1 ratio to make it. After it’s established (on day 8), you will begin feeding your starter which means you’ll use a 2:1 ratio to do so. Hope this helps clear up the confusion! I’m going to make a note of this on the recipe card incase others have the same question. If you still need help please let me know, I’m here to help!
I’ve just started with your starter recipe. It already had a clear liquid on the top the First morning after mixing the first flour and water. Last night was day 2 and this morning it had a slightly brown, but still clear liquid right in the middle that split the mixture in 2. No bad smells. Should the starter create hooch so soon? Mixture is quite bubbly, which looks Good. I use filtered water and AP flour and leave her out on the kitchen counter.
I’m quite excited about this starter…. Might just be the first starter which works for me or that I don’t murder 🙂 I’ve named her Matilda.
Great question, yes! Hooch can begin early on in the process. If you keep having a hard time with the hooch, using an unbleached AP flour will help. Otherwise it sounds like you’re on the right track. I love the name! If you have any issues or questions please reach out, I’m always happy to help!