Easy Sourdough Cheese Danish From Scratch
My sourdough cheese Danish pastries are made from scratch and perfect for beginner bakers, with a simplified laminating process and easy-to-follow steps. Whether you whip up this recipe for Mother’s Day or a random Saturday morning, you’ll fall in love with the cheesecake-like center surrounded by a flaky, buttery pastry.

Disclaimer: I’m not a medical or financial professional. The content I share is based on personal experience and opinions. Some links may be affiliates like Amazon, but I only recommend what I find valuable. I’m not responsible for linked products/services, allergies, or dietary upsets. Consult a professional for any medical or financial advice. Read our full privacy policy here.
Sourdough Cheese Danish Recipe Inspiration
This recipe is part of the brunch series I’m doing for Mother’s Day. As I created the content schedule for this series, I wanted to add a pastry that was simple but tasted like it came from a bakery. So I came up with the idea to develop a sourdough cheese Danish with super-simple steps. I know you’ll love it just as much as we do!
If you missed the first recipe in this series, you’ll want to go check it out! It’s my sourdough banana bread made from scratch. It’s simple and includes a little secret I learned from a New Orleans pastry chef!
My Tips for Making Easy Danish Pastries
- Always keep butter cold when using it to make Danish dough.
- Use a box grater to shred the butter rather than cutting it into the dough with a fork.
- I skip the traditional slab of butter lamination and instead create layers in the dough with the butter already in the dough.

Why You’ll Love This Recipe
- It’s the easiest Danish recipe you’ll ever use.
- The ingredients are wholesome, and the steps are simple.
- It’s beginner-friendly, so it won’t be overwhelming.
- These Danish taste like they’ve come from a bakery.
Ingredients You’ll Need
Sourdough Danish Dough
- all-purpose flour
- cane sugar
- salt
- cold butter
- milk (dairy or dairy-free)
- sourdough starter (fed or discard)
Cream Cheese Filling
- cream cheese (room temp/softened)
- pure vanilla extract
- lemon juice
- egg
- cane sugar
Egg Wash
- 1 egg
- 2 Tbsp water
Kitchen Tools You’ll Need
Step-By-Step Instructions
Make the dough.
In a large bowl, combine flour, salt, and sugar.
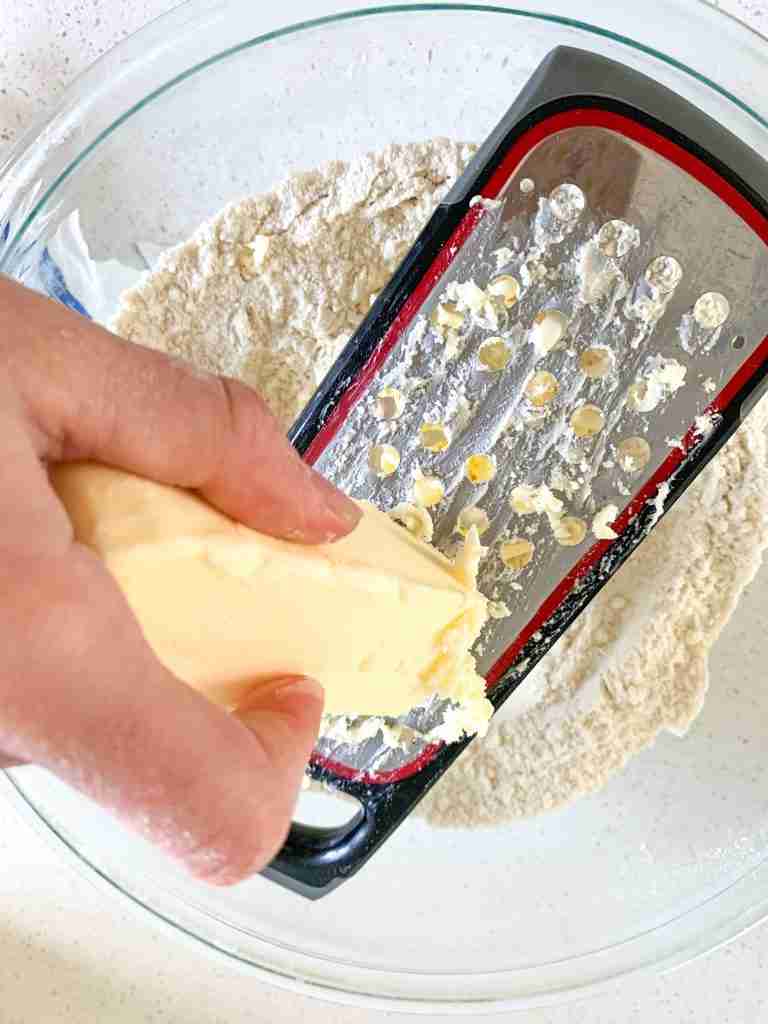
Grate the butter into the dry ingredients, or cut it in with a fork until the mixture is crumbly and the butter pieces are pea-sized.
Add milk and sourdough starter, then mix with a spoon until a dough forms.
Cover the dough and place it in the refrigerator for 3 hours.
Create the layers (laminate).
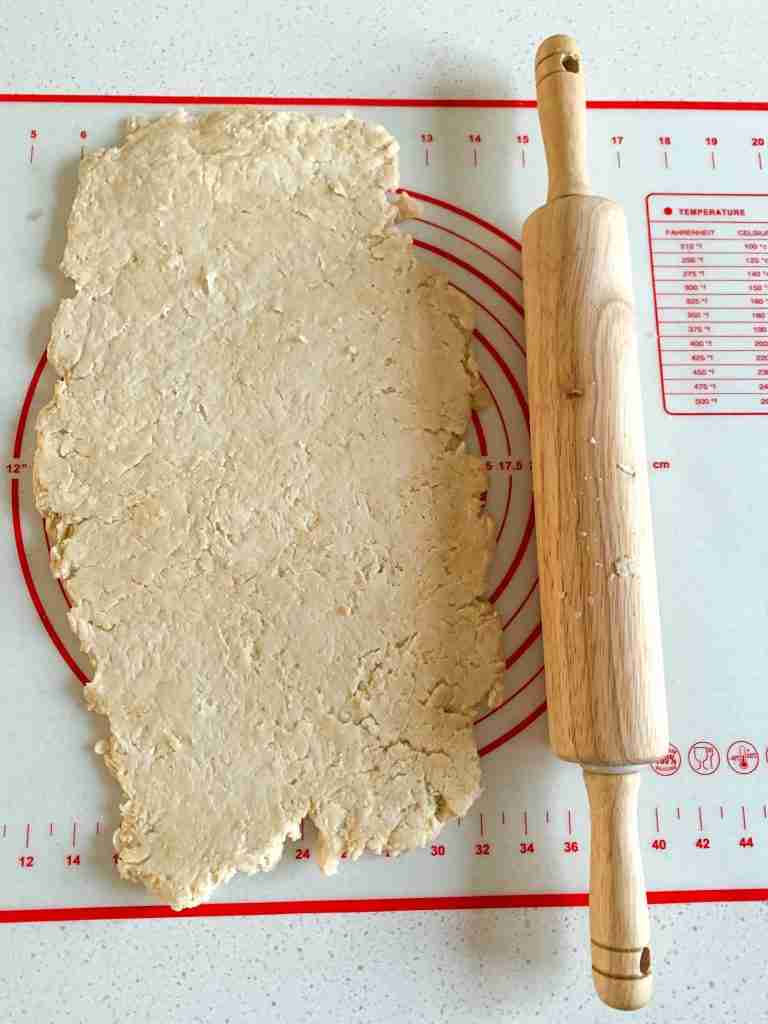
After 3 hours, roll the dough into a 12″ by 6″ rectangle on a floured surface.
To laminate the dough, fold the 12″ sides inward to meet in the middle, then do the same with the 6″ sides to create an envelope shape. Fold it in half again and roll it out into a large rectangle about the same size or larger.
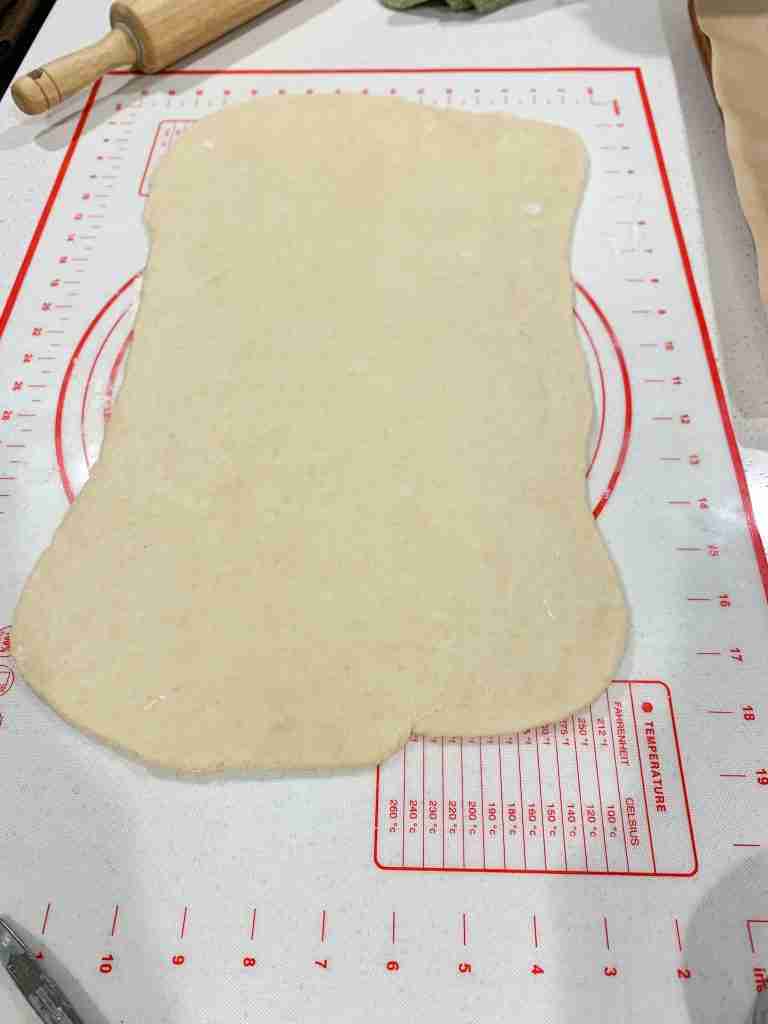
Repeat this process two more times for a total of three rounds.
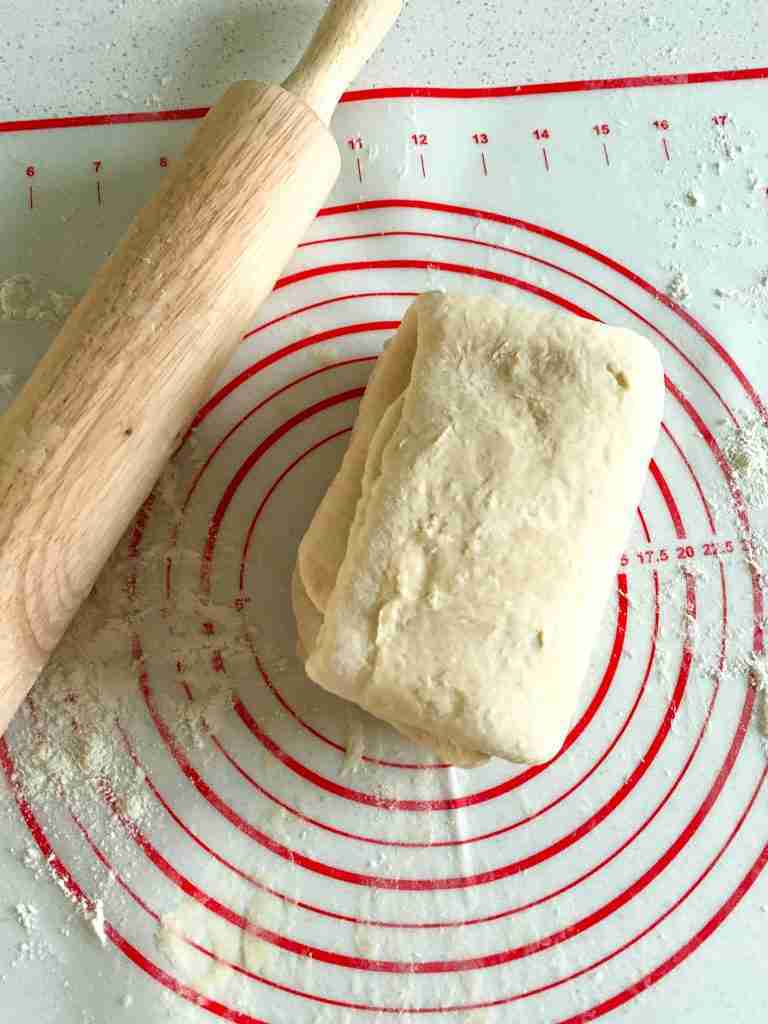
Place the folded dough back into the covered bowl and return it to the fridge for 2 more hours.
Make the cheese filling.
Right before the refrigeration period ends, make the cheese filling by combining softened cream cheese, vanilla, lemon juice, eggs, and cane sugar in a large bowl. Mix with a hand mixer at medium speed until combined and smooth.
Preheat the oven to 375 degrees Fahrenheit and line two baking sheets with parchment paper.
Assemble the Danish pastries.
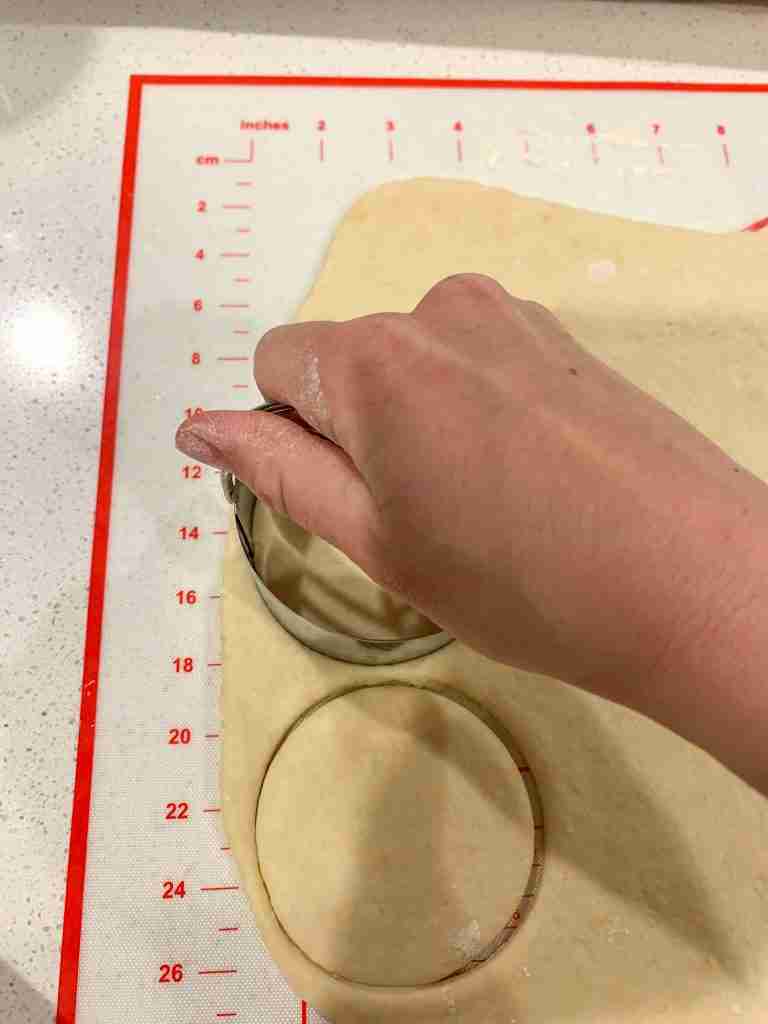
Once the refrigeration is finished, use a large biscuit cutter or round cookie cutter (mine is about 4.25 inches) to cut the dough into 15 large circles.
Place the circles on the baking sheets, about 1 inch apart.
Then, with the rest of the remaining dough, roll it out to 1/4 of an inch thick.
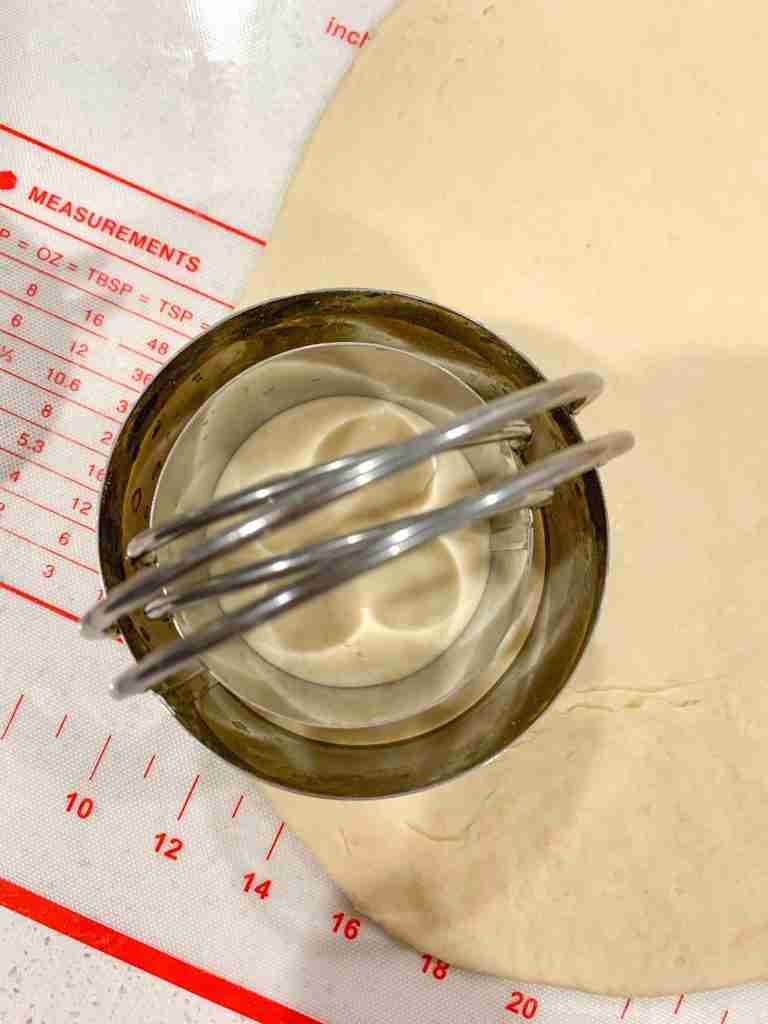
Grab a second cookie cutter or biscuit cutter, 1 inch smaller than the other. You’ll use both cutters at the same time to cut out a circular edge to go on top of your danishes that’ll hold in the cheese filling. Ball up the dough and roll it out again a few times to get 15 outer rings.
After you cut out each ring, immediately place them on the large Danish dough circles on the pan. Lightly place them on; there is no need to press down hard.
Do this until all 15 cut-out dough circles have an edge.
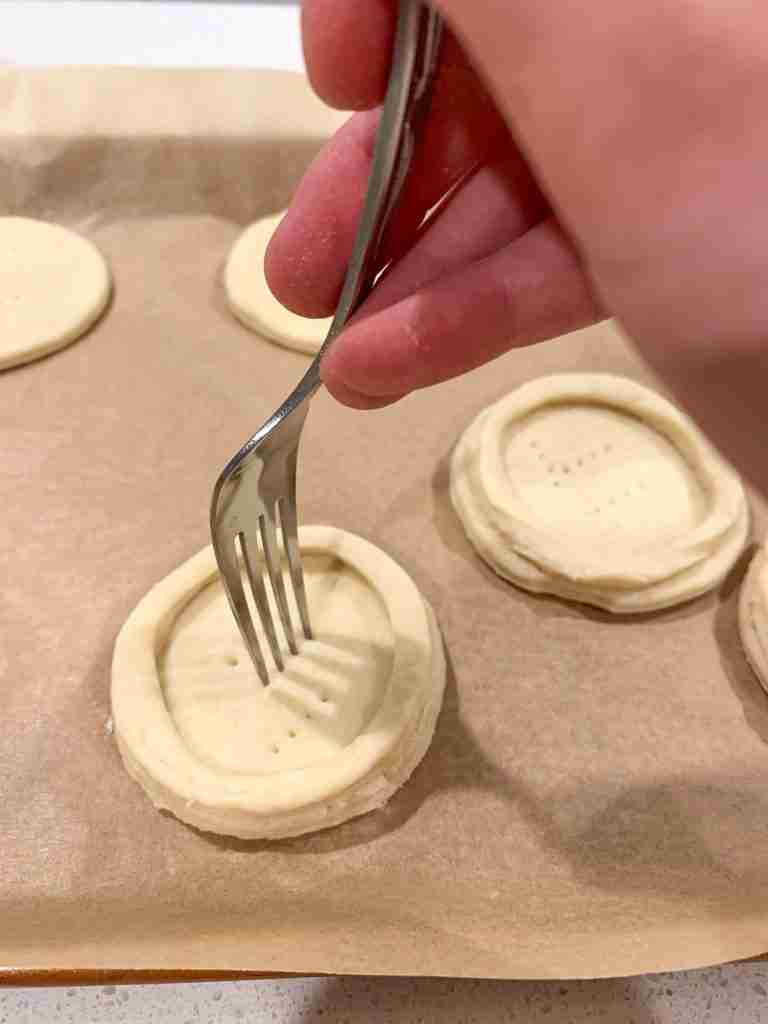
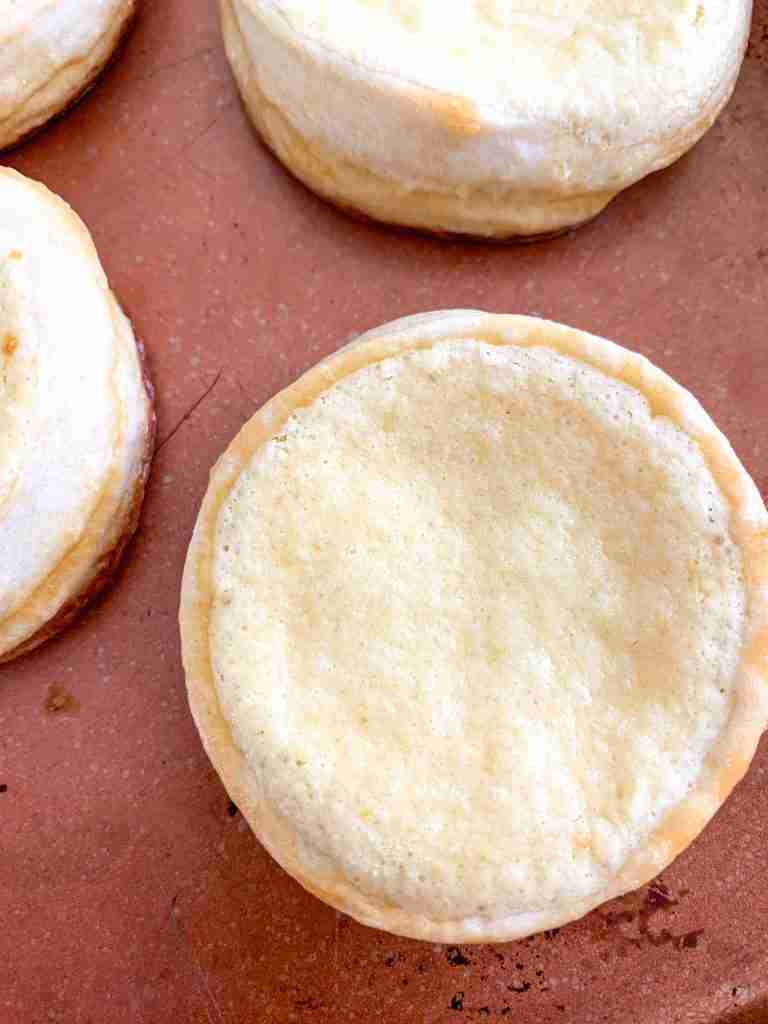
Once you’ve got the edges assembled, use a fork to poke the center of the bottom dough circles three times to prevent them from rising upward and pushing out your filling.
Fill the Danish
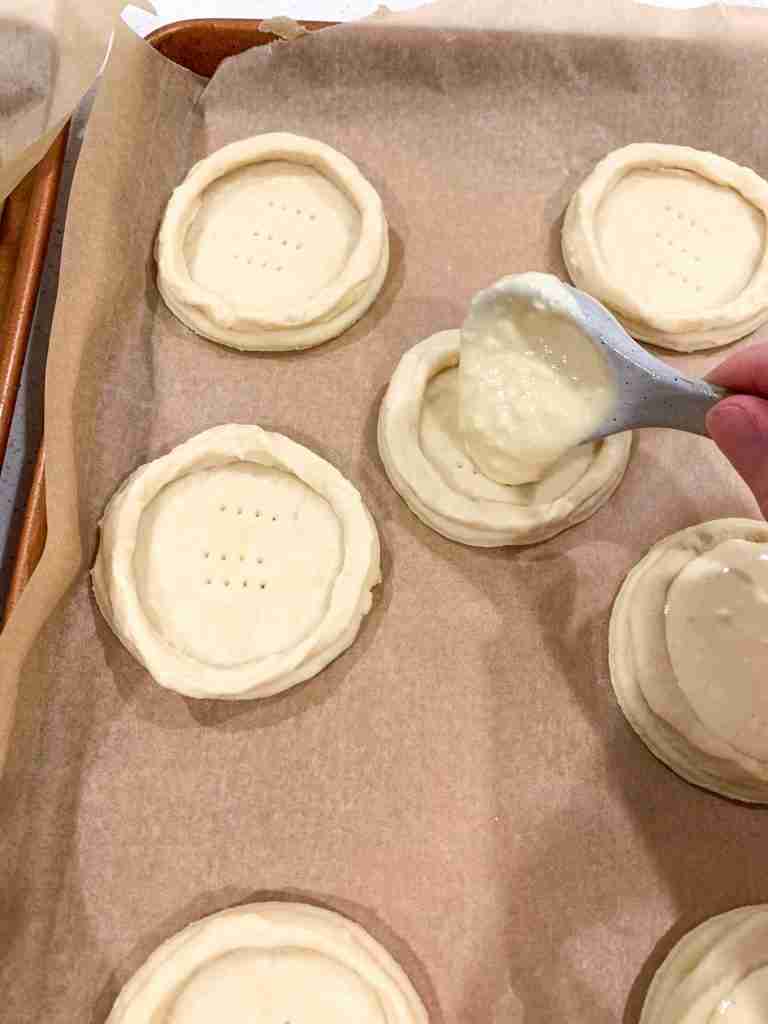
Finally, fill the centers of the dough with cheese filling, 1-2 tablespoons for each one; avoid overfilling. The cheese should come just to the top of the rings.
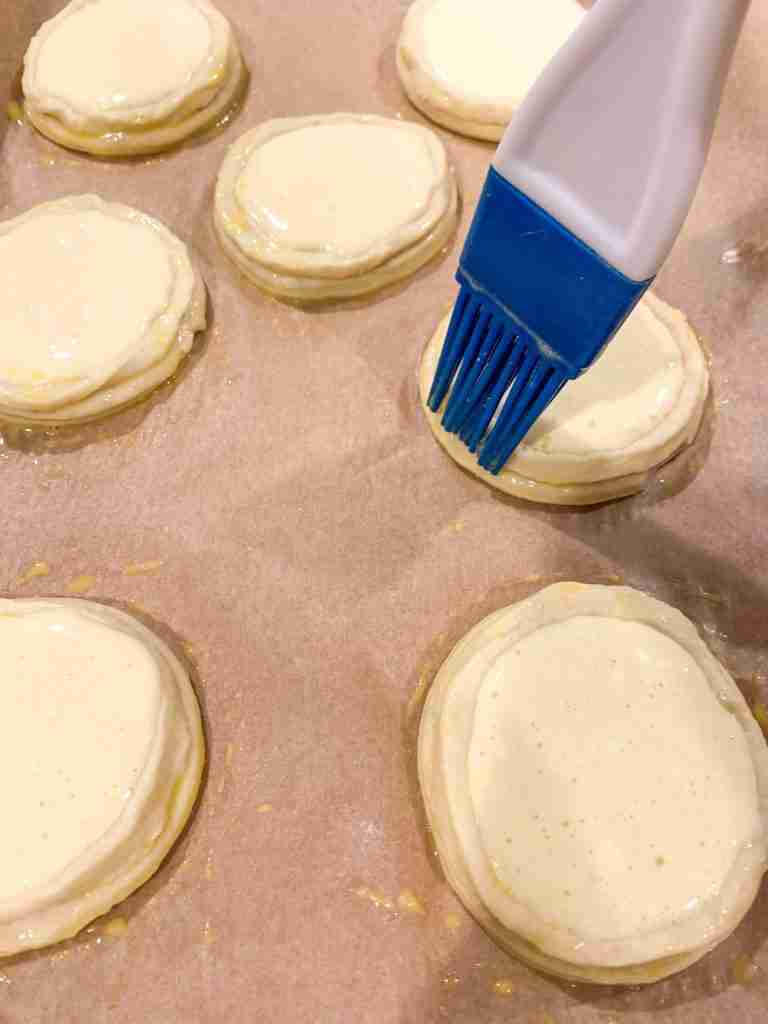
Brush dough edges with egg wash before placing them in the oven. To make this, whisk together 1 egg and 2 tablespoons of water until completely combined.
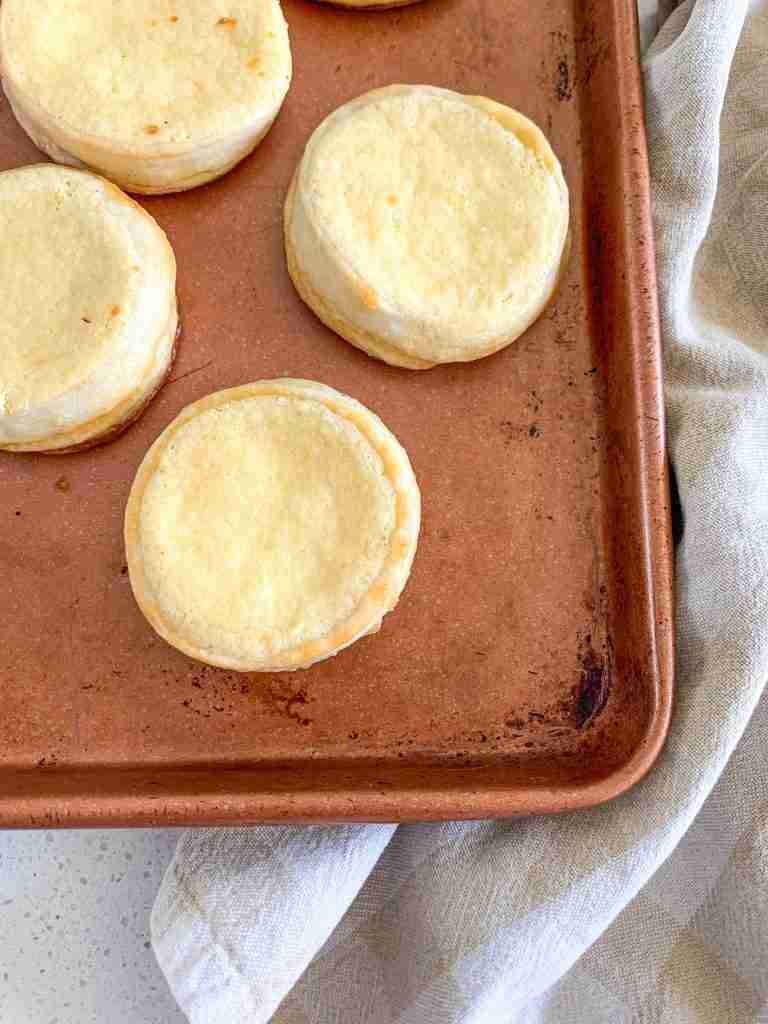
Bake and enjoy!
Lower the preheated oven to 350 and bake for 10 minutes, rotate the pan 180 degrees, and bake another 15-20 minutes until crisp golden brown.
How to Store Cheese Danish
Store these cheese Danish in the fridge in an airtight container after they’ve cooled down completely.
How to Reheat Cheese Danish
The best way to reheat these cheese Danish pastries is to warm them in the oven at 300 degrees Fahrenheit for 5-8 minutes. This helps crisp them up instead of making them soggy.
How to Serve Cheese Danish
You can serve cheese Danish in so many ways. Have them for breakfast by themselves, alongside a cup of coffee, or with a side of bacon. If you’re hosting family, friends, or a brunch party, set a batch of these Danish out for a sweet treat. They’re also a great snack whenever you get a sweet tooth!
Recipe FAQ
What is the filling in a cheese Danish made of?
My cheese Danish filling is made of cream cheese, vanilla extract, lemon juice, an egg, and cane sugar.
Why doesn’t this recipe use a traditional Danish pastry dough?
I wanted to make this an easy and simple Danish recipe that all skill levels of bakers could make. So instead of the traditional laminating step with the butter slab, I use the butter incorporated into the dough to make the layers.
Why doesn’t this recipe use an egg for the dough?
My recipe doesn’t include an egg, by preference. The traditional Danish dough does include an egg to enrich the dough, but for this easy recipe, it does not.
More Breakfast Recipes From Scratch To Try
- Sourdough Cream Cheese Apple Danish Recipe From Scratch
- Sourdough Cinnamon Rolls Recipe (with cream cheese frosting)
- Sourdough Raspberry Muffins with Chocolate Chips
- Best Sourdough French Toast From Scratch
- Easy Sourdough Banana Bread From Scratch
Full Printable Recipe
I love hearing how much you love my recipes, be sure to leave a review below and tag me on Instagram @plumbranchhome to share your photos!

Easy Sourdough Cheese Danish From Scratch
Ingredients
Sourdough Danish Dough
- 2 cups all-purpose flour
- 1/4 cup cane sugar
- 1/2 tsp salt
- 8 Tbsp (1/2 cup) cold butter
- 3/4 cup milk (dairy or dairy-free)
- 1/2 cup sourdough starter (fed or discard)
Cream Cheese Filling
- 8 oz. block of cream cheese (room temp/softened)
- 1 tsp pure vanilla extract
- 1 tsp lemon juice
- 1 egg
- 1/4 cup cane sugar
Egg Wash
- 1 egg
- 2 Tbsp water
Instructions
Make the dough.
- In a large bowl, combine flour, salt, and sugar.
- Grate the butter into the dry ingredients, or cut it in with a fork until the mixture is crumbly and the butter pieces are pea-sized.
- Add milk and sourdough starter, then mix with a spoon until a dough forms.
- Cover the dough and place it in the refrigerator for 3 hours.
Create the layers (laminate).
- After 3 hours, roll the dough into a 12″ by 6″ rectangle on a floured surface.
- To laminate the dough, fold the 12″ sides inward to meet in the middle, then do the same with the 6″ sides to create an envelope shape. Fold it in half again and roll it out into a large rectangle about the same size or larger.
- Repeat this process two more times for a total of three rounds.
- Place the folded dough back into the covered bowl and return it to the fridge for 2 more hours.
Make the cheese filling.
- Right before the refrigeration period ends, make the cheese filling by combining softened cream cheese, vanilla, lemon juice, eggs, and cane sugar in a large bowl. Mix with a hand mixer at medium speed until combined and smooth.
- Preheat the oven to 375 degrees Fahrenheit and line two baking sheets with parchment paper.
Assemble the Danish pastries.
- Once the refrigeration is finished, use a large biscuit cutter or round cookie cutter (mine is about 4.25 inches) to cut the dough into 15 large circles.
- Place the circles on the baking sheets, about 1 inch apart.
- Then, with the rest of the remaining dough, roll it out to 1/4 of an inch thick.
- Grab a second cookie cutter or biscuit cutter, 1 inch smaller than the other. You’ll use both cutters at the same time to cut out a circular edge to go on top of your danishes that’ll hold in the cheese filling. Ball up the dough and roll it out again a few times to get 15 outer rings.
- After you cut out each ring, immediately place them on the large Danish dough circles on the pan. Lightly place them on; there is no need to press down hard.
- Do this until all 15 cut-out dough circles have an edge.
- Once you’ve got the edges assembled, use a fork to poke the center of the bottom dough circles three times to prevent them from rising upward and pushing out your filling.
Fill the Danish
- Finally, fill the centers of the dough with cheese filling, 1-2 tablespoons for each one; avoid overfilling. The cheese should come just to the top of the rings.
- Brush dough edges with egg wash before placing them in the oven. To make this, whisk together 1 egg and 2 tablespoons of water until completely combined.
Bake and enjoy!
- Lower the preheated oven to 350 and bake for 10 minutes, rotate the pan 180 degrees, and bake another 15-20 minutes until crisp golden brown.
Notes
How to Store Cheese Danish
Store these cheese Danish in the fridge in an airtight container after they’ve cooled down completely.How to Reheat Cheese Danish
The best way to reheat these cheese Danish pastries is to warm them in the oven at 300 degrees Fahrenheit for 5-8 minutes. This helps crisp them up instead of making them soggy.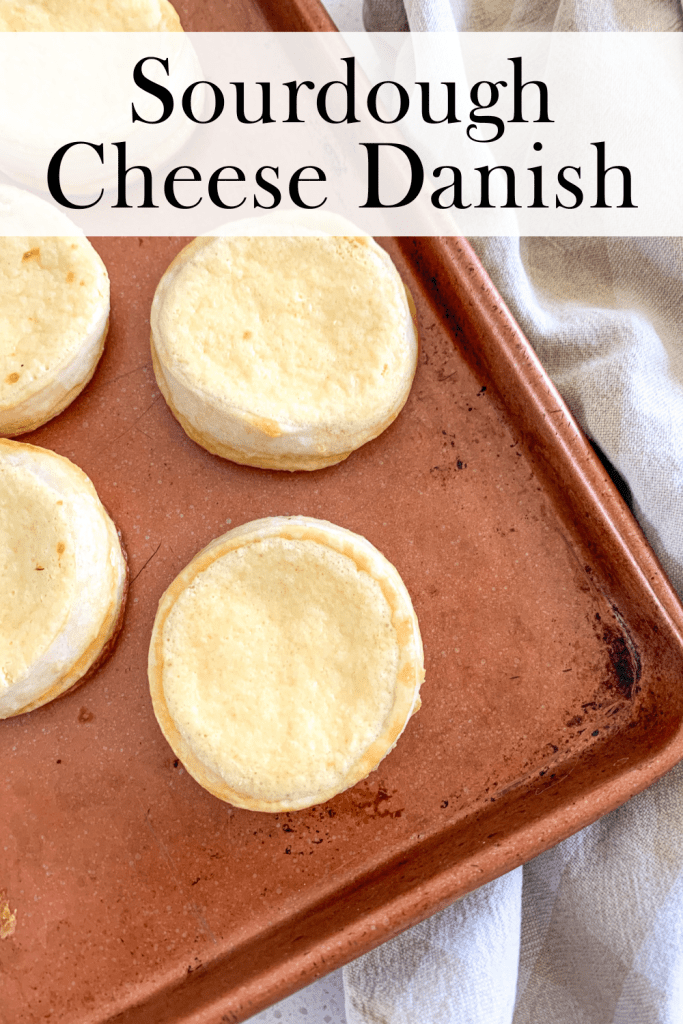
These are so tasty but the dough is way too wet/sticky to work with. What am I doing wrong?
It sounds like your starter is more hydrated than mine. That’s a common issue with sourdough baking. Next time you make them just add less milk to the dough. Let me know if you have any more questions!
Hello, these look delicious, I can’t wait to try them. Have you tried adding fruit as well?
Hello! Thank you so much! I have not for this specific recipe but I do have an apple cream cheese danish here on the blog: https://plumbranchhome.com/sourdough-cream-cheese-apple-danish-simple-recipe/