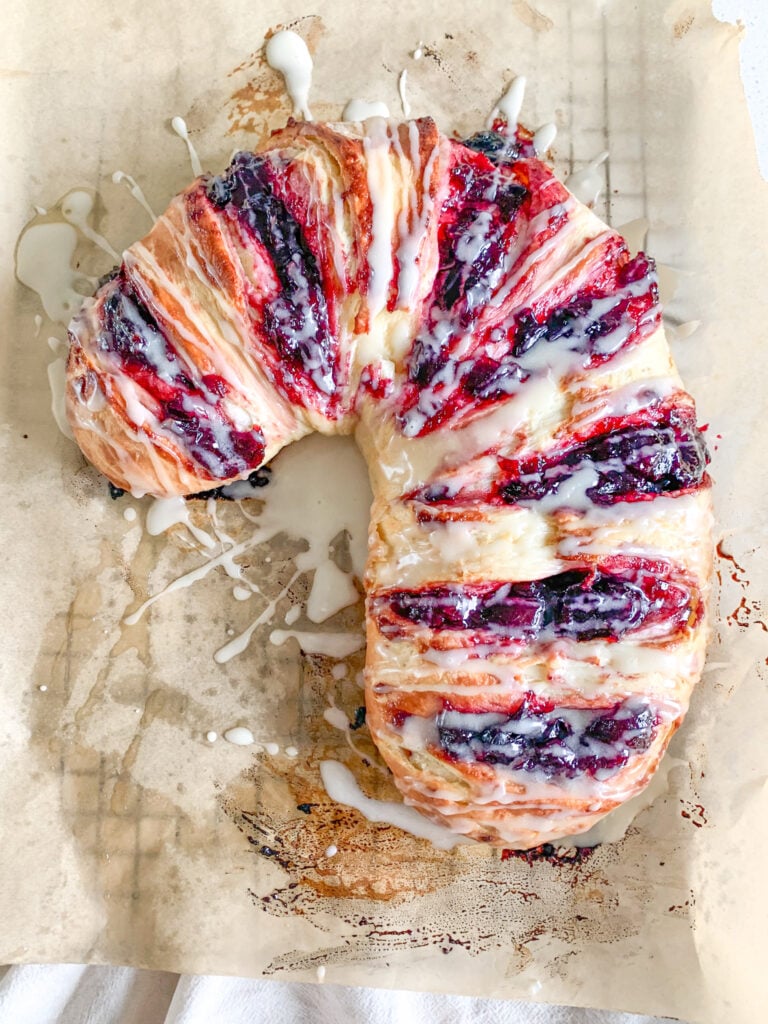
Sourdough Candy Cane Danish (Cherry-Filled)
My cherry-filled sourdough candy cane danish is the perfect breakfast for Christmas morning or St. Nicholas’s Feast Day! It’s got the best flaky yet fluffy dough and the perfect honey-sweetened filling. I couldn’t think of a better way to kick off the holidays than a pastry shaped like a candy cane! I hope my recipe finds a special place in your kitchen this holiday season, like it has in ours! This recipe includes a video tutorial so you can make it alongside me, step-by-step!
This post may contain affiliate links of items I know and love. Read our disclosure policy for more information. I NEVER use AI (artificial intelligence) to create content for Plum Branch Home. Recipes, blog posts, photos, videos, podcasts, social media content: everything is made from scratch by me, Molly LaFontaine. After developing my recipes, they’re tested 2x by my husband, Tyler, and I before publishing. What you see from Plum Branch Home is real. It’s made for a reason, tested, and loved!
If you want to make this recipe but don’t have a sourdough starter, no worries! Grab my free guide so you can make your own starter at home.
If you’re new to sourdough baking and feel hesitant, or you have questions, I’ve got something for you! I broke down the basics of what you need to know about sourdough baking in my free sourdough baking guide for beginners. I highly recommend grabbing a copy!

Inspiration Behind My Sourdough Candy Cane Danish Recipe
This was a really fun recipe to develop! I got the inspiration from Saint Nicholas’s Feast Day coming up on December 6th. It’s a day to honor and remember St. Nicholas, the Christian known for his secret acts of generosity.
Saint Nicholas is associated with the candy cane shape because it’s like a bishop’s staff. It symbolized him as the “Good Shepherd” caring for his flock. AKA the people in need around him.
So, I was trying to figure out a fun new recipe I could create not only to celebrate his Feast Day on the Christian calendar but also for Christmas morning. That’s when I came up with a candy cane shaped sourdough danish.
I had seen people in the past shape breakfast and dessert items into candy canes, but I wanted to do it with homemade sourdough Danish pastry dough and fill it with cherries.
It’s a fun recipe that tastes even better than it looks. I can’t wait for you to give it a try!
What is a Candy Cane Danish?
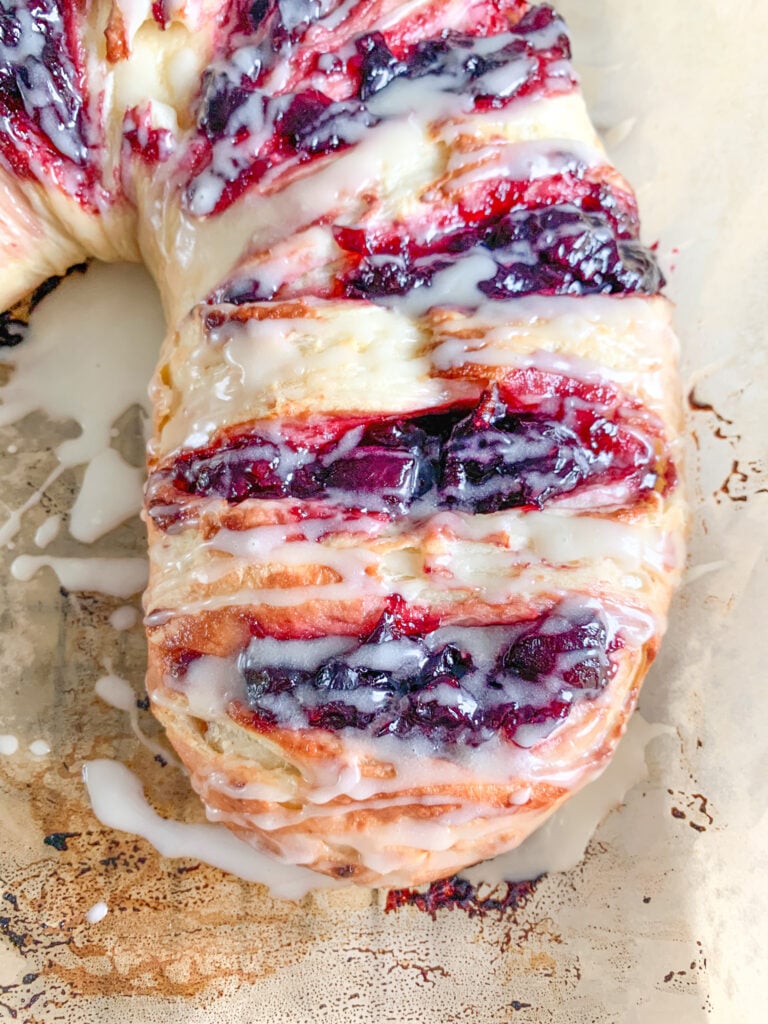
A candy cane danish is a Danish pastry filled with a red fruit filling and shaped like a candy cane. It’s got all the same Danish elements except it’s shaped in a fun way!
Why We Love This Recipe and Think You Will Too!
- Honey-sweetened cherry filling: The filling is perfectly sweetened with honey so it won’t be too sweet.
- Made from scratch: Every part of this treat is made from scratch, no pre-made items here.
- Wholesome Ingredients: Each ingredient is wholesome, with no additives or junky ingredients.
- Simple steps: There are a good number of steps, but each one is simple and easy to follow.
- A delicious Christmas morning breakfast: It’s wonderful on Christmas morning to start the day with a special breakfast.
- Perfect for celebrating Saint Nicholas Feast Day: Because Saint Nicholas is symbolized by a candy cane, this is the perfect Feast Day treat!
My Tips for Making Sourdough Candy Cane Danish
- Make sure you’re using a fed and active starter so the dough is light and fluffy.
- Read the full recipe before getting started so you know what to expect ahead of time.
- Don’t skip the lamination steps; this makes a Danish a Danish.
- Make sure the cherry filling becomes thick before you take it off the heat. This ensures it’s not a huge mess when shaping the dough.
- Let the cherry filling cool before adding it to the dough. This helps prevent more of a mess.
- Don’t overfill the Danish before rolling; it can get a little messy if you do (I’ve done this multiple times, haha!)
- Don’t skip or shorten the proofing time; this ensures the pastry isn’t too dense.
- A good sign to tell if the Danish is baked is when the top is golden brown.
How to Prepare Your Sourdough Starter for This Recipe
I’m starting to add this section to my sourdough recipes to help anyone who’s having trouble baking with their starter. Most of the time it’s not you; it’s the starter’s strength!
Follow my simple instructions to get your starter ready to make this recipe or read my starter troubleshooting post.
- BEFORE YOU GET STARTED if your starter is not active and bubble: Feed your starter 4-12 hours before starting this recipe. I recommend feeding it a 2:1 ratio of unbleached flour to filtered water to get the same results as I do when you make this recipe.
- Example: Feed your ENTIRE sourdough starter jar 1 cup flour + 1/2 cup water and let the starter sit on the counter at room temperature until it’s bubbly and has grown in the jar. Your starter needs to be active, bubbly, and a thicker consistency to begin this recipe.
Ingredients You’ll Need (with notes and substitutions)
Note: Please see the recipe card at the bottom of this blog post for measurements

Danish Dough
- all-purpose flour: I like to use unbleached, organic but you can use any all-purpose
- sea salt: you could also use regular salt if desired
- cold salted stick butter: it needs to be cold, margarine or room temperature doesn’t work well
- milk: I like to use whole milk but you can use any
- raw honey: you can also use pure cane sugar or pure maple syrup if desired
- fed sourdough starter: make sure it’s active and bubbly before making this recipe
- egg yolk: we don’t need the egg white, just the yolk to enrich the dough
- Butter Lamination Layer: cold salted stick butter

Cherry Filing
- frozen cherries: make sure they’re pitted and unsweetened but you can also use fresh, if desired
- pure vanilla extract: highly recommend using pure, not imitation
- raw honey: you could also use pure cane sugar if desired but the honey makes it extra good
- lemon juice: you can use fresh or concentrated, just as long as it’s pure and nothing added
- Cornstarch slurry: cornstarch and water mixed together, you can also use flour if desired

Glaze
- powdered cane sugar: I like to use Florida Crystals from Walmart for a more wholesome option
- milk: I like to use whole milk but you can use any
Helpful Kitchen Tools for this Recipe
This section contains Amazon affiliate links to items I use and love for this recipe.
How to Make Sourdough Candy Cane Danish
Note: Please see the recipe card at the bottom of this blog post for the full written recipe.
Feed Your Starter
BEFORE YOU GET STARTED: Feed your entire sourdough starter jar4-12 hours before starting this recipe. I recommend feeding your entire starter a 2:1 ratio of unbleached flour to filtered water to get the same results as I do when making this recipe. (Example: Feed entire starter 1 cup flour + 1/2 cup water and let it sit on the counter at room temperature until it’s bubbly and has grown in the jar. Your starter needs to be active, bubbly, and a thicker consistency to use in this recipe.)
Make Dough
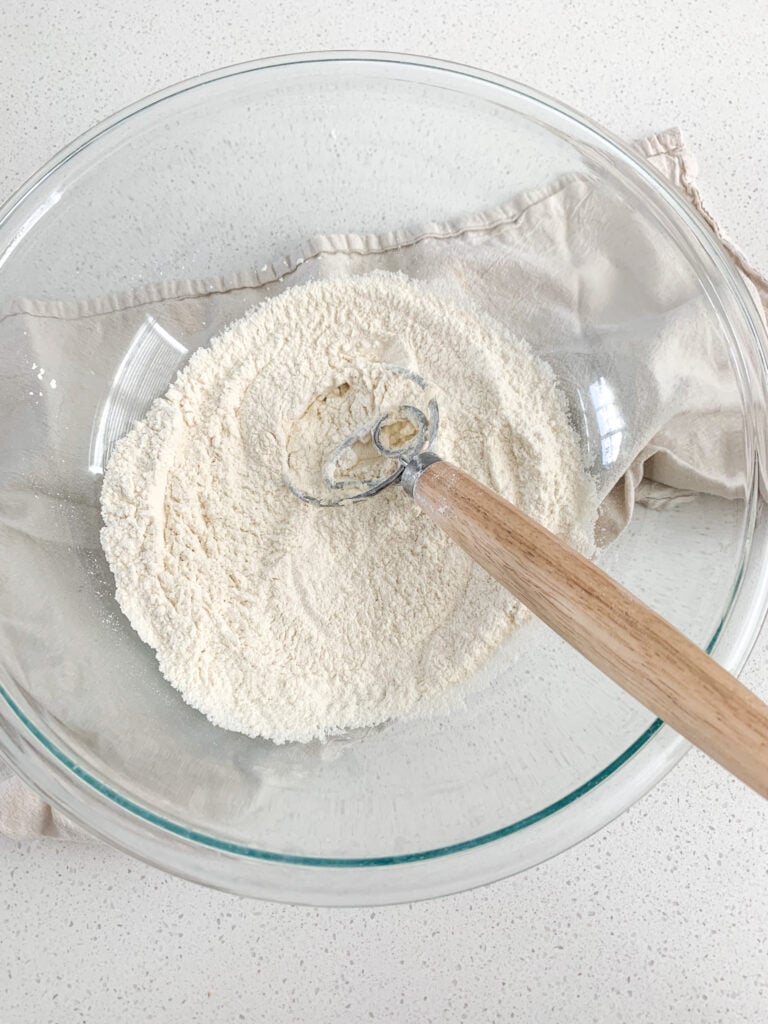
Add ONLY 1 1/2 cups of flour and 1 tsp salt to a large bowl and stir to combine.
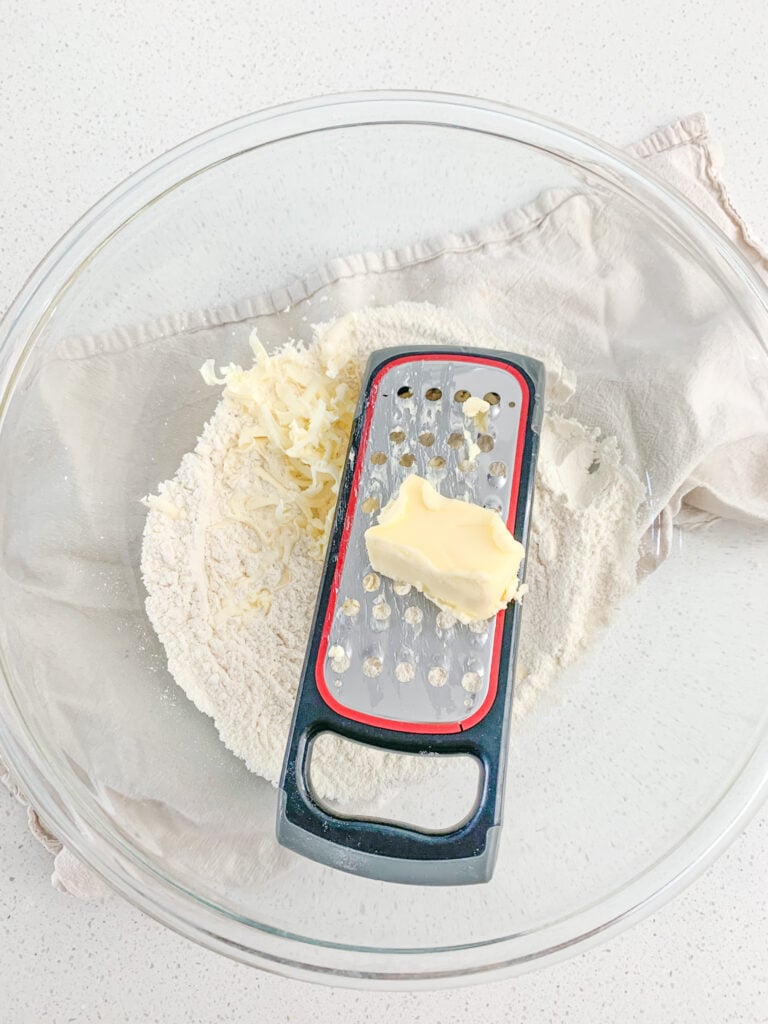
Grate butter into the dry mixture or use a fork to cut butter into flour until pea-sized. Stir to evenly distribute butter pieces.
Add in milk, honey, and fed sourdough starter. Stir to combine then use your hands to finish combining into a dough ball. (If dough is too wet, your starter is more hydrated than mine. Just add a few tablespoons of extra flour. If dough is too dry, your starter is less hydrated than mine. Just add a few tablespoons of extra water.)
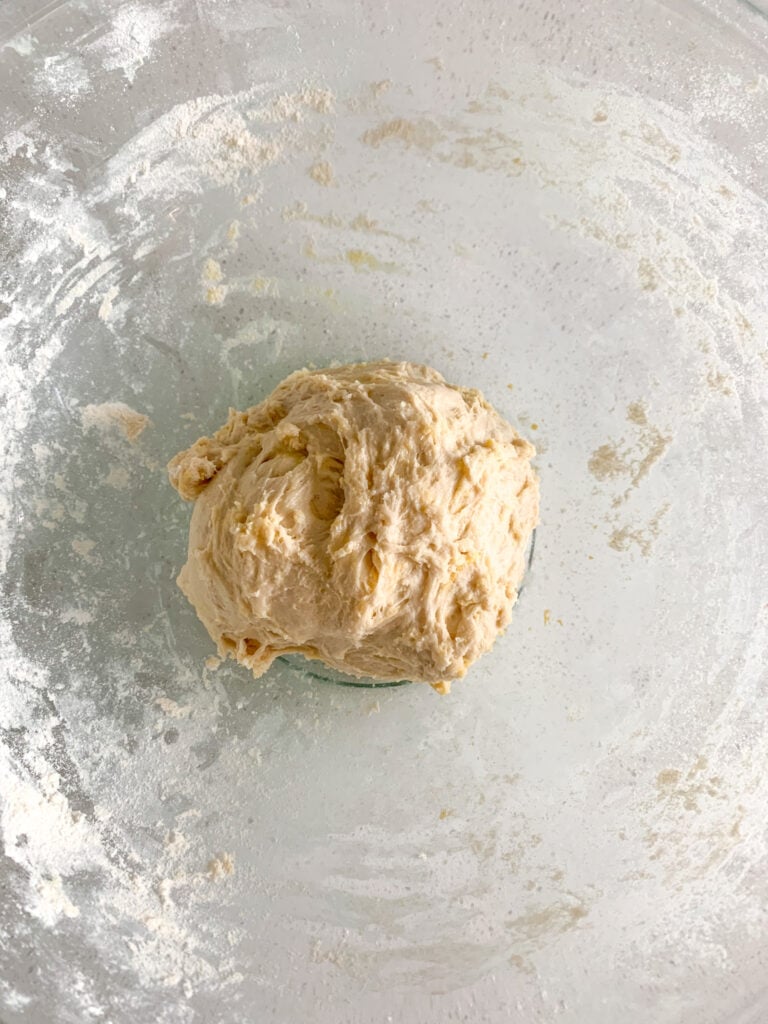
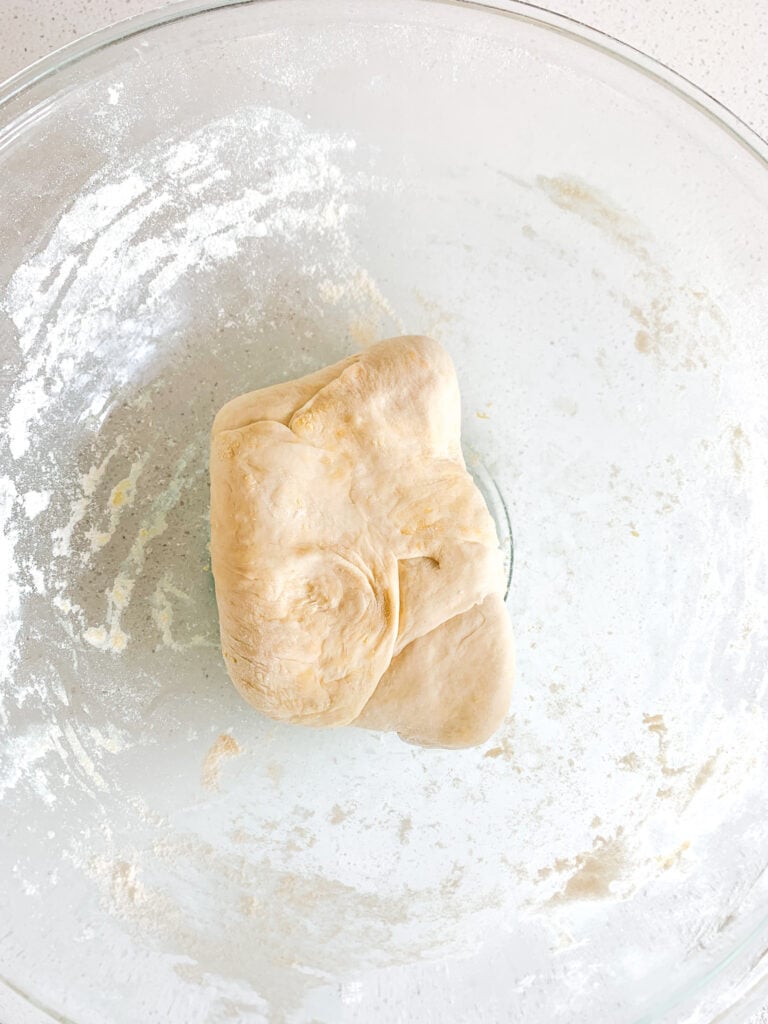
Keep dough in bowl and knead for 2 minutes or use an electric mixer with a dough hook. (It’ll become a little sticky so we’re keeping it in the bowl to knead).
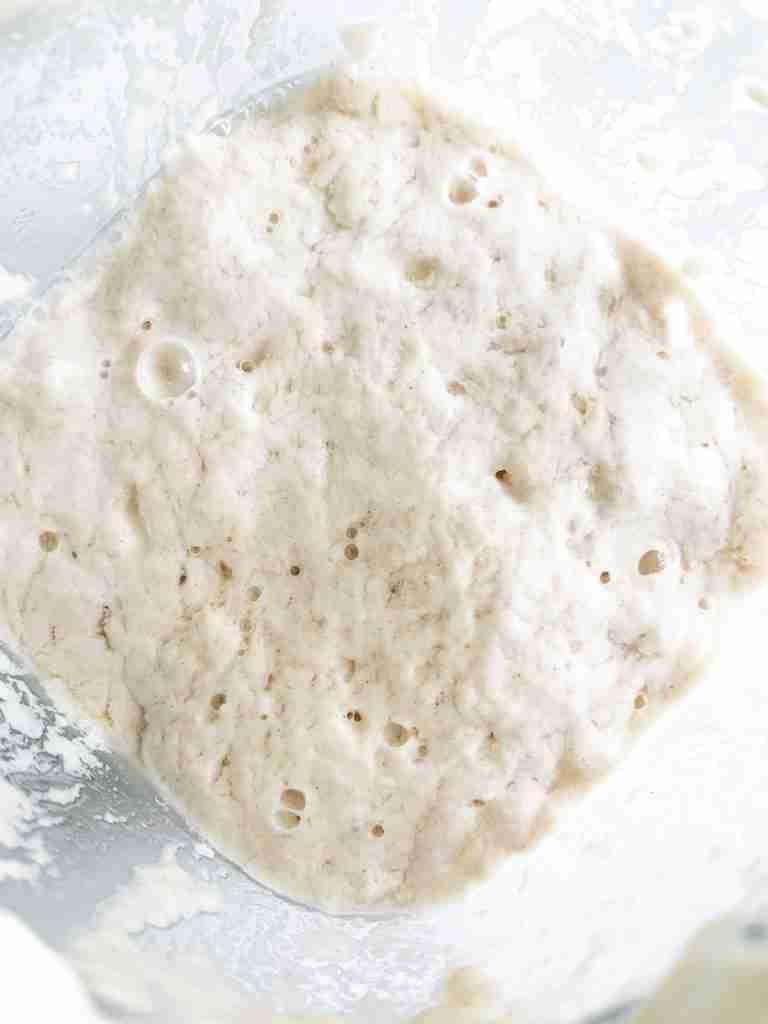
Place dough back in its bowl and cover it with a damp towel or lid, loosely. Let it bulk ferment on the counter at room temperature for 12 hours or until it doubles or triples in size. Please see notes for troubleshooting.
Add Egg
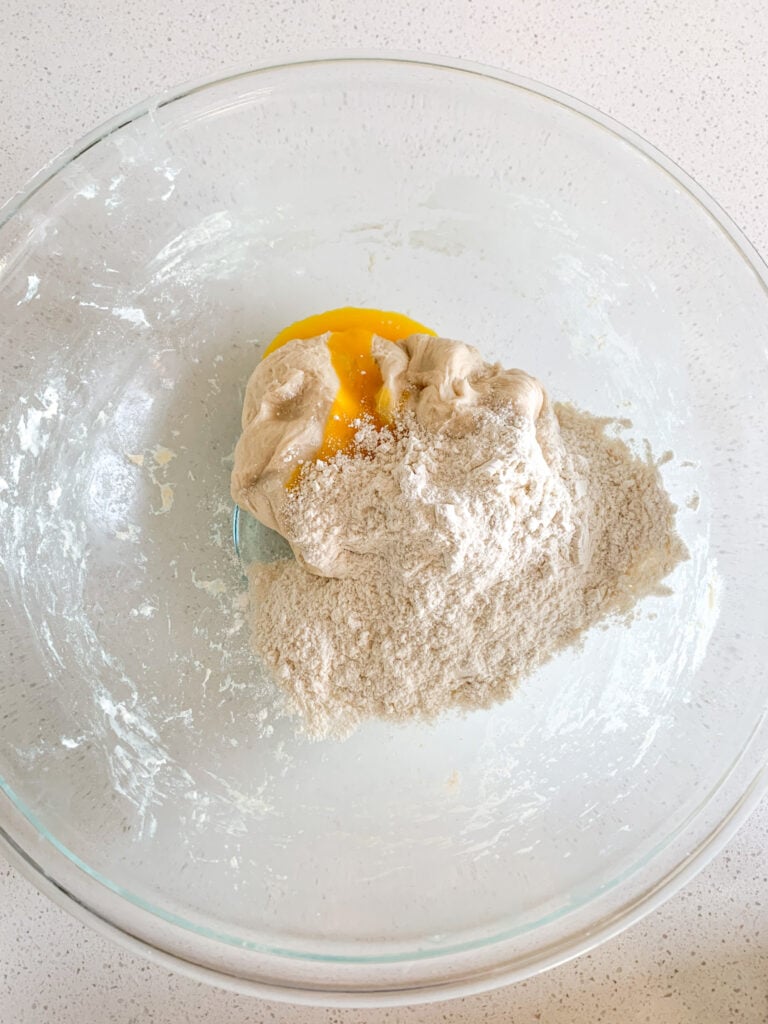
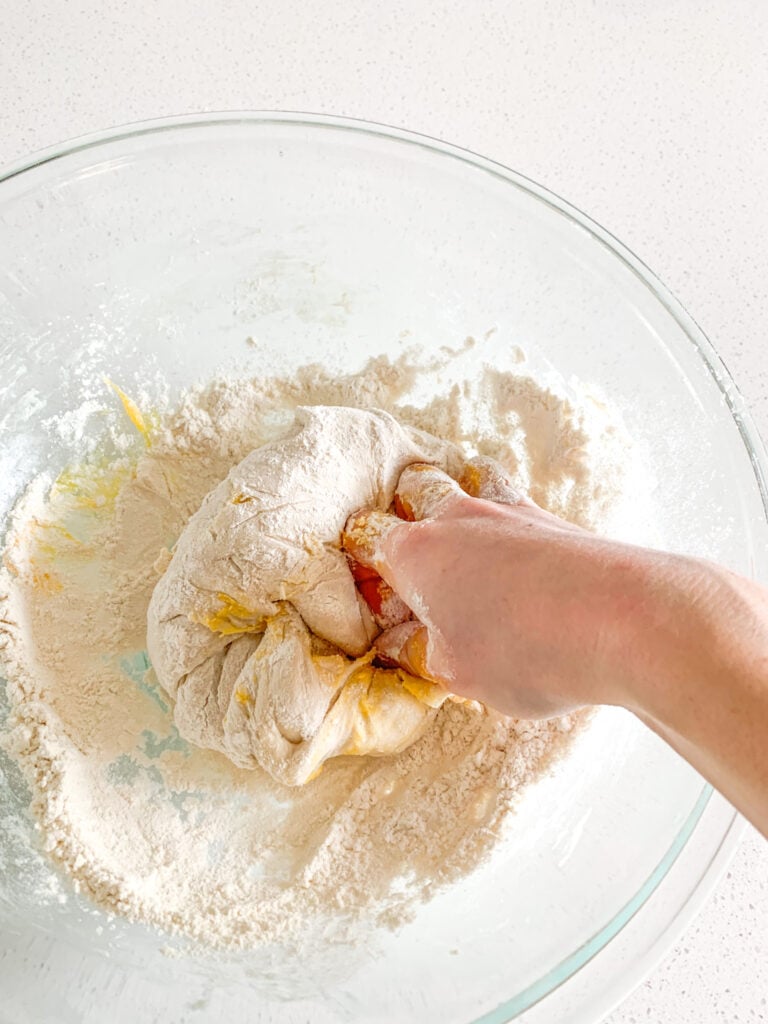
When dough has doubled in size, add egg yolk and 1/2 cup flour into dough. Knead it until well combined. (We do this after the bulk ferment for food safety)
Chill Dough
Place dough in fridge for 1 hour (or up to 24 hours, if you want more time). Do not skip this step!
Make Filling

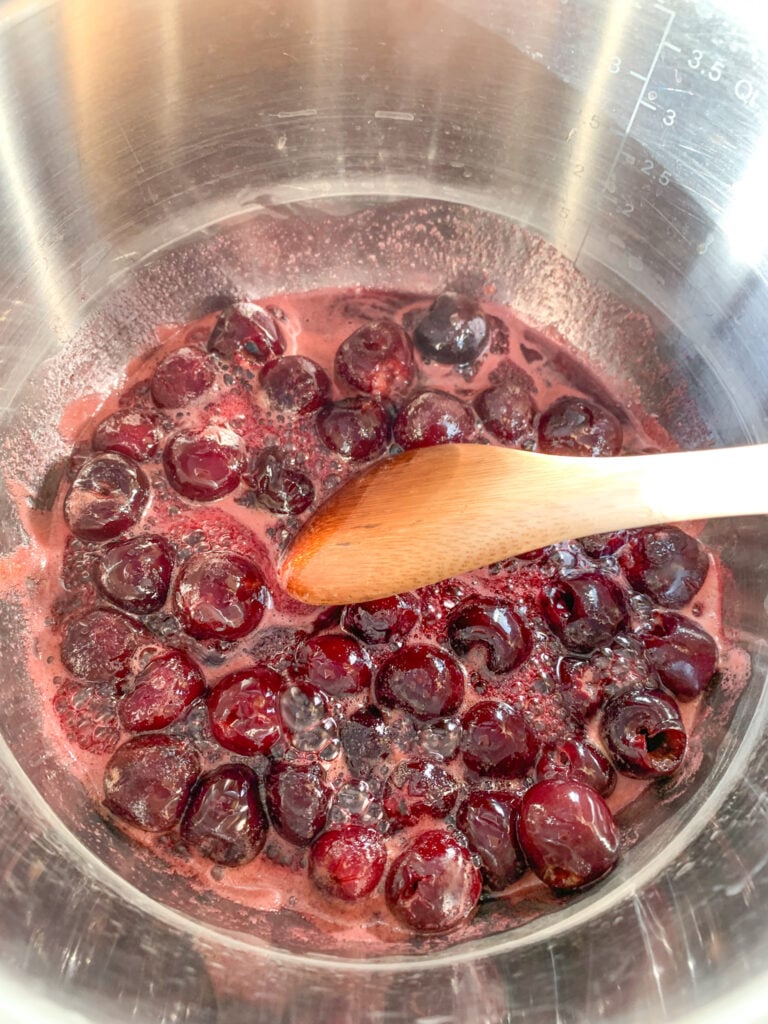
While dough chills, add cherries, vanilla, honey, and lemon juice to a medium-sized saucepan and heat on medium heat for 10 -15 minutes stirring occasionally. This filling mixture should start to bubble and come together as a sauce.
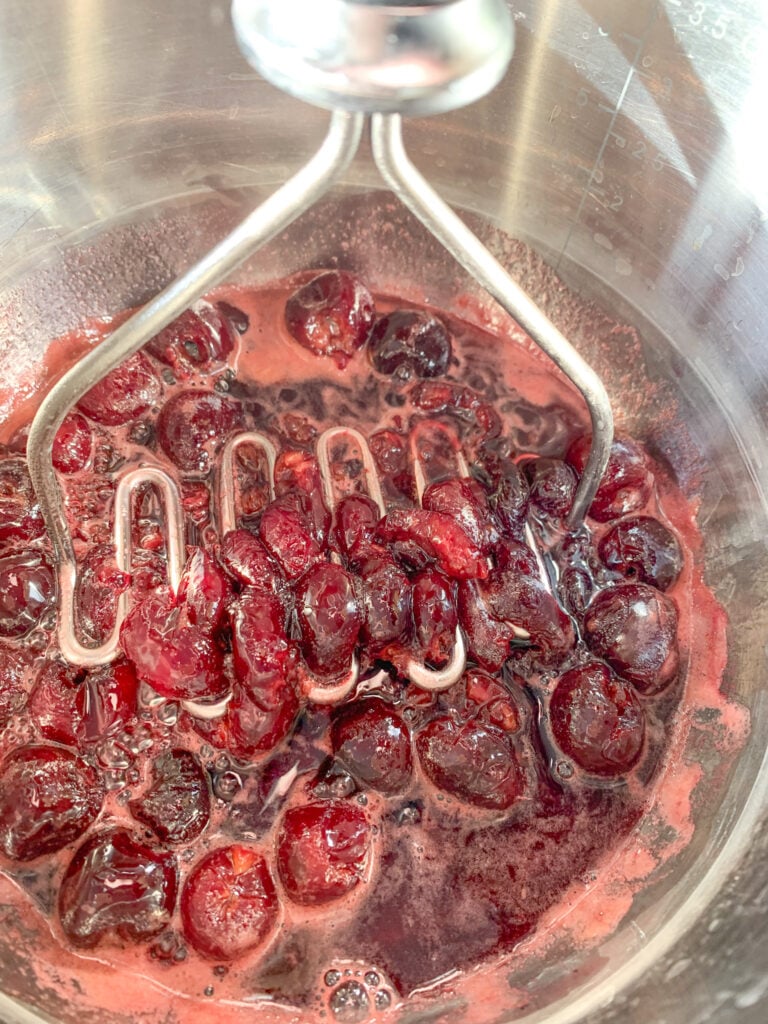
After the filling cooks, use a masher or the back of a spoon to break down the cherries into smaller pieces.
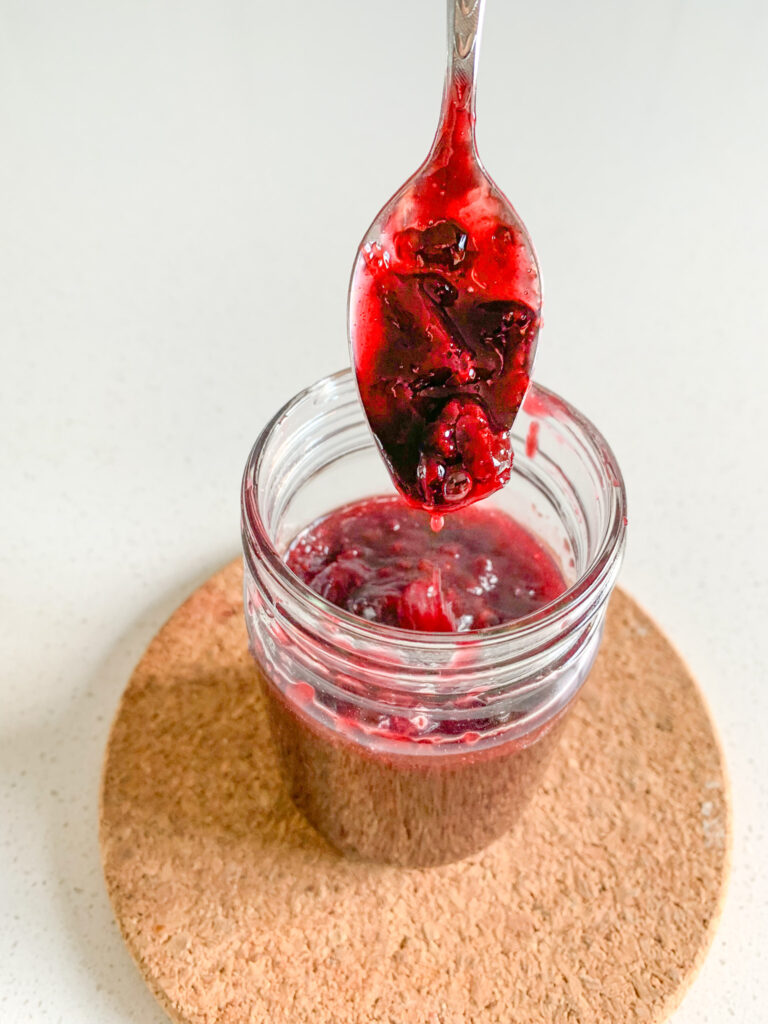
In a small bowl, whisk cornstarch and water until combined and no lumps. Add to filling, stirring frequently until thickened over medium heat (about 2-4 minutes), remove from heat and let cool while dough finishes chilling.
Laminate Dough

When dough finishes chilling, dust your workspace lightly with flour. Then turn it out on the countertop and roll it into a rectangle, 1/2 inch thick.
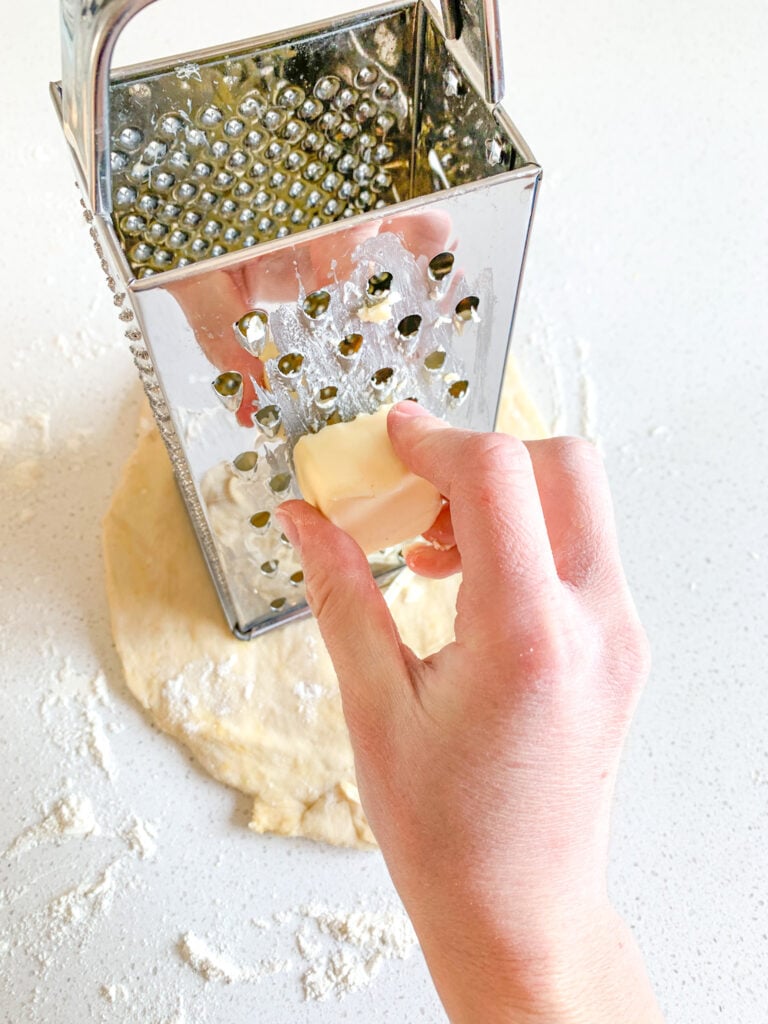
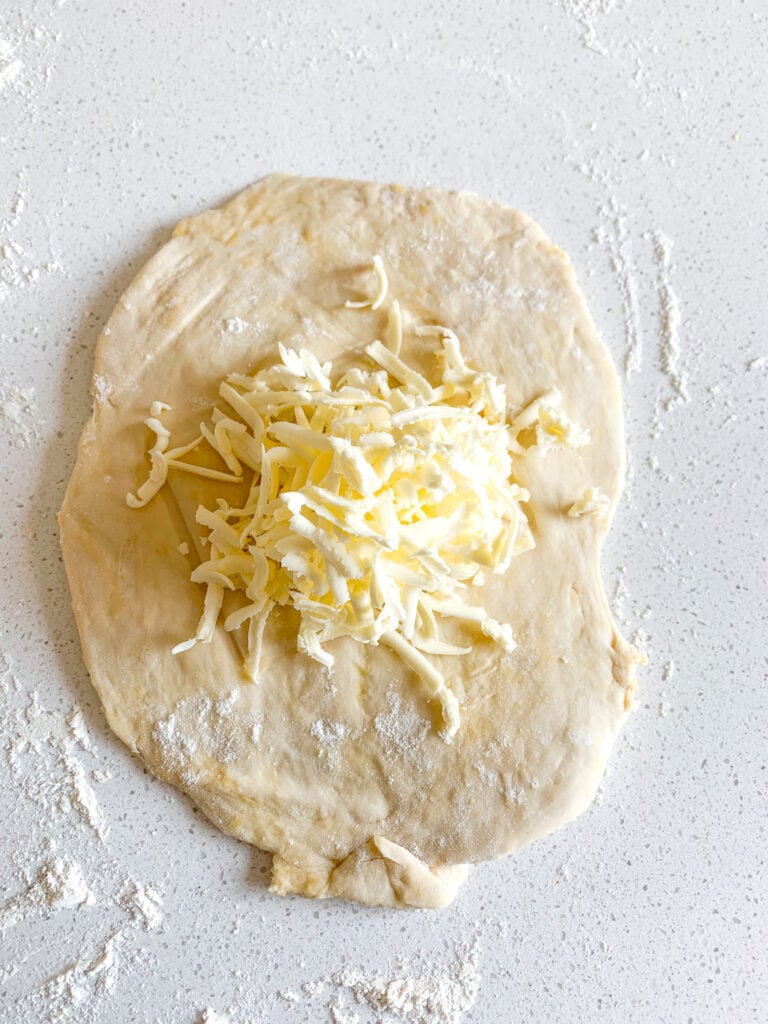
Grate cold butter (lamination layer ingredient) into a pile on top of the rectangle with a large holed cheese grater (or cut it into tiny pieces with a knife).
Spread small pieces of butter into a small rectangle in the middle of dough.
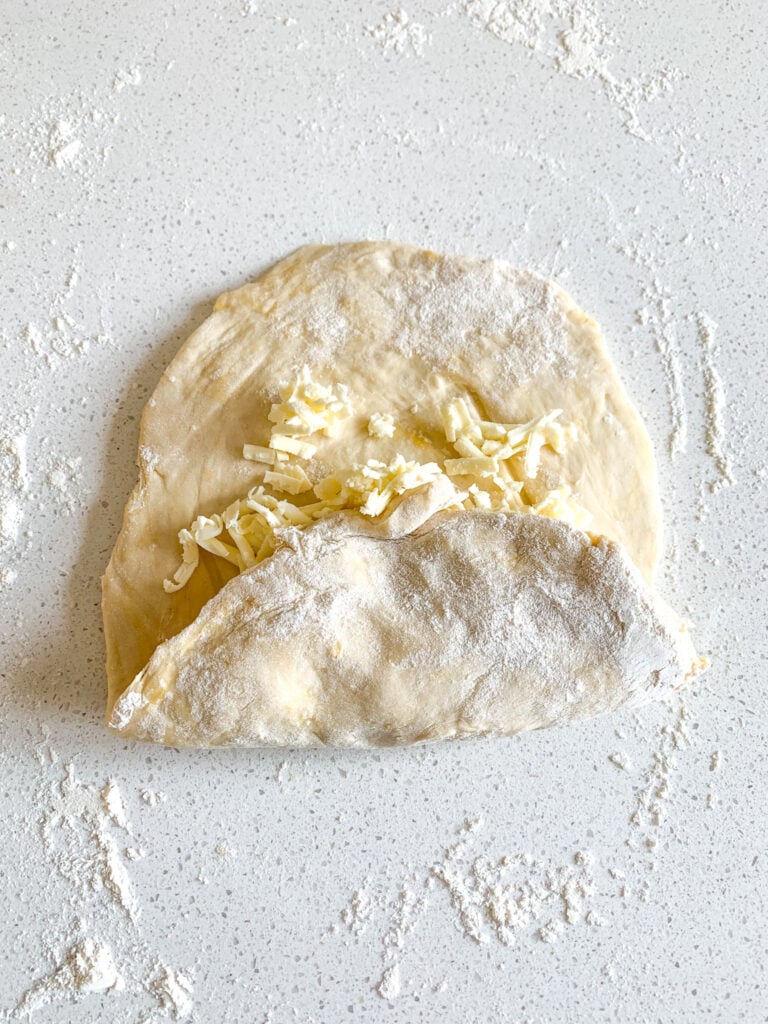
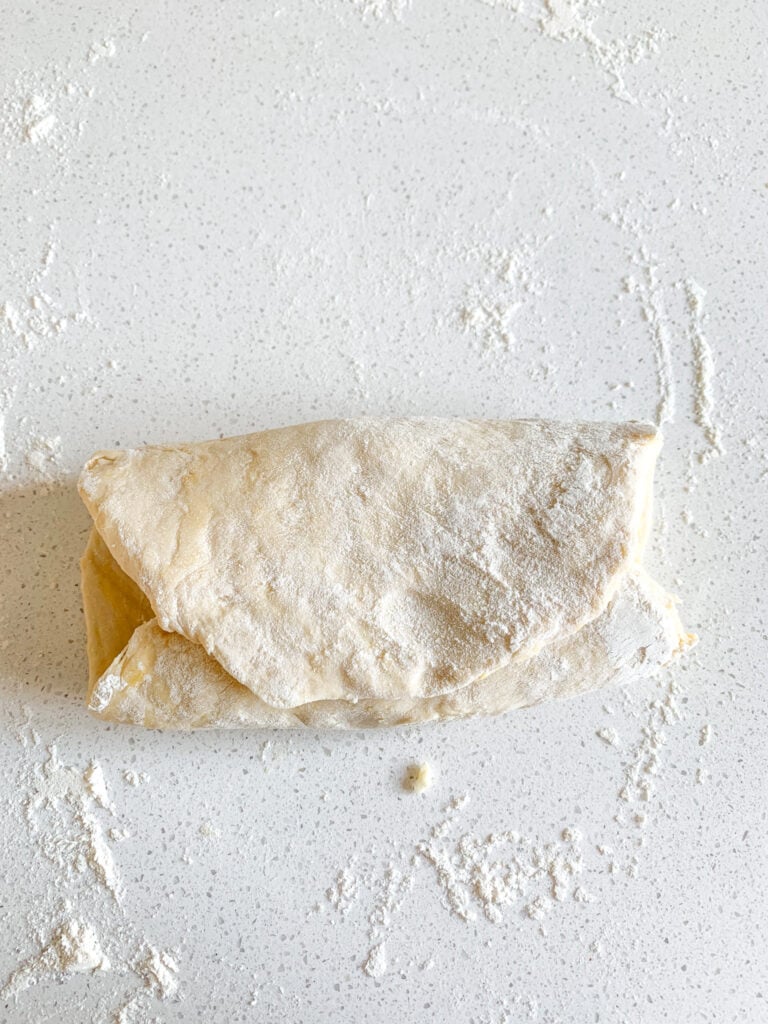
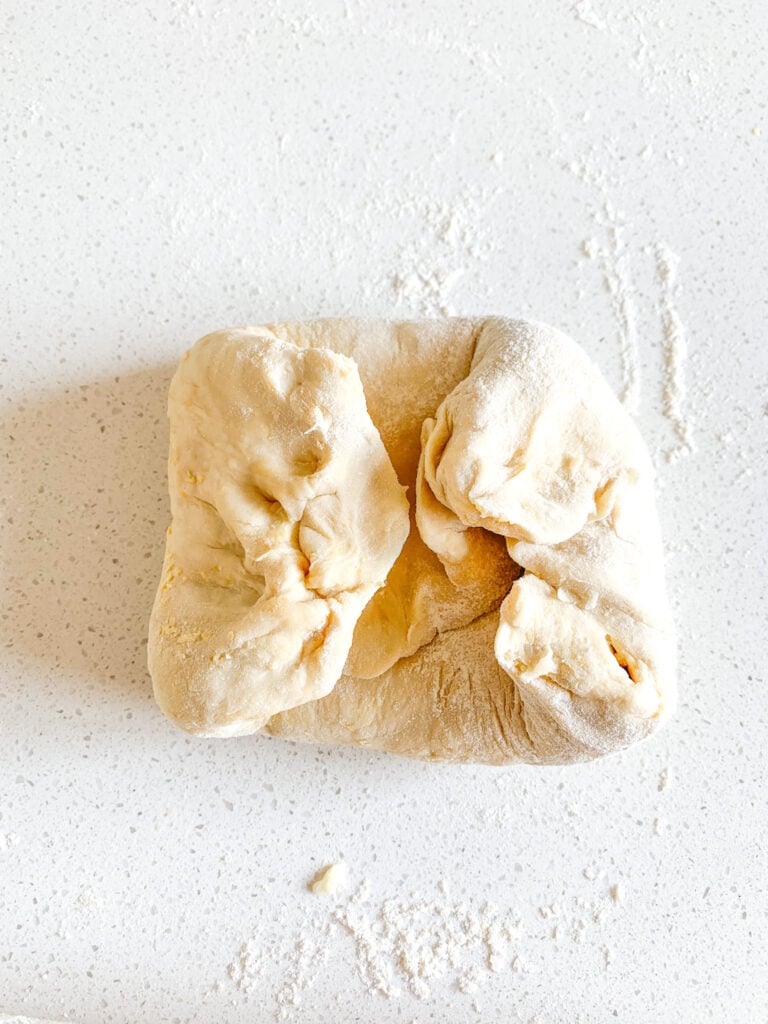
Fold top 1/3 of dough down so it folds into the middle then fold bottom 1/3 up to meet in the middle. Like an envelope. Then fold the 2 sides into the center to make a square.
Turn dough over and roll it out into another large rectangle about 1/2 inch thick. Repeat the folding process exactly how we just did it. If the dough is sticking, dust with a little flour.
Let rest for 2 minutes in the freezer (not on counter or in fridge!).
Shape Candy Cane Danish
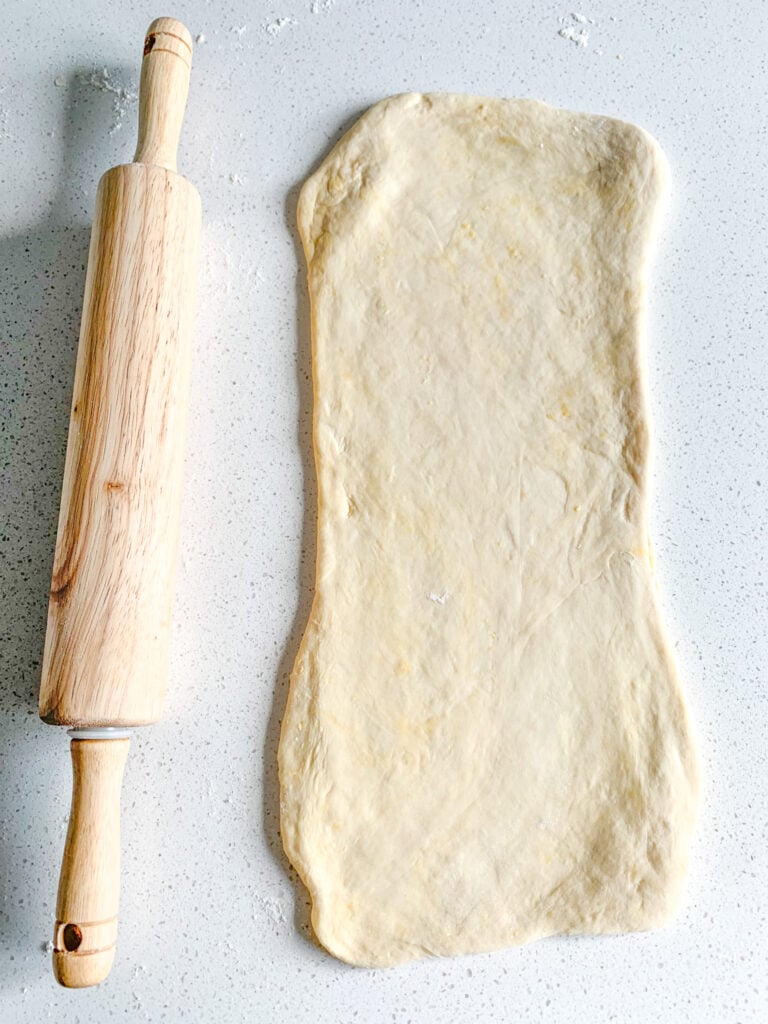
Cover a large, rimmed metal baking sheet pan with parchment paper and roll chilled dough out into a 1/4 inch large thick rectangle (about 7”x15”).
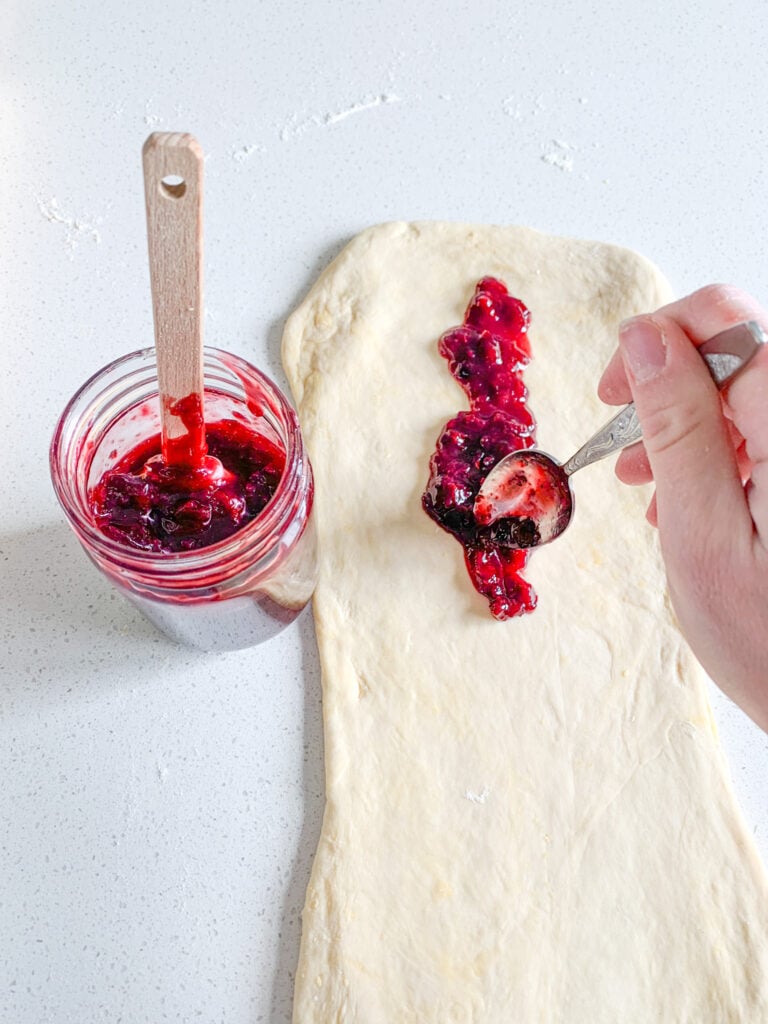
Spread half of the cooled down cherry filling over the rolled out dough except leave an inch around all the edges so it doesn’t gush out too much in the next step.
Starting with a long side, roll dough like you would for a cinnamon roll. (If the filling starts to gush out while you do this, keep rolling then remove any excess coming out at the end.)
Once done, carefully move log to the rimmed sheet pan covered with parchment paper so it’s laying longwise. Place seam side down and tuck edges of both ends under the log.
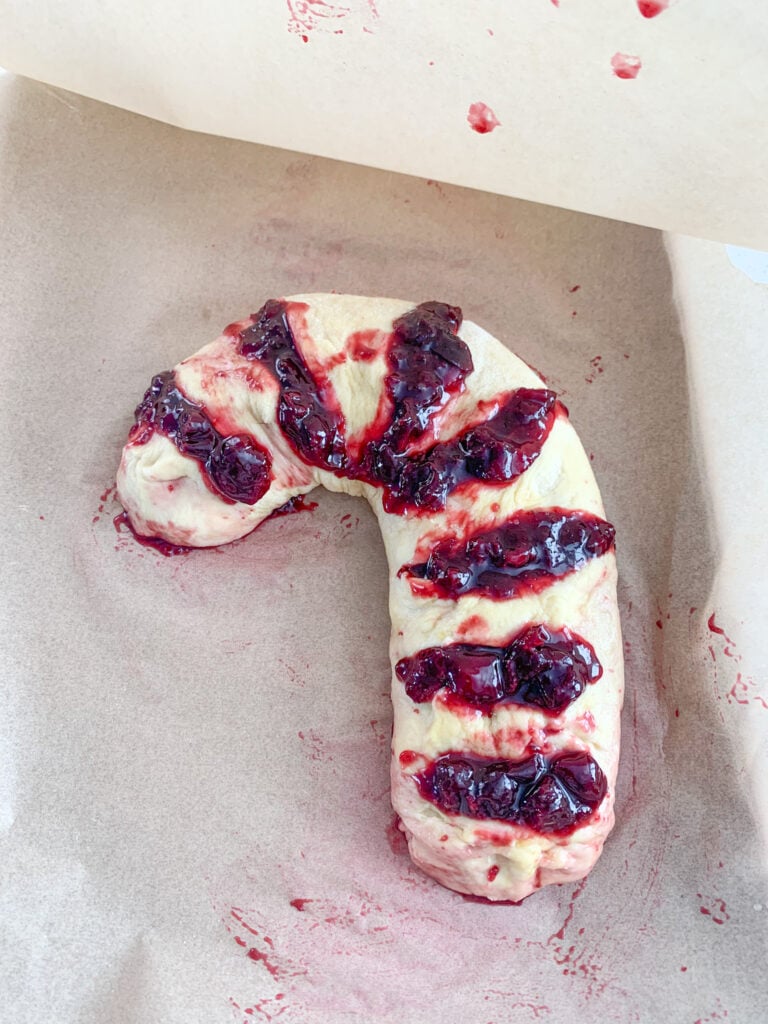
Take the top 1/4 and bend it to the left to make the candy cane shape.
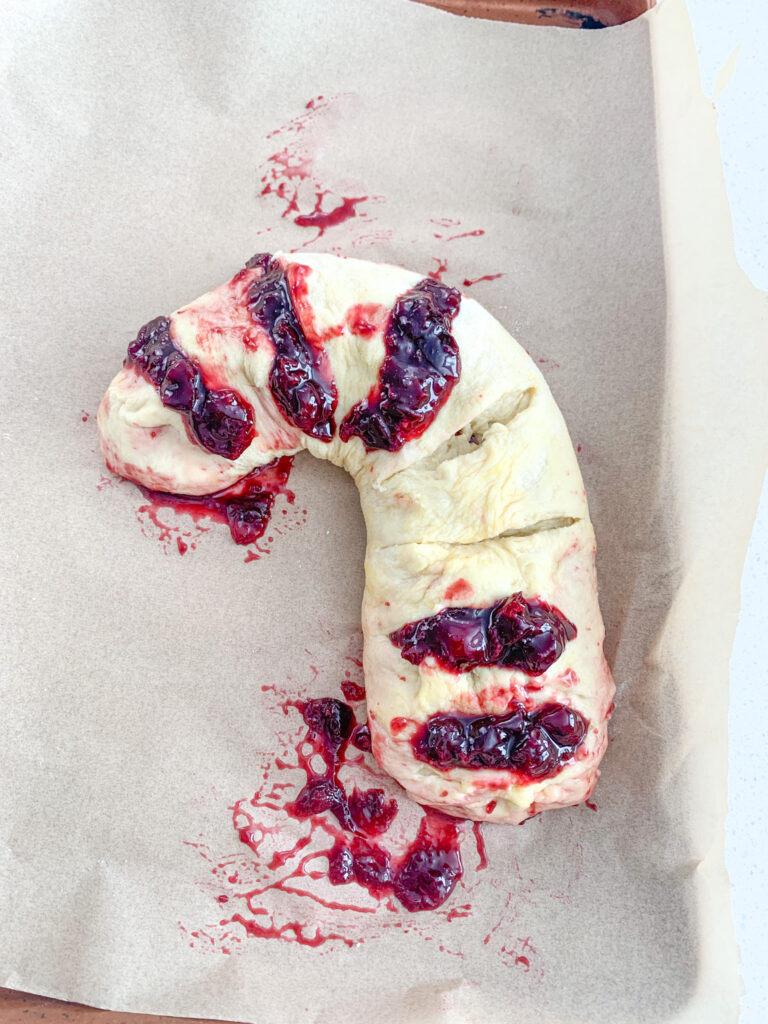
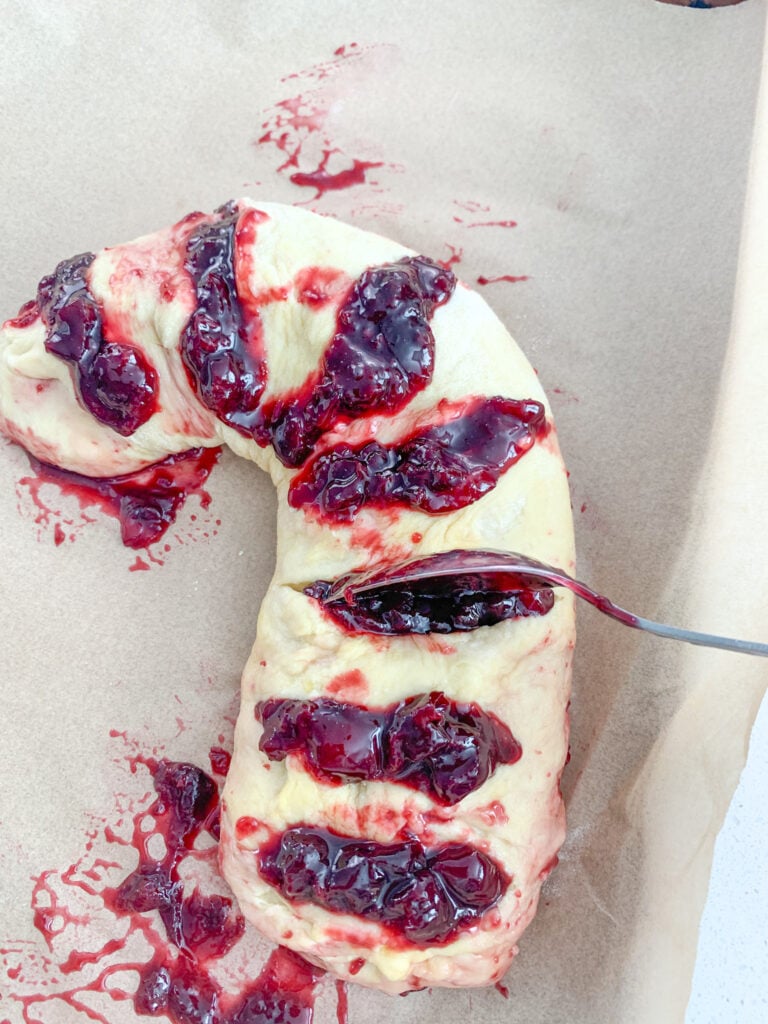
Take a knife and make horizontal slices half way down into the dough to make the candy cane stripes, every 1-2 inches. Add 1 spoonful of leftover filling into each of these slices to make the red stripes. Clean/wipe up any filling that may have fallen around the dough so it doesn’t burn.
Proofing
OPTIONAL: At this point you can place the pan in the fridge, covered with parchment paper, up to 24 hours if you want to make this ahead or need more time. Add 2 hours to the proofing time since the dough will start out cold.
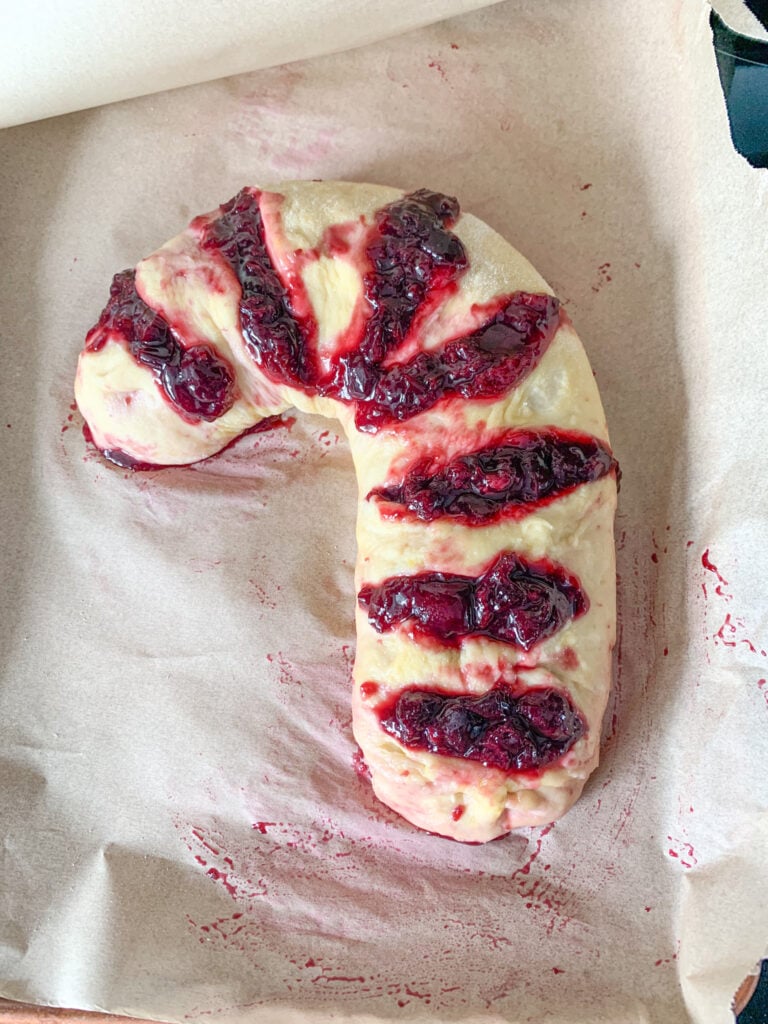
Cover pan loosely with a piece of parchment paper and let rise for 2 hours at room temperature on the counter top. It will be slightly puffy when ready to bake.
Bake Danish
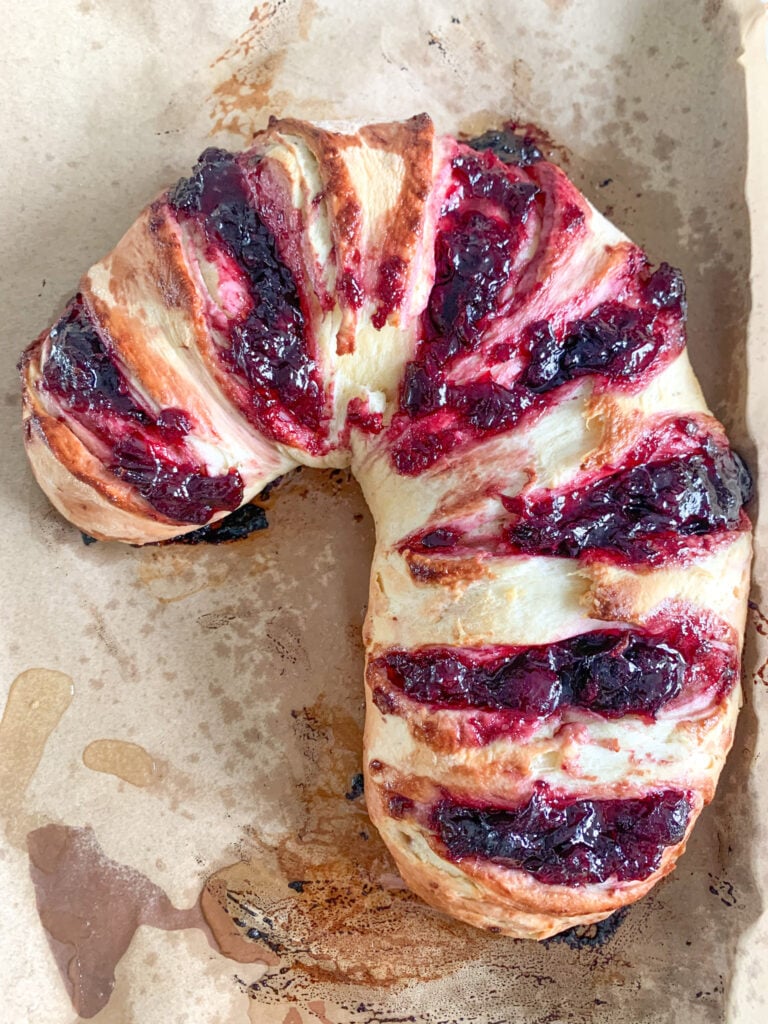
Preheat oven to 400 degrees Fahrenheit. Then bake at 400 degrees for 23-26 minutes or until fully baked. It will be golden brown and crispy.
Cool & Glaze
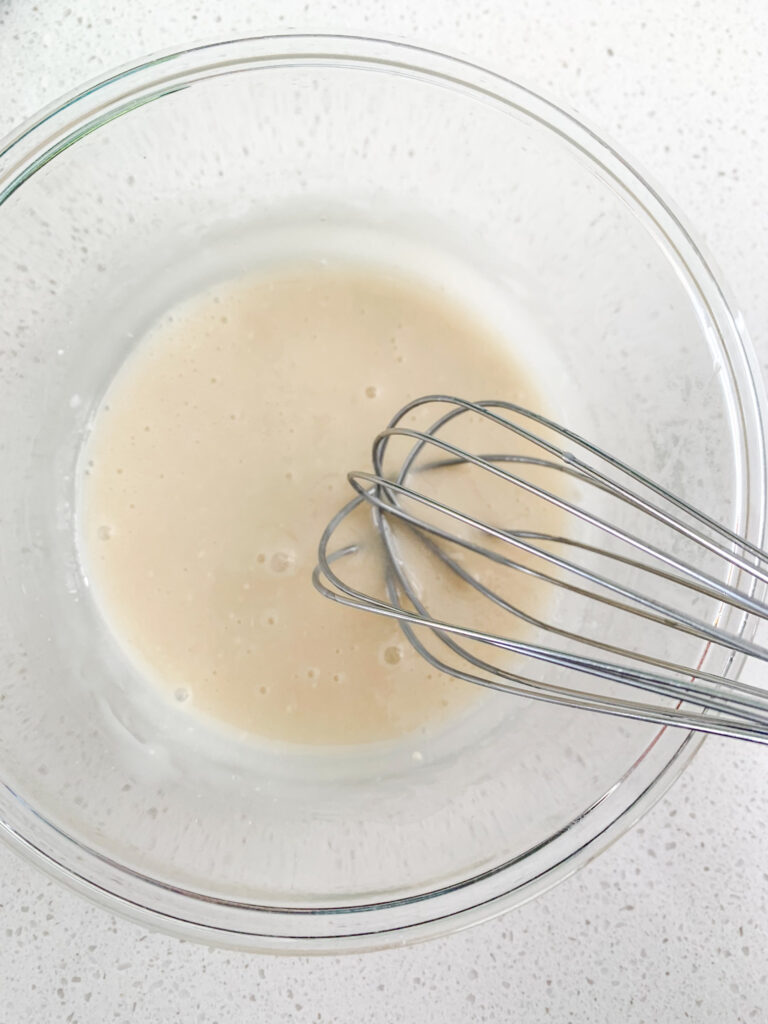
While it bakes, whisk powdered sugar and milk in a bowl to make the glaze. It should be runny.
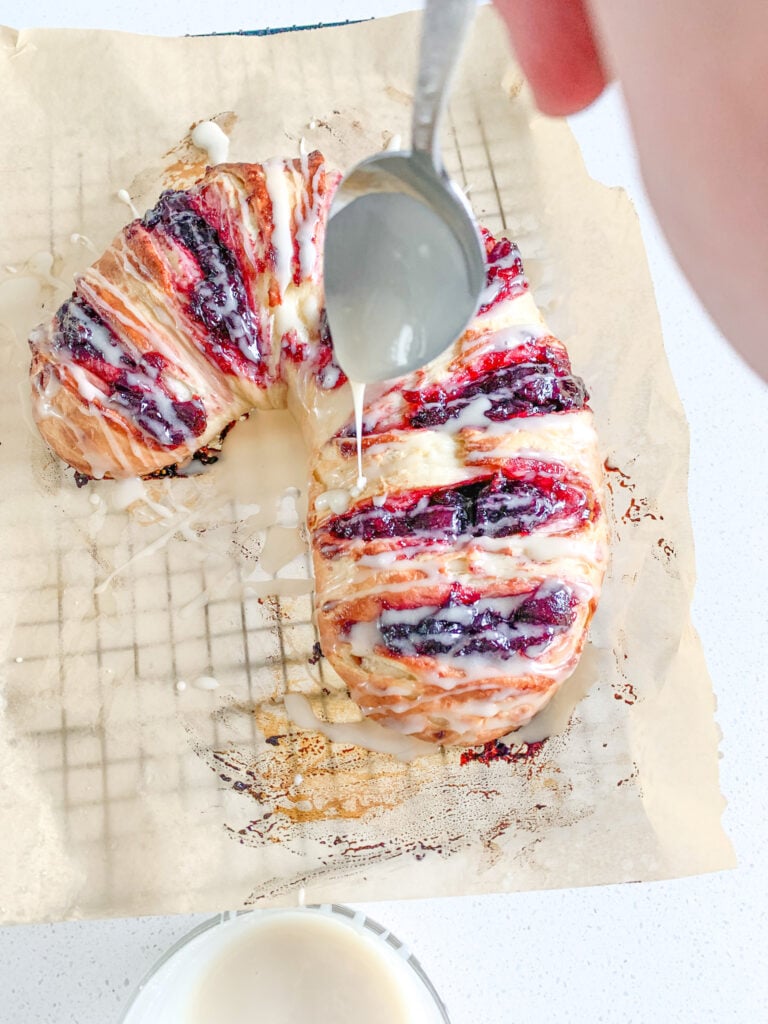
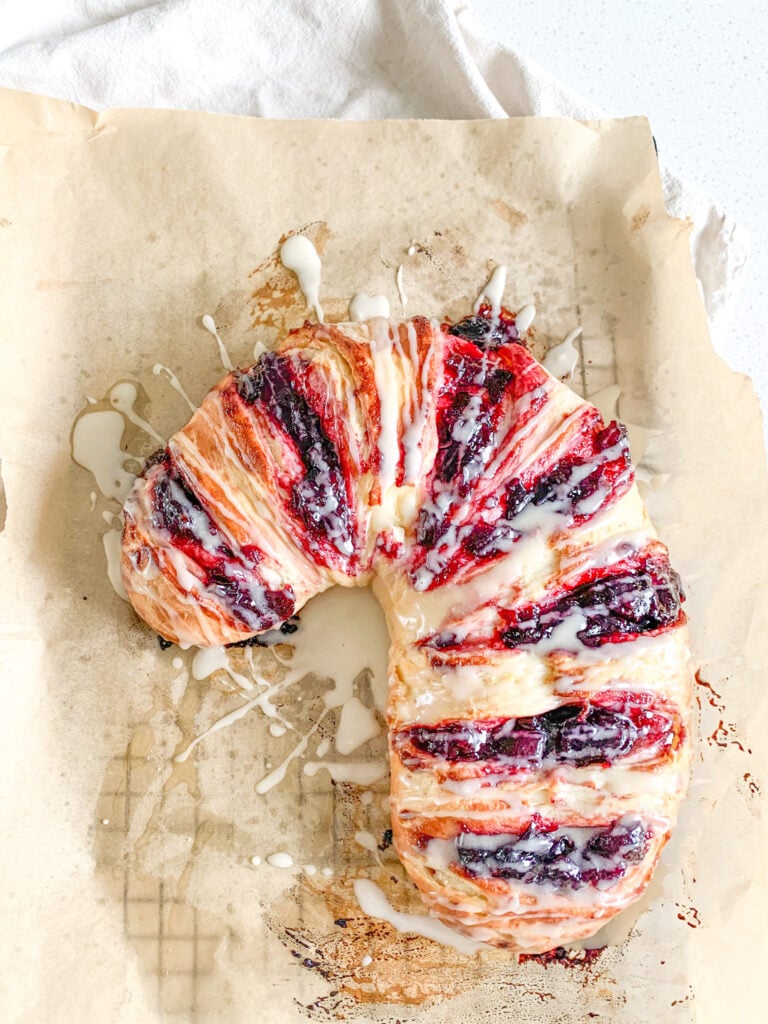
When Danish comes out of the oven, remove it from the pan by sliding it off on the parchment paper onto a wire cooling rack. Drizzle glaze over the top and slice to enjoy!
Video Tutorial
Troubleshooting Help
What to do if your dough isn’t doubling in size during the bulk ferment and/or 2nd rise:
- If your dough doesn’t look like it’s doing anything halfway through the rises, you need to place it in a slightly warmer area.
- This can be in a turned-off oven with the light on and oven door open, or you can slightly warm the oven to about 75-80 degrees Fahrenheit, then turn it off and place your dough inside with the door shut.
- Never leave the oven on, even on the keep warm setting, with fermenting dough inside. Your dough, for both rises, needs to double.
What to do if your dough won’t double in size even in the warmer place (and your baked good is dense):
This will strengthen the cultures in your starter to give you fluffy baked bread and treats. After the 2 days, you can go back to feeding it like usual (once a week if stored in the fridge or once a day if stored on the counter). Be sure to use the 2:1 ratio feeding from here on out.
If your dough doesn’t double even in the warmer area, there is a problem with your starter. It is too weak to ferment the dough even in a warm environment.
To fix this, you will want to leave your starter out on the counter for 2 days and feed it every 12 hours at a 2:1 ratio of unbleached flour to filtered water.
For example, 1 cup unbleached flour + 1/2 cup filtered (or bottled) water.
Make sure you’re using unbleached flour and filtered or bottled water to do this. If you don’t, it will affect your starter strength. Reverse osmosis water (or any water that uses salt in the filter) can make the starter weak.
Sample Baking Schedule for Christmas Morning
- December 23rd (in the evening): Make the dough and begin bulk ferment
- December 24th (in the morning): Bulk ferment is complete. Either place the dough in the fridge until you’re ready to continue or start now by adding the egg, laminating the dough, and shaping.
- Option 1: You can either proof and bake the Danish on Christmas Eve and rewarm on Christmas morning (finish the recipe Christmas Eve day or night)
- Option 2: Or you can stop here and place the shaped candy cane Danish in the fridge until morning.
- If going with option 2 – December 25th (as soon as you wake up): Get shaped dough out of fridge and let proof in a turned-off oven with the oven light on and the door cracked open for 2 hours. Bake and enjoy!
Our Favorite Ways to Serve Cherry-Filled Candy Cane Danish
You can serve candy cane danish any day of the holiday season, but it’s especially perfect for St. Nicholas’s Feast Day (his symbol is the candy cane), Christmas Eve, and Christmas morning.
You can serve it warm by itself, with a cup of coffee or tea, a breakfast meat, or even hash browns!
How to Store Candy Cane Breakfast Pastry
You’ll want to slice the candy cane up into pieces as if you were serving it. Then place the slices in a glass airtight container. They’ll last at room temperature for 2-3 days.
Freezing and Thawing Instructions
To freeze Danish: After the Danish is completely cooled, slice it into pieces then wrap each one with a small slice of parchment paper. Place the slices in a freezer-safe baggie or container. They’ll last for up to 3 months in the freezer.
To thaw Danish: To thaw Danish, place on the counter for a few hours to thaw or in the fridge overnight.

My Favorite Way to Reheat Sourdough Danish
The best way, in my opinion, is to place the Danish on a small sheet pan and warm in the oven or toaster oven at 350 degrees until warm. About 3-5 minutes.
Frequently Asked Questions
No, it’s made with a danish dough instead of crescent rolls.
You can try it, but since I developed this recipe with a from-scratch Danish dough, it will turn out differently.
Of course! I have notes throughout the recipe card instructions to help you if you’re looking to make it ahead.
More Sourdough Christmas Recipes To Try
If you’re looking for more sourdough recipes for Christmas morning, try a few of these:
- Sourdough Angel Biscuit Recipe
- Sourdough Lemon Scones
- Sourdough Breakfast Sandwich
- Sourdough Orange Scones
- Softest Sourdough Maple Cinnamon Rolls
- Sourdough Chocolate Babka
- Sourdough Coffee Cake
If you made this recipe, give it a 5-star rating below and share a photo on your social media stories! Be sure to tag @plumbranchhome
Recipe

Sourdough Candy Cane Danish (Cherry-Filled)
Ingredients
Danish Dough
- 2 cups all-purpose flour
- 1 tsp sea salt
- 3 Tbsp cold salted stick butter
- 1/2 cup milk
- 1 1/2 Tbsp raw honey
- 1/4 cup fed sourdough starter
- 1 egg yolk
- Butter Lamination Layer – 3 Tbsp cold salted stick butter
Cherry Filing
- 2 cups frozen cherries, pitted, no sugar added (dark sweet cherries are okay) (about a 10oz bag)
- 1/8 tsp pure vanilla extract
- 1/4 cup raw honey
- 1/2 tsp lemon juice
- cornstarch slurry: 1 Tbsp cornstarch + 1 Tbsp water
Glaze
- 1/2 cup powdered cane sugar
- 2 Tbsp milk
Instructions
Feed Your Starter
- BEFORE YOU GET STARTED: If your starter isn't active and bubbly, feed your entire sourdough starter jar 4-12 hours before starting this recipe. I recommend feeding your entire starter a 2:1 ratio of unbleached flour to filtered water to get the same results as I do when making this recipe. (Example: Feed entire starter 1 cup flour + 1/2 cup water and let it sit on the counter at room temperature until it's bubbly and has grown in the jar. Your starter needs to be active, bubbly, and a thicker consistency to use in this recipe.)
Make Dough
- Add ONLY 1 1/2 cups of flour and 1 tsp salt to a large bowl and stir to combine.
- Grate butter into the dry mixture or use a fork to cut butter into flour until pea-sized. Stir to evenly distribute butter pieces.
- Add in milk, honey, and fed sourdough starter. Stir to combine then use your hands to finish combining into a dough ball. (If dough is too wet, your starter is more hydrated than mine. Just add a few tablespoons of extra flour. If dough is too dry, your starter is less hydrated than mine. Just add a few tablespoons of extra water.)
- Keep dough in bowl and knead for 2 minutes or use an electric mixer with a dough hook. (It’ll become a little sticky so we’re keeping it in the bowl to knead).
- Place dough back in its bowl and cover it with a damp towel or lid, loosely. Let it bulk ferment on the counter at room temperature for 12 hours or until it doubles or triples in size. Please see notes for troubleshooting.
Add Egg
- When dough has doubled in size, add egg yolk and 1/2 cup flour into dough. Knead it until well combined. (We do this after the bulk ferment for food safety)
Chill Dough
- Place dough in fridge for 1 hour (or up to 24 hours, if you want more time). Do not skip this step!
Make Filling
- While dough chills, add cherries, vanilla, honey, and lemon juice to a medium-sized saucepan and heat on medium heat for 10 -15 minutes stirring occasionally. This filling mixture should start to bubble and come together as a sauce.
- After the filling cooks, use a masher or the back of a spoon to break down the cherries into smaller pieces.
- In a small bowl, whisk cornstarch and water until combined and no lumps. Add to filling, stirring frequently until thickened over medium heat (about 2-4 minutes), remove from heat and let cool while dough finishes chilling.
Laminate Dough
- When dough finishes chilling, dust your workspace lightly with flour. Then turn it out on the countertop and roll it into a large rectangle, 1/2 inch thick.
- Grate cold butter (lamination layer ingredient) into a pile on top of the rectangle with a large holed cheese grater (or cut it into tiny pieces with a knife).
- Spread small pieces of butter into a small rectangle in the middle of dough.
- Fold top 1/3 of dough down so it folds into the middle then fold bottom 1/3 up to meet in the middle. Like an envelope. Then fold the 2 sides into the center to make a square.
- Turn dough over and roll it out into another large rectangle about 1/2 inch thick. Repeat the folding process exactly how we just did it. If the dough is sticking, dust with a little flour.
- Let rest for 2 minutes in the freezer (not on counter or in fridge!).
Shape Candy Cane Danish
- Cover a large, rimmed metal baking sheet pan with parchment paper and roll chilled dough out into a 1/4 inch large thick rectangle (about 7”x15”).
- Spread half of the cooled down cherry filling over the rolled out dough except leave an inch around all the edges so it doesn't gush out too much in the next step.
- Starting with a long side, roll dough like you would for a cinnamon roll. (If the filling starts to gush out while you do this, keep rolling then remove any excess coming out at the end.)
- Once done, carefully move log to the rimmed sheet pan covered with parchment paper so it's laying longwise. Place seam side down and tuck edges of both ends under the log.
- Take the top 1/4 and bend it to the left to make the candy cane shape.
- Take a knife and make horizontal slices half way down into the dough to make the candy cane stripes, every 1-2 inches. Add 1 spoonful of leftover filling into each of these slices to make the red stripes. Clean/wipe up any filling that may have fallen around the dough so it doesn't burn.
Proofing
- OPTIONAL: At this point you can place the pan in the fridge, covered with parchment paper, up to 24 hours if you want to make this ahead or need more time. Add 2 hours to the proofing time since the dough will start out cold.
- Cover pan loosely with a piece of parchment paper and let rise for 2 hours at room temperature on the counter top. It will be slightly puffy when ready to bake.
Bake Danish
- Preheat oven to 400 degrees Fahrenheit. Then bake at 400 degrees for 23-26 minutes or until fully baked. It will be golden brown and crispy.
Cool & Glaze
- While it bakes, whisk powdered sugar and milk in a bowl to make the glaze. It should be runny.
- When Danish comes out of the oven, remove it from the pan by sliding it off on the parchment paper onto a wire cooling rack. Drizzle glaze over the top and slice to enjoy!
Video
Notes
Troubleshooting Help for Bulk Fermenting & Rising…
1. What to do if your dough isn’t doubling in size during the bulk ferment and/or 2nd rise:- If your dough doesn’t look like it’s doing anything halfway through the rises, you need to place it in a slightly warmer area.
- This can be in a turned-off oven with the light on and oven door open, or you can slightly warm the oven to about 75-80 degrees Fahrenheit, then turn it off and place your dough inside with the door shut.
- Never leave the oven on, even on the keep warm setting, with fermenting dough inside. Your dough, for both rises, needs to double.
- If your dough doesn’t double even in the warmer area, there is a problem with your starter. It is too weak to ferment the dough even in a warm environment.
- To fix this, you will want to leave your starter out on the counter for 2 days and feed it every 12 hours at a 2:1 ratio of unbleached flour to filtered water.
- For example, 1 cup unbleached flour + 1/2 cup filtered (or bottled) water.
- Make sure you’re using unbleached flour and filtered or bottled water to do this. If you don’t, it will affect your starter strength. Reverse osmosis water (or any water that uses salt in the filter) can make the starter weak.
- This will strengthen the cultures in your starter to give you fluffy baked bread and treats. After the 2 days, you can go back to feeding it like usual (once a week if stored in the fridge or once a day if stored on the counter). Be sure to use the 2:1 ratio feeding from here on out.
Wonderful way to celebrate Christmas morning ⛪️🎄
Looks and sounds amazingly Delicious!!
Definitely want to make this 😋 more then once!
Thank you so much!! It’s such a good one for Christmas! I hope you love it as much as we do!
This looks amazing! What a fun and delicious holiday treat!
Thank you so much! It is so good!
So beautiful, perfect for Christmas Brunch!
Thank you so much!