Easy Sourdough Ciabatta Bread
Sourdough ciabatta bread has a soft, airy crumb with a crisp crust, making it perfect for sandwiches! In our house, we love using these little breads as buns. Our favorite filler is my slow cooker sloppy joe Philly cheesesteak. It’s so delicious!
This post may contain affiliate links of items I know and love. Read our disclosure policy for more information.
If you want to make this recipe but don’t have a sourdough starter, no worries! Grab my free guide so you can make your own starter at home.
If you’re new to sourdough baking and feel hesitant, or you have questions, I’ve got something for you! I broke down the basics of what you need to know about sourdough baking in my free sourdough baking guide for beginners. I highly recommend grabbing a copy!
Tips for Success with this Sourdough Recipe
- Make sure your starter is active! BEFORE YOU GET STARTED: Feed your starter 4-12 hours before starting this recipe. I recommend feeding it a 2:1 ratio of unbleached flour to filtered water to get the same results as I do when you make this recipe. Example: Feed 1 cup flour + 1/2 cup water and let the starter sit on the counter at room temperature until it’s bubbly and has grow in the jar. Your starter needs to be active, bubbly, and a thicker consistency to begin this recipe.
- Let the dough bulk ferment for 12 hours. It is important to let your dough bulk ferment for the full 12 hours. It should double in size and have air bubbles in it.
- Place the dough in a warm spot to rise. For both the bulk ferment and the second rise after shaping, your dough needs to be at room temperature in a non-drafty place.
What is Ciabatta?
Ciabatta is rustic Italian bread that has a crisp crust, an airy crumb, and it has a chew to it. This is all caused by a higher hydration of the dough.
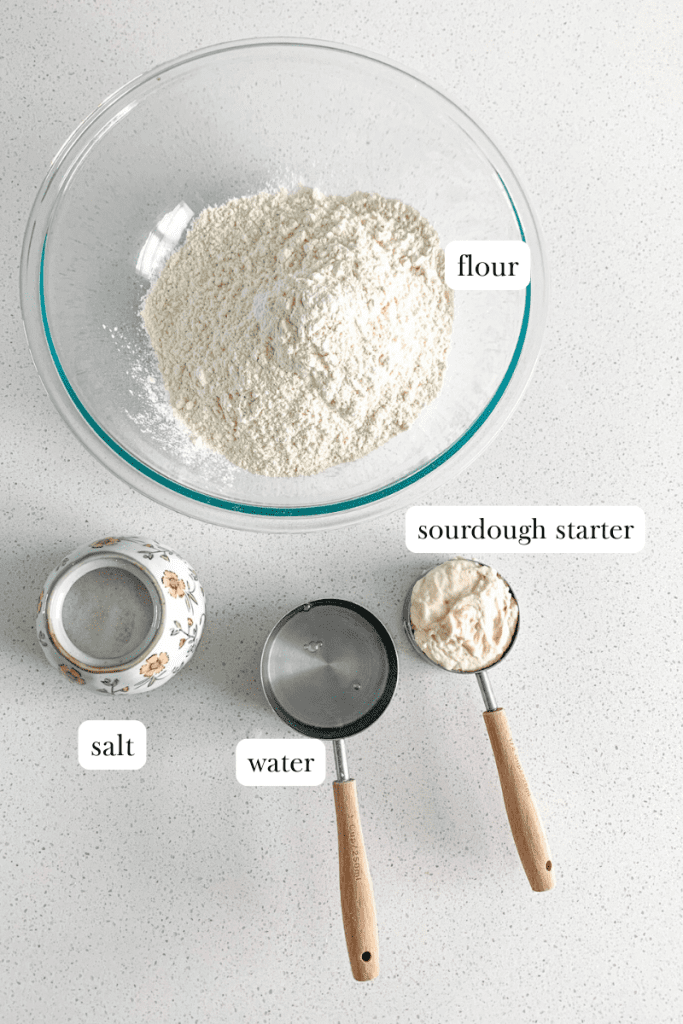
Ingredients You’ll Need
- fed sourdough starter
- water
- salt
- unbleached all-purpose flour
Kitchen Tools You’ll Need
How to Make Sourdough Ciabatta Bread (step-by-step)
Prep Your Starter
BEFORE YOU GET STARTED: Feed your starter 4-12 hours before starting this recipe. I recommend feeding it a 2:1 ratio of unbleached flour to filtered water to get the same results as I do when you make this recipe. Example: Feed 1 cup flour + 1/2 cup water and let the starter sit on the counter at room temperature until it’s bubbly and has grow in the jar. Your starter needs to be active, bubbly, and a thicker consistency to begin this recipe.
Make the Dough
In a large mixing bowl, add in sourdough starter, water, and salt, then stir until combined.
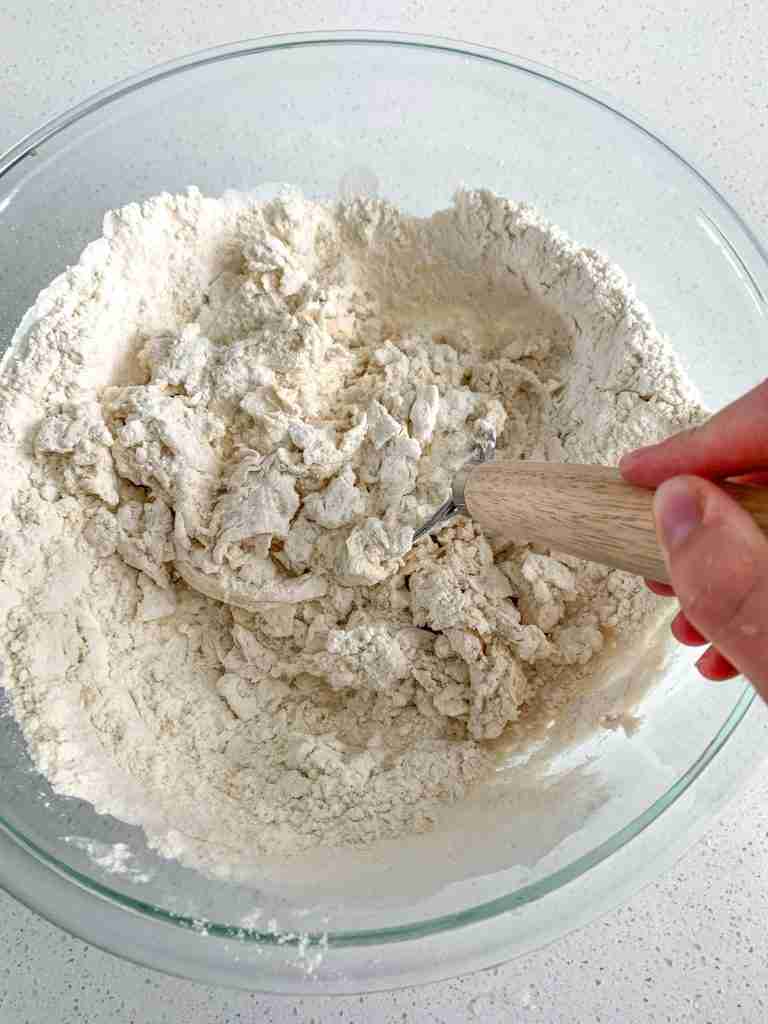
Add flour and stir until a shaggy dough forms. Use your hands to bring the dough into a ball. It will be a little sticky, that’s what you want.
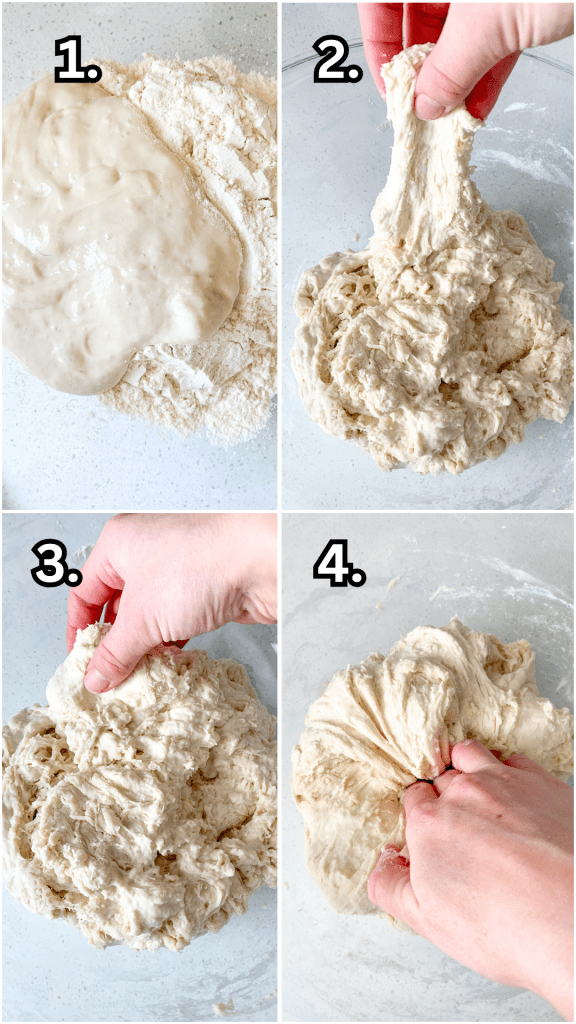
Stretch & Folds
Cover dough with a lid loosely, a damp kitchen towel (that’s been wet then rung out), or plastic wrap. Let dough sit for 30 minutes on the counter at room temperature.
After 30 minutes, begin the first round of stretch and folds. To do this pull a section of the dough upward, folding it into the center, and pressing it down. Repeat this around the dough for 1-2 complete circles.
Cover the dough again and let it sit at room temperature for another 30 minutes. Then, repeat a second round of stretch and folds.
Bulk Ferment
Cover the dough and let it sit at room temperature on the counter or in a turned-off oven/microwave for 12 hours until it doubles in size. See notes for helpful information.
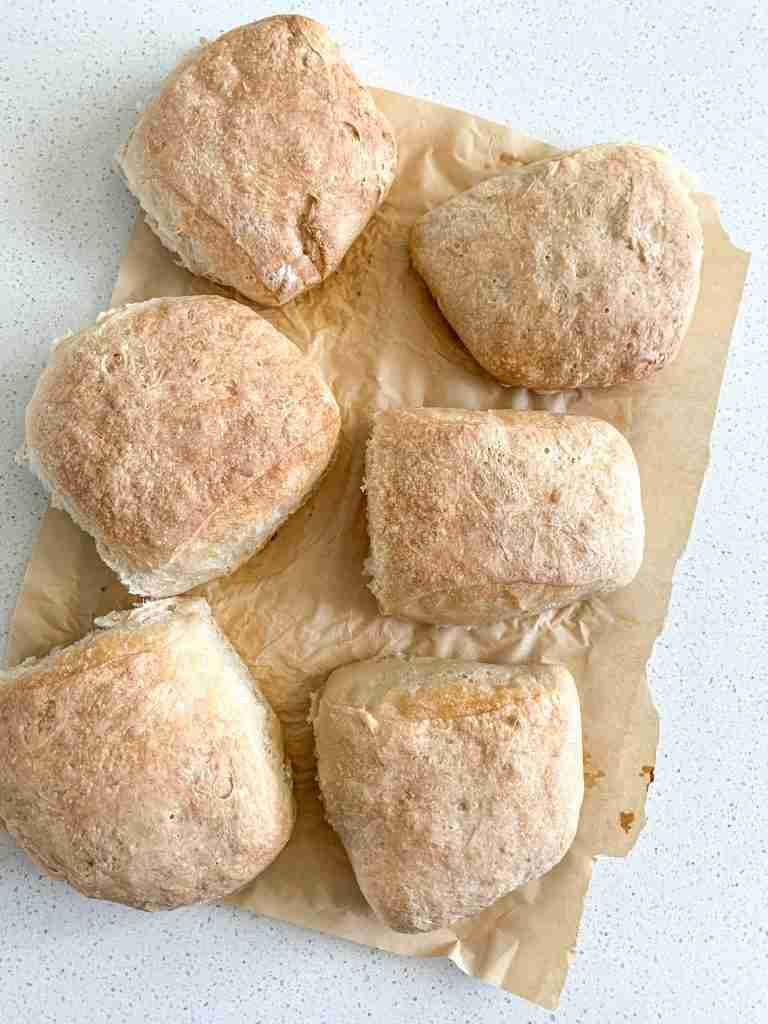
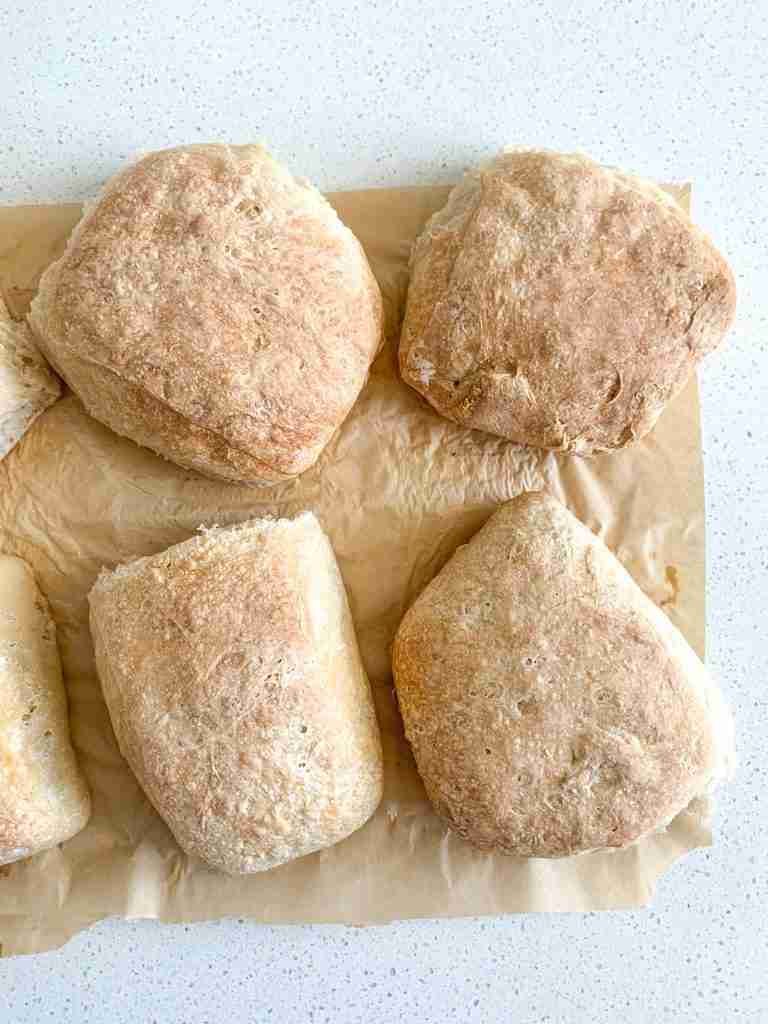
Shaping the Ciabattas
Once bulk fermentation is complete your dough should have doubled in size. Do not punch the dough down you want to keep the air bubbles.
Flour your counter top workspace and then the dough out.
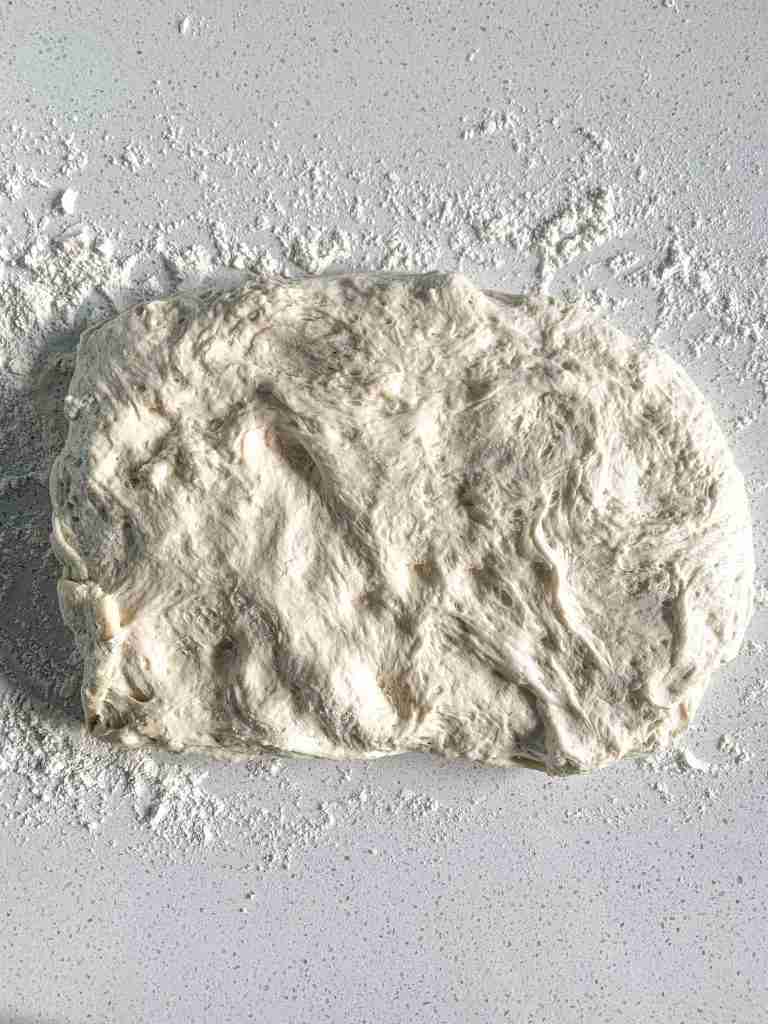
Use your hands to shape it gently into a rectangle. About 10”x7”
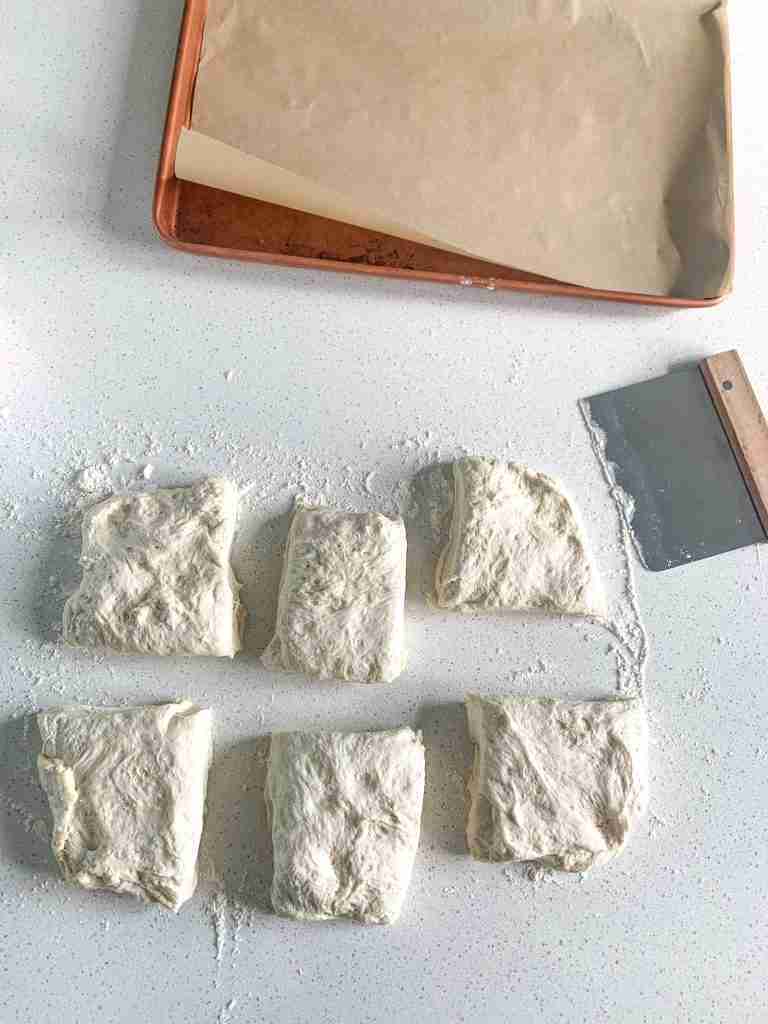
Cut the dough into 6 even pieces

Line a baking sheet pan with parchment paper and place the dough pieces on it 2 inches apart from one another.
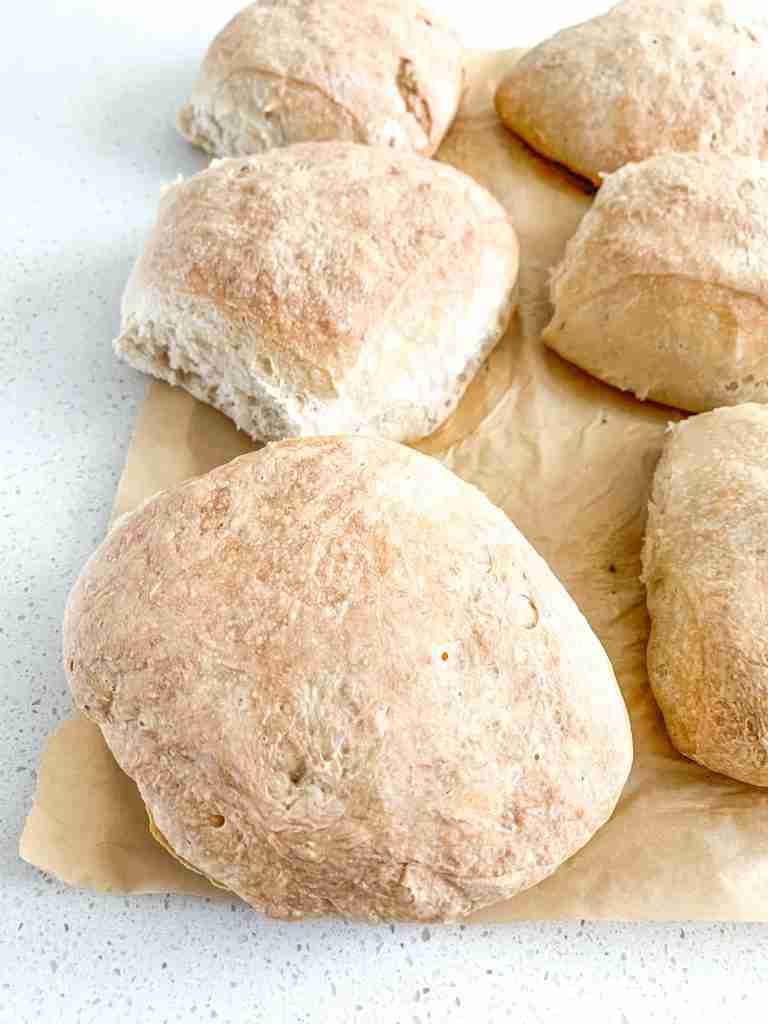
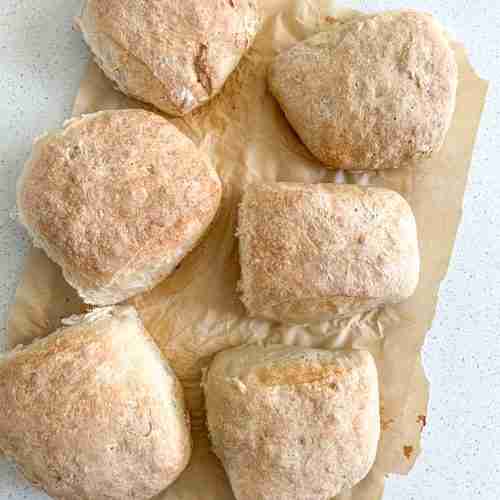
Proof & Bake
Cover the pan with a dry kitchen towel and let rise 3-4 hours (see notes).
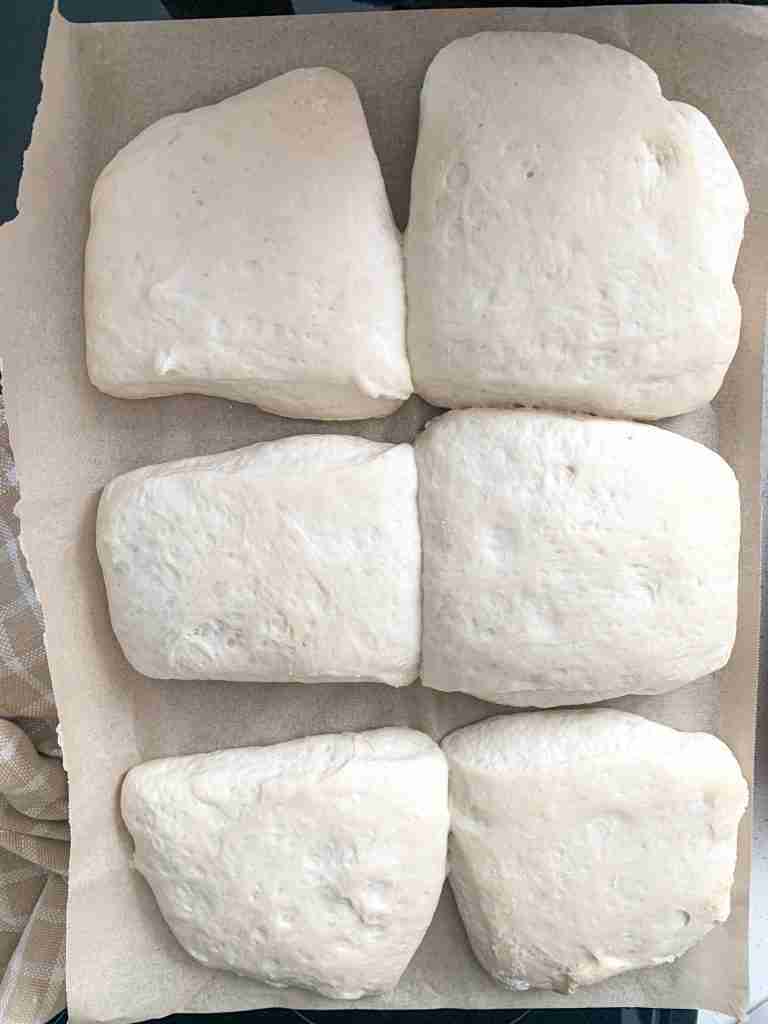
Once doubled in size and puffy, preheat the oven to 450 degrees Fahrenheit.
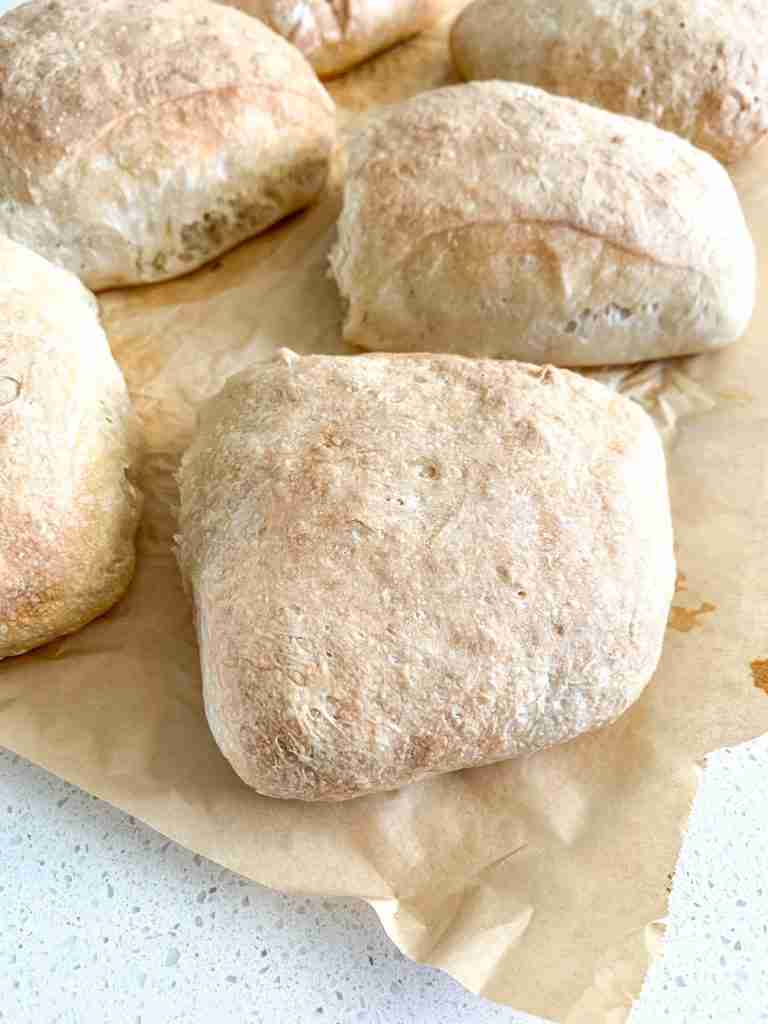
Bake ciabattas for 10 minutes then turn down the oven heat to 425.
Bake ciabattas for an additional 20-25 minutes or until the crust is brown.
Allow the ciabattas to cool on a wire rack for 20-30 minutes before cutting into them. Enjoy!
How to Serve Sourdough Ciabatta
You can serve ciabatta so many ways! Here’s just a few ideas:
- Serve it as a sandwich bun filled with your favorite meat and cheese (hot or cold).
- Sliced in half and toasted then spread with butter and/or jam.
- Serve it with soup as a side for dipping.
- Make a panini with ciabatta for the bread.
- Use them for hamburger buns.
- Serve as an appetizer with olive oil and balsamic vinegar.
Storing Ciabatta
The best way to store cooled down ciabatta bread is in a glass, air-tight container at room temperature. They’ll last 3-5 days.
How to Freeze Ciabatta Bread
Make sure the ciabatta bread is completely cooled after baking, then freeze in a freezer safe baggie or glass container. They’ll last 3 months in the freezer.
Thawing Instructions: Thaw them in the fridge or at room temperature overnight when ready to use them.
Best Way to Warm Ciabatta
The best way to warm them is in a 350-degree Fahrenheit oven for 3-5 minutes. Just ensure they’re not in the oven too long or else they’ll get hard.
Recipe FAQs
I don’t recommend it for this recipe. You’ll want to use fed starter, so the dough will rise and create that airy crumb.
Of course! Just adjust the baking time if needed.
More Sourdough Bun Recipes
Did you make this recipe?
- Give it a 5-star rating in the comments below 👇🏼
- Share a photo of your muffins on your Instagram or Facebook stories. Be sure to tag @plumbranchhome and use the hashtag #plumbranchhome so I can see it!
Sourdough Ciabatta Bread Recipe
Sourdough Ciabatta Bread
Ingredients
- 1 cup fed sourdough starter feed 4-12 hours before using
- 1 1/4 cups water
- 2 tsp salt
- 3 1/2 cups unbleached all-purpose flour
Instructions
Prep Your Starter
- BEFORE YOU GET STARTED: Feed your starter 4-12 hours before starting this recipe. I recommend feeding it a 2:1 ratio of unbleached flour to filtered water to get the same results as I do when you make this recipe. Example: Feed 1 cup flour + 1/2 cup water and let the starter sit on the counter at room temperature until it's bubbly and has grow in the jar. Your starter needs to be active, bubbly, and a thicker consistency to begin this recipe.
Make the Dough
- In a large mixing bowl, add in sourdough starter, water, and salt, then stir until combined.
- Add flour and stir until a shaggy dough forms. Use your hands to bring the dough into a ball. It will be a little sticky, that’s what you want.
Stretch & Folds
- Cover dough with a lid loosely, a damp kitchen towel (that’s been wet then rung out), or plastic wrap. Let dough sit for 30 minutes on the counter at room temperature.
- After 30 minutes, begin the first round of stretch and folds. To do this pull a section of the dough upward, folding it into the center, and pressing it down. Repeat this around the dough for 1-2 complete circles.
- Cover the dough again and let it sit at room temperature for another 30 minutes. Then, repeat a second round of stretch and folds.
Bulk Ferment
- Cover the dough and let it sit at room temperature on the counter or in a turned-off oven/microwave for 12 hours until it doubles in size. See notes for helpful information.
Shaping the Ciabattas
- Once bulk fermentation is complete your dough should have doubled in size. Do not punch the dough down you want to keep the air bubbles.
- Flour your counter top workspace and then the dough out.
- Use your hands to shape it gently into a rectangle. About 10”x7”
- Cut the dough into 6 even pieces
- Line a baking sheet pan with parchment paper and place the dough pieces on it 2 inches apart from one another.
Proof & Bake
- Cover the pan with a dry kitchen towel and let rise 3-4 hours (see notes).
- Once doubled in size and puffy, preheat the oven to 450 degrees Fahrenheit.
- Bake ciabattas for 10 minutes then turn down the oven heat to 425.
- Bake ciabattas for an additional 20-25 minutes or until the crust is brown.
- Allow the ciabattas to cool on a wire rack for 20-30 minutes before cutting into them. Enjoy!
Notes
- Make sure your starter is active! BEFORE YOU GET STARTED: Feed your starter 4-12 hours before starting this recipe. I recommend feeding it a 2:1 ratio of unbleached flour to filtered water to get the same results as I do when you make this recipe. Example: Feed 1 cup flour + 1/2 cup water and let the starter sit on the counter at room temperature until it’s bubbly and has grow in the jar. Your starter needs to be active, bubbly, and a thicker consistency to begin this recipe.
- Let the dough bulk ferment for 12 hours. It is important to let your dough bulk ferment for the full 12 hours. It should double in size and have air bubbles in it.
- Place the dough in a warm spot to rise. For both the bulk ferment and the second rise after shaping, your dough needs to be at room temperature in a non-drafty place.
- If your dough doesn’t look like it’s doing anything halfway through the rises, you need to place it in a slightly warmer area.
- This can be in a turned-off oven with the light on and oven door open, or you can slightly warm the oven to about 75-80 degrees Fahrenheit, then turn it off and place your dough inside with the door shut.
- Never leave the oven on, even on the keep warm setting, with fermenting dough inside. Your dough, for both rises, needs to double.
- If your dough doesn’t double even in the warmer area, there is a problem with your starter. It is too weak to ferment the dough even in a warm environment.
- To fix this, you will want to leave your starter out on the counter for 2 days and feed it every 12 hours at a 2:1 ratio of unbleached flour to filtered water.
- For example, 1 cup unbleached flour + 1/2 cup filtered (or bottled) water.
- Make sure you’re using unbleached flour and filtered or bottled water to do this. If you don’t, it will affect your starter strength. Reverse osmosis water (or any water that uses salt in the filter) can make the starter weak.
- This will strengthen the cultures in your starter to give you fluffy baked bread and treats. After the 2 days, you can go back to feeding it like usual (once a week if stored in the fridge or once a day if stored on the counter). Be sure to use the 2:1 ratio feeding from here on out.