Sourdough Hamburger Buns (small batch recipe)
This sourdough hamburger bun recipe is perfect if you’re looking to make a small batch! My easy recipe makes 3 buns, but you can double it as many times as you’d like. The steps are simple, and the ingredients are wholesome. I hope this recipe replaces store-bought hamburger buns in your house like is has in ours! This recipe includes a video tutorial so you can make it alongside me, step-by-step!
This post may contain affiliate links of items I know and love. Read our disclosure policy for more information.
If you want to make this recipe but don’t have a sourdough starter, no worries! Grab my free guide so you can make your own starter at home.
If you’re new to sourdough baking and feel hesitant, or you have questions, I’ve got something for you! I broke down the basics of what you need to know about sourdough baking in my free sourdough baking guide for beginners. I highly recommend grabbing a copy!

Small Batch Sourdough Hamburger Buns
Instead of buying hamburger buns at the grocery store, I decided I wanted to make my own version at home. This not only saves money, but it makes them so much better for you.
There’s no dough conditioners, additives, or chemicals when you make them at home. That’s why I developed this small-batch recipe.
If you only need one or two buns, you can make a batch and store the others away without having too many. But if you need a bunch of buns, you can easily double the recipe as many times as you need.
I hope this recipe replaces store-bought burger buns in your home like it has in ours!
Reasons to Make Hamburger Buns at Home
- Money Saver: It will save you money.
- Better for You: They’re healthier than store-bought because they’re made from scratch with wholesome ingredients!
- No Seed Oils: Making them at home means using avocado oil aka no seed oils!
- No Preservatives: There are zero dough conditioners or preservatives added to this recipe.
- Fermentation Benefits: The sourdough cultures ferment the other ingredients, giving you tons of fermentation benefits!
- Amazing Taste: The taste is so much better than store-bought!
Why Make Burger Buns with Sourdough
When you make hamburger buns with sourdough, you get benefits from the starter’s cultures. The bulk fermentation of the dough allows the cultures to ferment the other ingredients!
Molly’s Tips for Making Sourdough Burger Buns
- Make sure your starter is active and bubbly before making this recipe.
- Don’t skip the kneading process; it strengthens the gluten in your dough.
- Let the dough bulk ferment for a full 10-12 hours and make sure it’s double or tripled in size.
- The proofing step is crucial for light and fluffy buns; don’t skip or shorten it.
- The longer you proof your buns, the lighter and fluffier they will be.
Sample Baking Schedule
- 8:00 am: Mix the dough.
- 8:05 am: Knead the dough.
- 8:10 am: Let dough bulk ferment for 10–12 hours.
- 6:10 pm: Shape dough into buns and proof for 2-4 hours.
- 8:10 pm: Preheat oven, brush buns with egg wash, and sprinkle sesame seeds.
- 8:25 pm: Bake at 375°F for 20–25 minutes.
- 8:50 pm: Cool on wire rack.
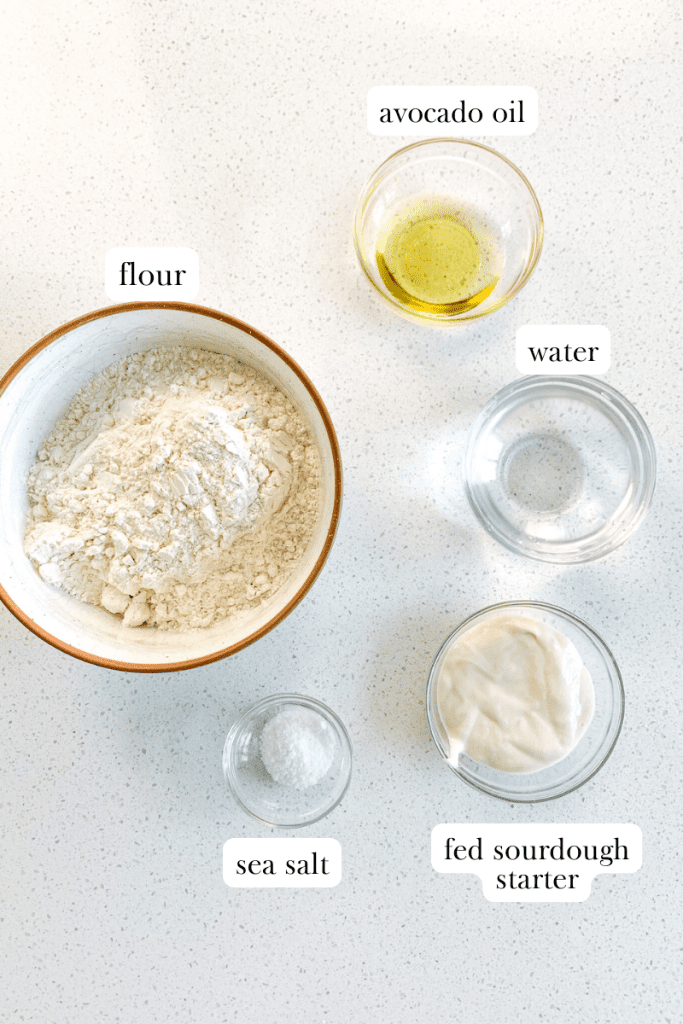
Ingredients You’ll Need (with notes)
Note: Please see the recipe card at the bottom of this blog post for measurements.
For the Buns
- all-purpose flour: great base for buns
- sea salt: you can also use regular salt if you choose
- fed sourdough starter: make sure it’s active and bubbly before using it
- water: a good base for making buns
- avocado oil: you can also use melted butter
For the Topping
- egg wash: this is just an egg and water whisked together
- sesame seeds: these are optional
Kitchen Items You’ll Need
This section contains Amazon affiliate links to items I use and love for this recipe.
- mixing bowl
- bench scraper (optional)
- unbleached parchment paper
- baking sheet
- silicon brush (for egg wash)
How to Make Sourdough Hamburger Buns (step-by-step instructions)
Note: Please see the recipe card at the bottom of this blog post for the full written recipe.
Make the Hamburger Bun Dough
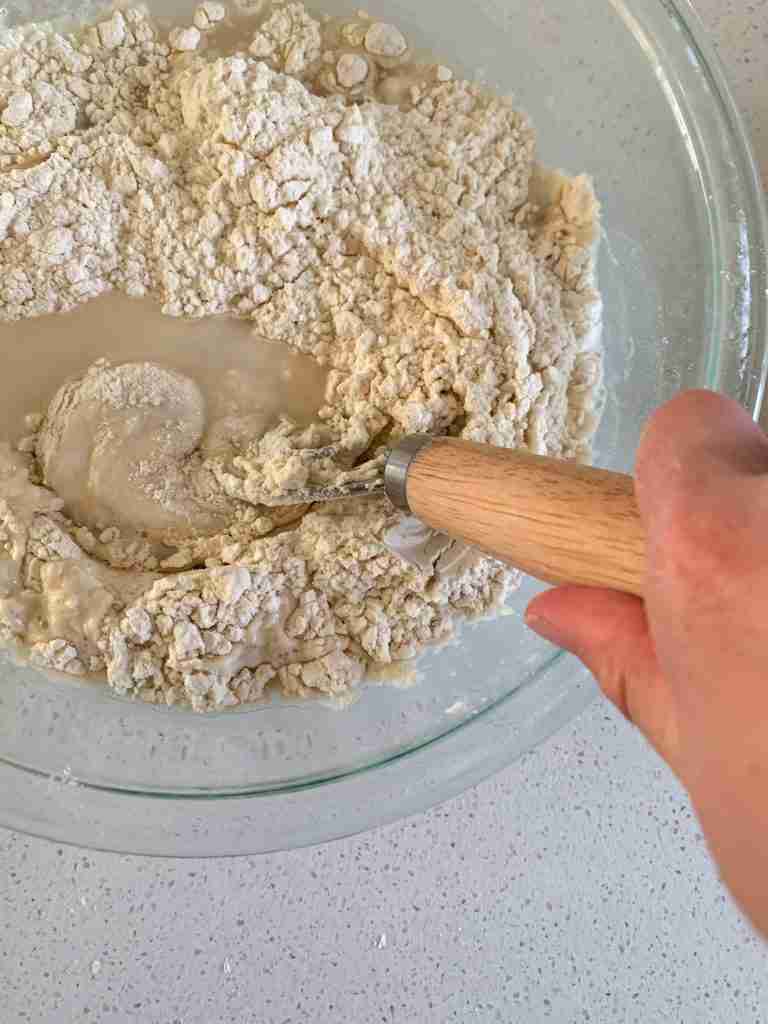
Add the starter, salt, water, avocado oil, and flour to a mixing bowl and mix until combined.
Knead for 2 minutes (by hand or with an electric stand mixer with a kneading attachment).
Bulk Ferment the Hamburger Bun Dough
Place the dough back into the bowl and cover loosely with a wet towel or lid slightly on (not airtight).
Let the dough bulk ferment on the counter for 10-12 hours. It should double in size and be full of air bubbles. See notes below on recipe card!
Optional: When the bulk ferment is over you can continue this recipe OR cover the dough with an airtight lid or saran wrap. Then place it in the fridge up to 48 hours until you’re ready to use it.
Shape the Burger Buns
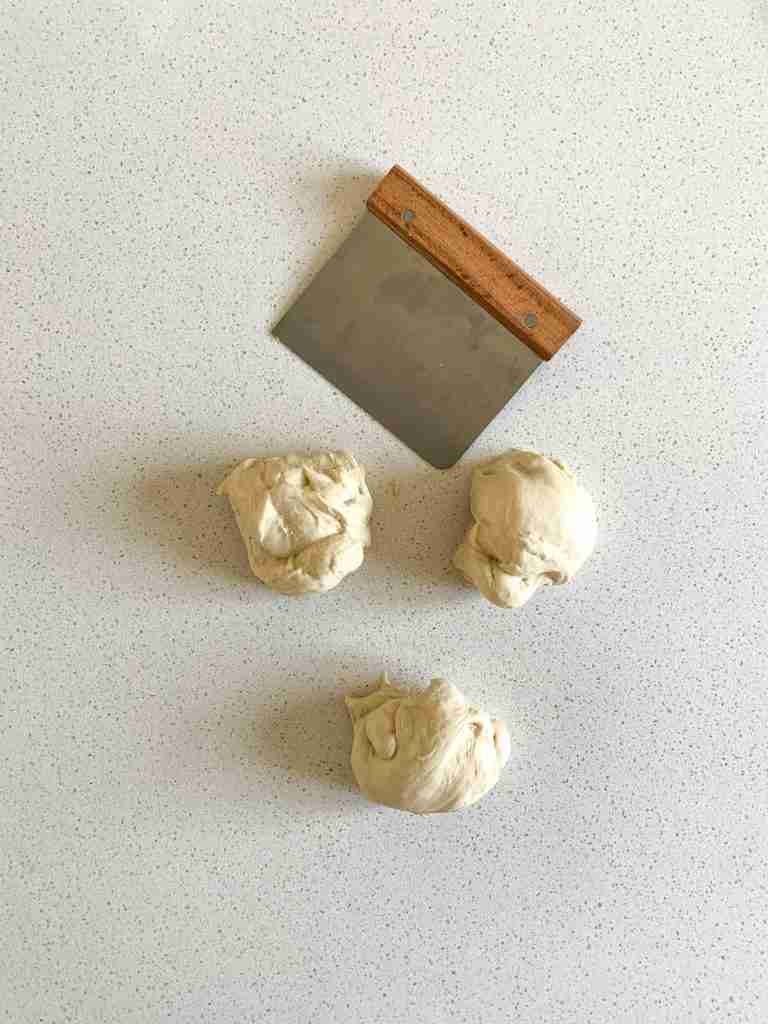
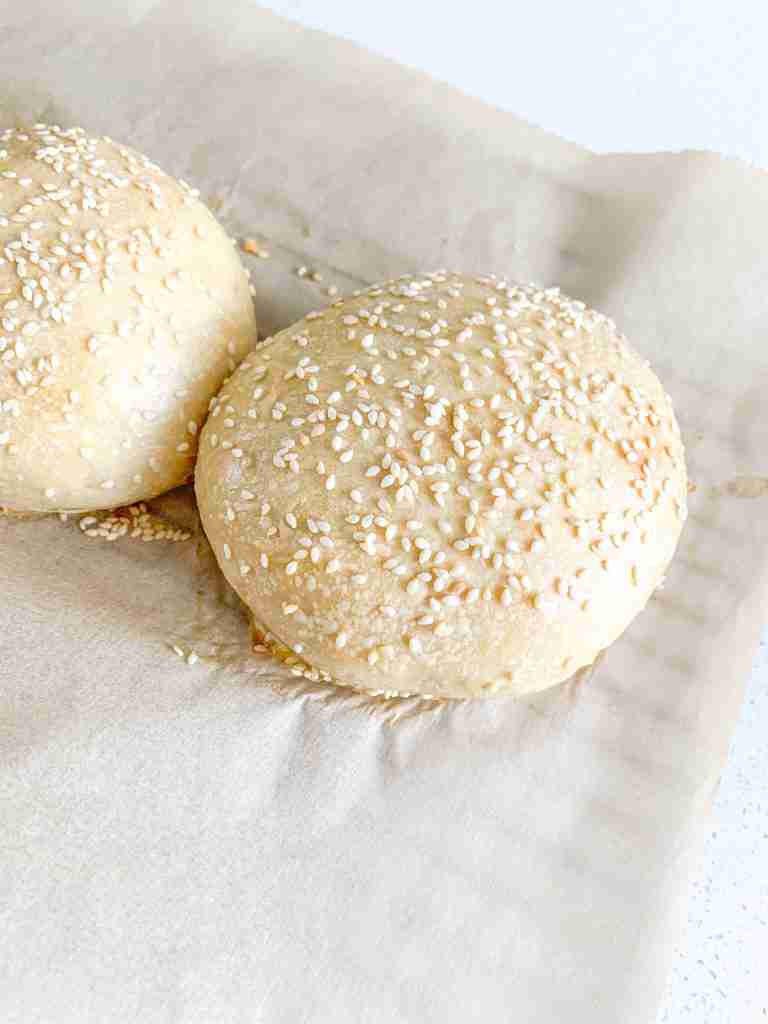
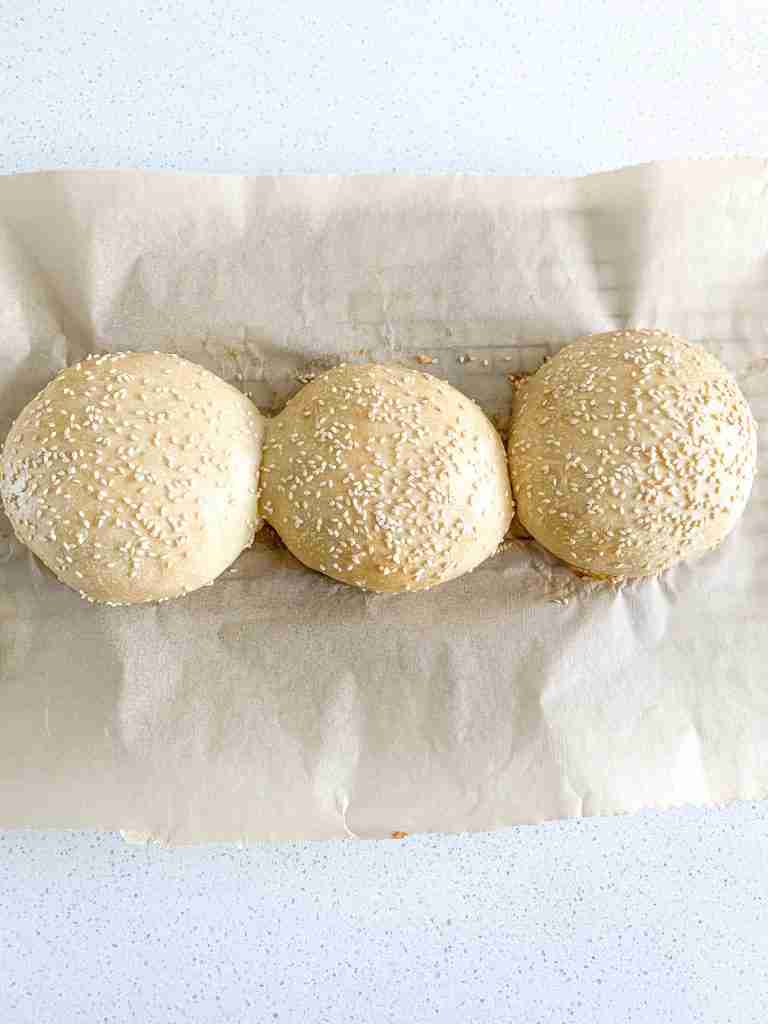
Turn the dough out on the counter (no flour needed). Divide dough into 3 equal pieces.
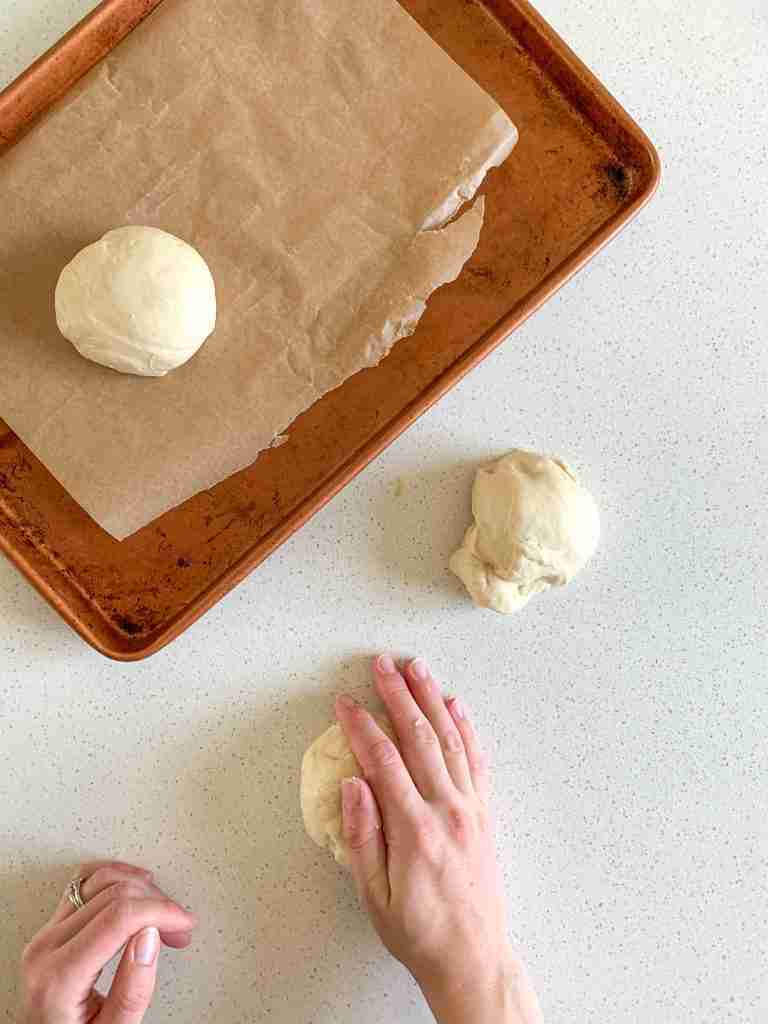
Roll each dough piece into a ball, then press down gently to create a dome shape (flat bottom).
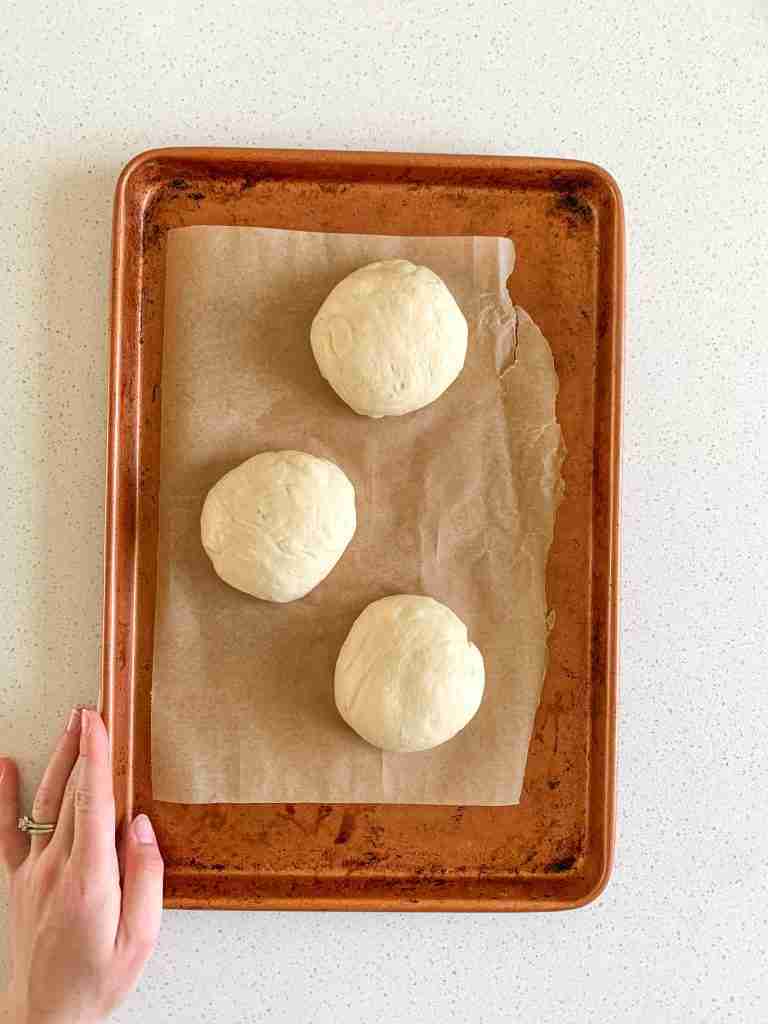
Place each bun on a parchment-lined sheet pan about 2 inches apart
Proof the Burger Buns and Bake
Cover the sheet pan with a dry towel and let the buns rise at room temp for 2-4 hours. They should be puffy and larger after the proofing. See notes below!
Preheat oven to 375 degrees Fahrenheit.
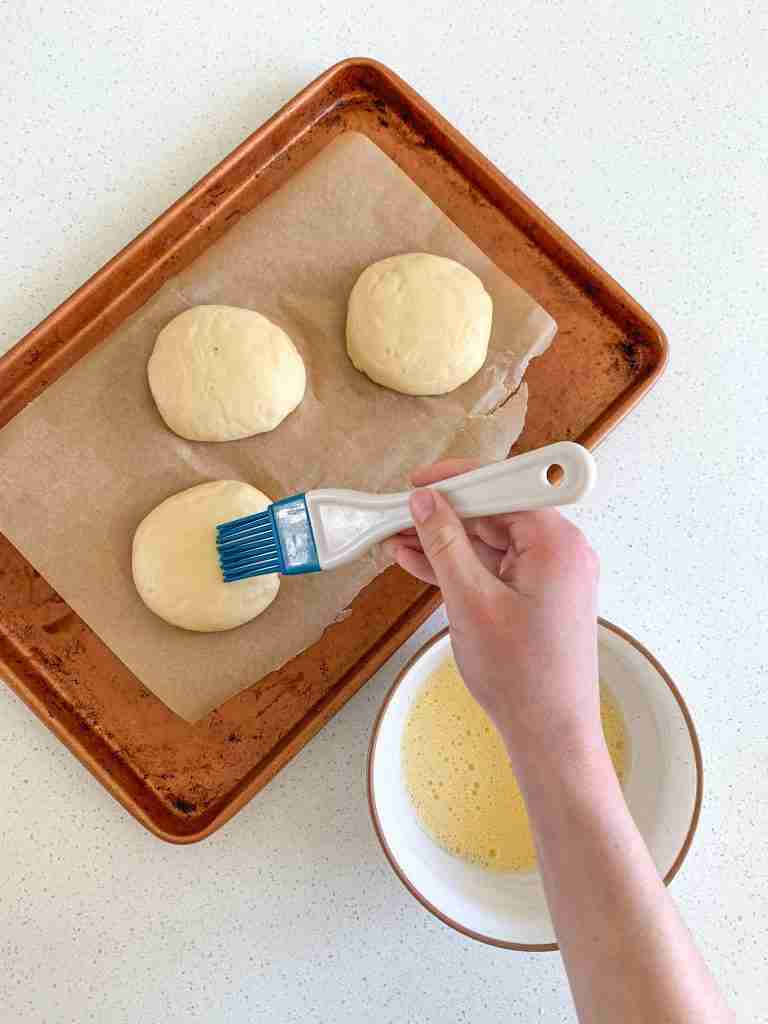
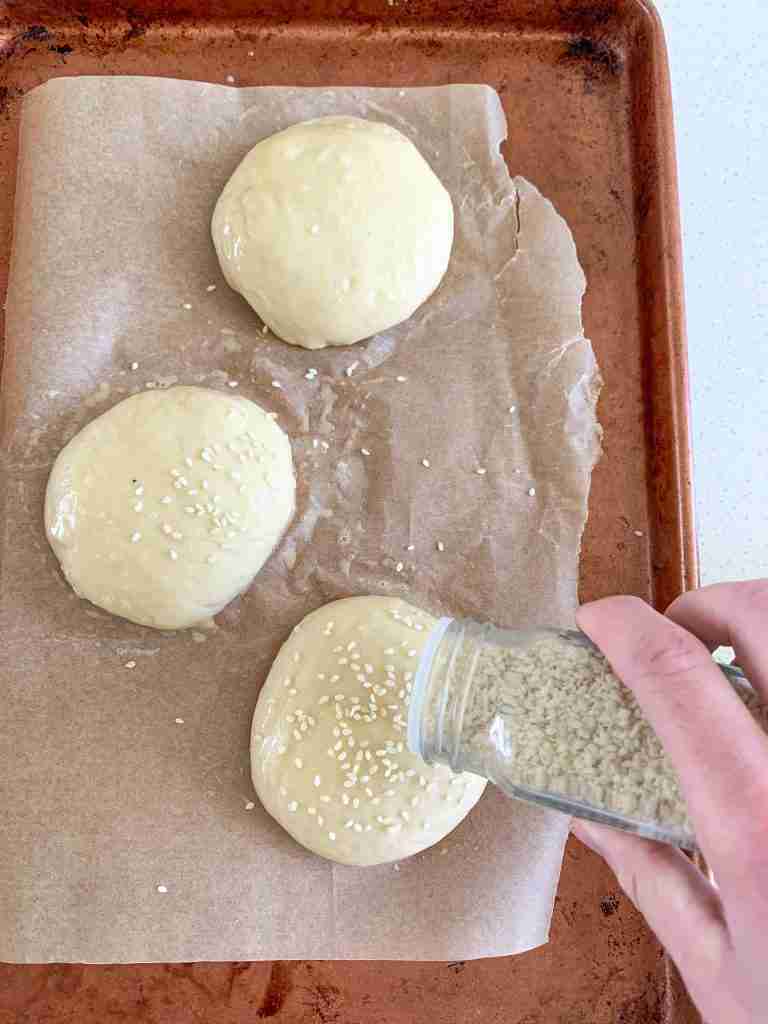
Brush buns with egg wash and sprinkle on sesame seeds if desired. Bake for 20–25 minutes.
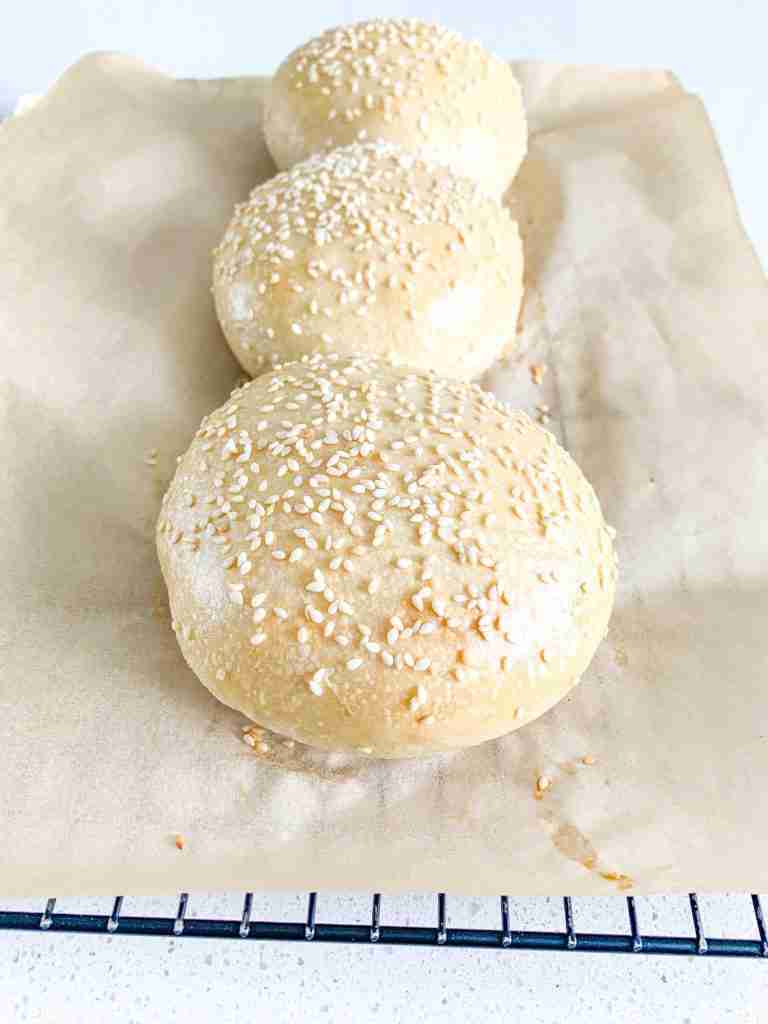
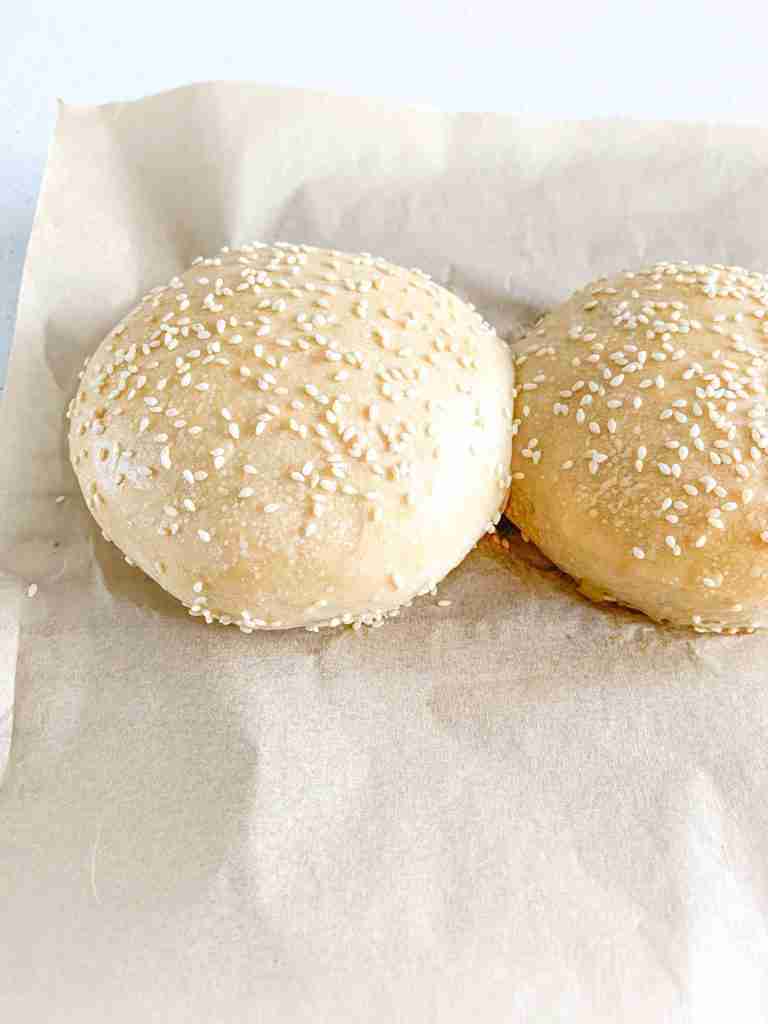
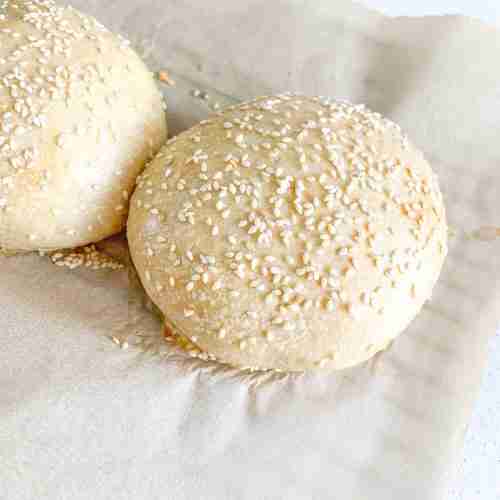
Take out of oven and place on a cooling rack. Enjoy!
Let them cool on a wire rack, then enjoy!
Video Tutorial

Hamburger Bun Serving Ideas
You can use these buns for cheeseburgers, chicken burgers, fried chicken sandwiches, chicken salad, or any other sandwich you love! They are so versatile. I recommend toasting the buns with a little butter before making a sandwich. It adds so much texture and flavor!
How to Store
Store buns in an airtight container at room temperature for up to 3 days or in the fridge for 5 days.
How to Freeze
To freeze, first let them cool completely, then place them in a freezer-safe bag or container. Store in the freezer for 3-4 months. When you’re ready to use them, thaw overnight in the fridge.
Best Way to Reheat Buns
My favorite way to warm sourdough hamburger rolls is in a 350-degree Fahrenheit oven for 3-5 minutes until warm. It preserves the texture and taste!
Frequently Asked Questions
Yes, these sourdough buns are perfect for burgers. They’re super soft, and the slight sourdough tang pairs well with any burger.
You can buy sourdough buns from small sourdough home-bakeries if you have any in your area.
There are many ways to do this, but I like the easiest way. You’ll take the dough piece and roll it into a ball. Then you’ll use your hand to gently press down so it’s a dome shape, flat on the bottom and round on the top.
This can happen for a few reasons, either your dough didn’t proof enough before baking or your starter is weak and need strengthened. Find instructions on how to strengthen it on the bottom of the recipe card.
This can happen if you don’t let the dough bulk ferment or proof long enough.
These buns taste like a delicious savory bread with a hint of sourdough tang.
It’s the exact same process, but you’ll need to let the dough bulk ferment and proof longer than if you use fed starter. Just note that your buns may come out a little more dense than if you use fed starter, but they’ll still be good!
More Better Than Store-Bought Sourdough Recipes
If you’re looking for more sourdough recipes to replace store-bought items, try a few of these:
- Sourdough Dinner Rolls
- Sourdough Bread Crumbs
- Sourdough Garlic Knots
- Sourdough Tortillas
- Sourdough French Bread
- Sourdough Sandwich Bread
Recipe
Sourdough Hamburger Buns (easy small batch recipe)
Ingredients
The Buns
- 1 1/2 cup all-purpose flour
- 1 tsp sea salt
- 1/4 cup fed sourdough starter
- 1/2 cup water
- 1 1/2 Tbsp avocado oil (or melted butter)
The Topping
- egg wash (1 egg + 2 Tbsp water)
- sesame seeds (optional)
Instructions
- BEFORE YOU GET STARTED: Feed your entire sourdough starter jar 4-12 hours before starting this recipe. I recommend feeding your entire starter a 2:1 ratio of unbleached flour to filtered water to get the same results as I do when making this recipe.(Example: Feed entire starter 1 cup flour + 1/2 cup water and let it sit on the counter at room temperature until it's bubbly and has grown in the jar. Your starter needs to be active, bubbly, and a thicker consistency to use in this recipe.)
Make the Dough
- Add the starter, salt, water, avocado oil, and flour to a mixing bowl and mix until combined.
- Knead for 2 minutes (by hand or with an electric stand mixer with a kneading attachment).
- Place the dough back into the bowl and cover loosely with a wet towel or lid slightly on (not airtight).
Bulk Ferment
- Let the dough bulk ferment on the counter for 10-12 hours. It should double in size and be full of air bubbles. See notes below!
- Optional: When the bulk ferment is over you can continue this recipe OR cover the dough with an airtight lid or saran wrap. Then place it in the fridge up to 48 hours until you're ready to use it.
Shape Buns
- Turn the dough out on the counter (no flour needed). Divide dough into 3 equal pieces.
- Roll each dough piece into a ball, then press down gently to create a dome shape (flat bottom).
- Place each bun on a parchment-lined sheet pan about 2 inches apart.
Proof and Bake
- Cover the sheet pan with a dry towel and let the buns rise at room temp for 2-4 hours. They should be puffy and larger after the proofing. See notes below!
- Preheat oven to 375 degrees Fahrenheit.
- Brush buns with egg wash and sprinkle on sesame seeds if desired. Bake for 20–25 minutes.
- Take out of oven and place on a cooling rack. Enjoy!
Video
Notes
- If your dough doesn’t look like it’s doing anything halfway through the rises, you need to place it in a slightly warmer area.
- This can be in a turned-off oven with the light on and oven door open, or you can slightly warm the oven to about 75-80 degrees Fahrenheit, then turn it off and place your dough inside with the door shut.
- Never leave the oven on, even on the keep warm setting, with fermenting dough inside. Your dough, for both rises, needs to double.
- If your dough doesn’t double even in the warmer area, there is a problem with your starter. It is too weak to ferment the dough even in a warm environment.
- To fix this, you will want to leave your starter out on the counter for 2 days and feed it every 12 hours at a 2:1 ratio of unbleached flour to filtered water.
- For example, 1 cup unbleached flour + 1/2 cup filtered (or bottled) water.
- Make sure you’re using unbleached flour and filtered or bottled water to do this. If you don’t, it will affect your starter strength. Reverse osmosis water (or any water that uses salt in the filter) can make the starter weak.
- This will strengthen the cultures in your starter to give you fluffy baked bread and treats. After the 2 days, you can go back to feeding it like usual (once a week if stored in the fridge or once a day if stored on the counter). Be sure to use the 2:1 ratio feeding from here on out.